
Vision V6-201 3.3L (1993)
Camshaft: Service and Repair
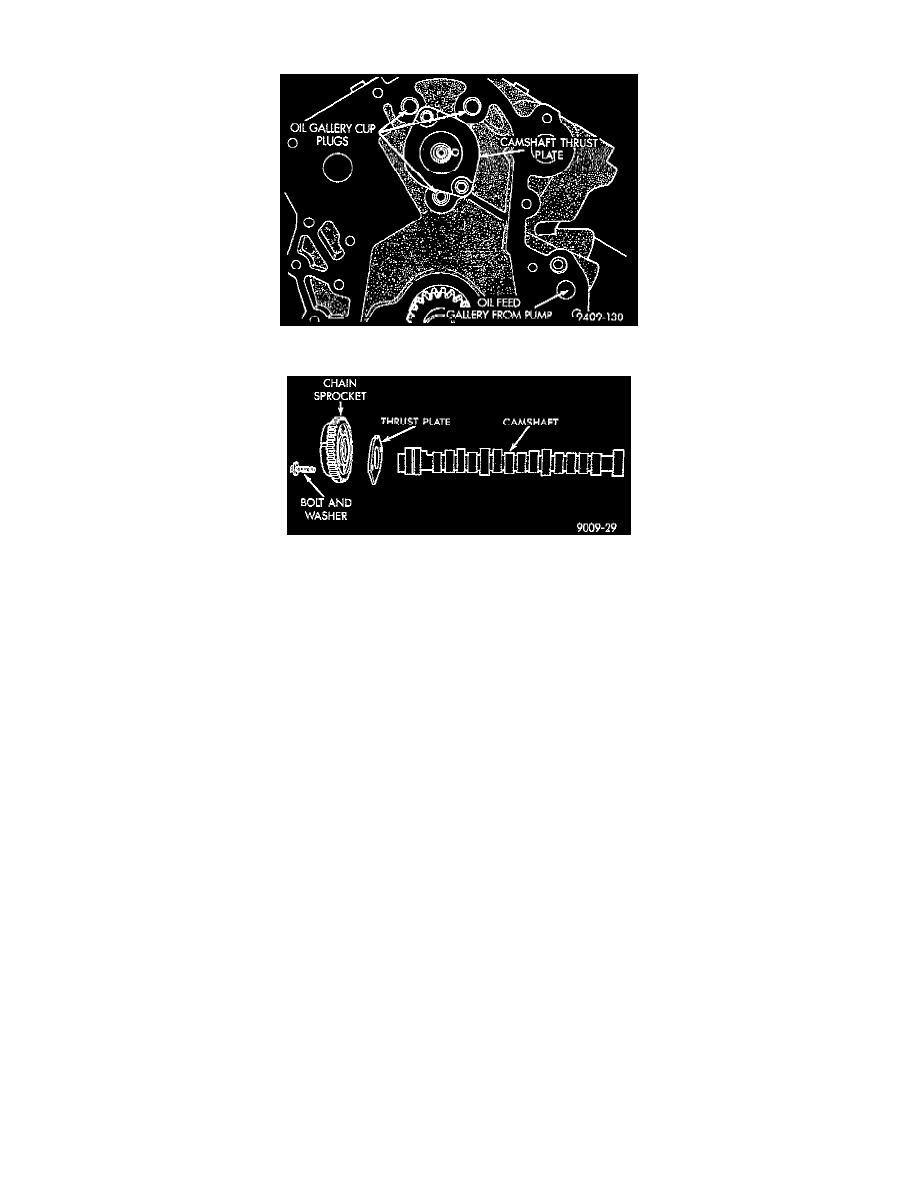
Fig. 24 Camshaft Thrust Plate
Fig. 25 Camshaft And Sprocket Assembly
REMOVAL (ENGINE REMOVED FROM VEHICLE)
Remove intake manifold, cylinder head covers, cylinder heads, timing chain case cover and timing chain. Refer to procedures outlined in this section.
1. Remove rocker arm and shaft assemblies.
2. Remove push rods and tappets; identify so each part will be replaced in its original location.
3. Remove camshaft thrust plate Fig. 24.
4. Install a long bolt into front of camshaft to facilitate removal of the camshaft; remove camshaft, being careful not to damage cam bearing with the
cam lobes Fig. 25.
INSTALLATION
1. Lubricate camshaft lobes and camshaft bearing journals and insert the camshaft to within2 inches of its final position in cylinder block.
NOTE: Whenever an engine has been rebuilt or a new camshaft or tappets have been installed, add one pint of Chrysler Crankcase Conditioner or
equivalent to engine oil to aid in break in. The oil mixture should be left in engine for a minimum of 805 km (500 miles) and drained at the next
normal oil change.
2. Install camshaft thrust plate with two screws as shown in Fig. 24. Tighten to 12 Nm (105 in.lbs.) torque.
3. Rotate crankshaft so the timing arrow is to the12 o'clock position.
4. Place timing chain around camshaft sprocket and place the timing arrow to the 6 o'clock position.
5. Align the dark colored links with the dot on the camshaft sprocket, place timing chain around crank shaft sprocket with the dark colored link lined
up with the dot on sprocket and install camshaft sprocket into position.