
Vision V6-3.5L VIN F (1997)
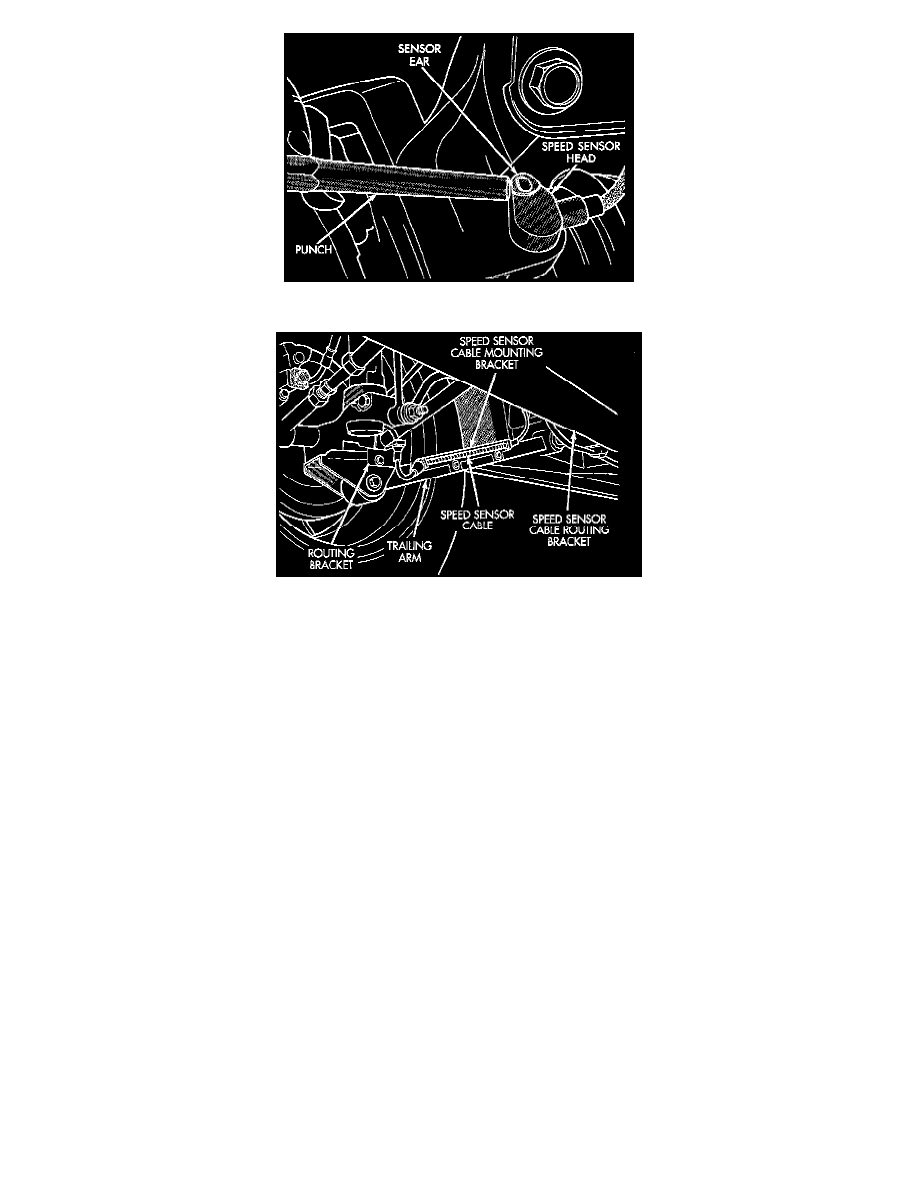
Speed Sensor Head Removal
Speed Sensor Cable Attachment To Trailing Arm
REMOVE
1. Remove the rear seat lower cushion and seat back cushion from vehicle.
2. Lift edge of sound insulation on rear bulkhead. Locate speed sensor cable to vehicle wiring harness connector. Disconnect speed sensor cable from
vehicle wiring harness.
3. Raise vehicle using a frame contact type hoist or supported as required using jack stands.
4. Remove rear wheel and tire from vehicle.
5. Remove speed sensor cable grommet retaining clip from rear inner fender. Carefully pull speed sensor cable and grommet from hole in fender
well.
6. Remove speed sensor head, attaching bolt from rear adapter. Then remove rear speed sensor head from adapter. If the sensor has seized, due to
corrosion, DO NOT USE PLIERS ON SENSOR HEAD. Use a hammer and punch to tap edge of sensor ear, rocking sensor side to side until free.
7. Remove screws attaching speed sensor cable mounting bracket to inboard side of trailing arm Remove speed sensor cable routing brackets from
rear fender well and trailing arm bracket at rear knuckle.
8. Remove speed sensor cable assembly from vehicle.
INSTALL
1. Coat speed sensor where it slides into adapter with high temperature multi-purpose E.P. Grease before installing into adapter. Install speed sensor
head into adapter. Install speed sensor to adapter attaching screw. Torque the speed sensor attaching screw to 7 Nm (60 in. lbs.).
2. Install speed sensor cable mounting bracket on trailing arm. Install speed cable routing tube to trailing arm attaching screws. Install speed sensor
cable routing brackets at rear fender well and rear knuckle.
3. Insert speed sensor cable and grommet back in hole in rear inner fender. Install speed sensor cable grommet retaining bracket and securely tighten
attaching screw.
4. Install rear wheel and tire assembly back on vehicle. Install the wheel and tire assembly. Tighten the wheel mounting stud nuts in proper sequence
until all nuts are torqued to half specification. Then repeat the tightening sequence to the full specified torque of 110 - 135 Nm (85 - 115 ft. lbs.).
5. Lower vehicle.
6. Connect rear speed sensor cable, to vehicles wiring harness. Be sure locking tab on connector is securely latched.
7. Install the rear seat back cushion and seat lower cushion back into vehicle.