
Vision V6-3.5L VIN F (1997)
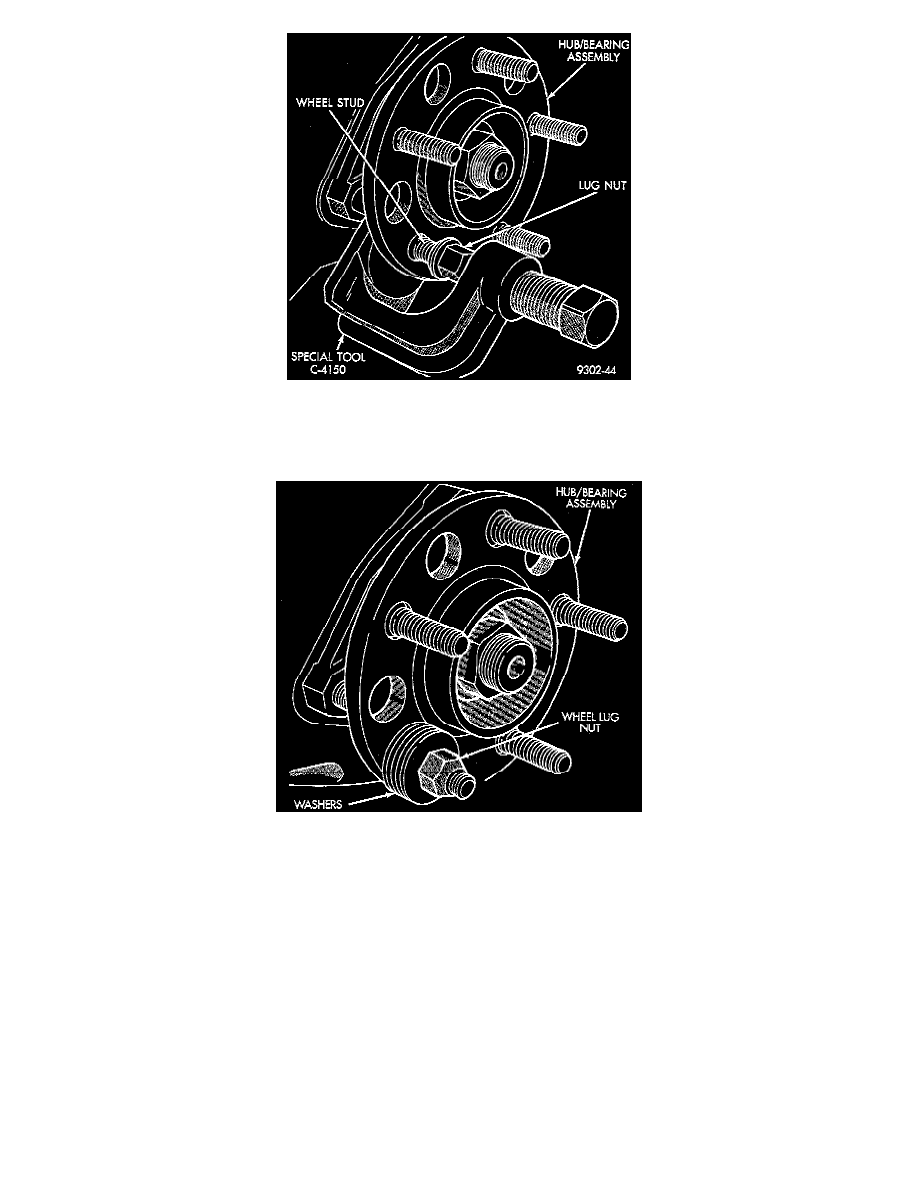
4. Install a lug nut on the wheel stud to be removed from the hub and bearing assembly so the threads on stud are even with end of lug nut. Install
Remover, Special Tool C-4150, or equivalent on hub and bearing assembly flange and wheel stud.
5. Tighten down on special tool, to push wheel stud out of the hub and bearing assembly. When shoulder of wheel stud is past flange remove special
tool from hub and bearing assembly. Remove lug nut from stud and remove wheel stud from flange.
INSTALL
1. Install wheel stud into of hub and bearing assembly. Install washers on wheel stud, then install a wheel lug nut on stud with flat side of lug nut
against washers.
2. Tighten the wheel lug nut, pulling the wheel stud into the flange of the hub and bearing assembly. When the head of the stud is fully seated against
the bearing flange, remove lug nut and washers from wheel stud.
3. Install the rotor on the hub and bearing assembly.
4. Install front brake caliper back over braking disc and align with caliper mounting holes on steering knuckle. Refer to Brakes and Traction Control.
Install the caliper to steering knuckle guide pin bolts and tighten to a torque of 19 Nm (168 inch lbs.).
5. Install wheel and tire assembly on vehicle. Tighten the wheel mounting stud nuts in proper sequence until all nuts are torqued to half specification.
Then repeat the tightening sequence to the full specified torque of 129 Nm (95 ft. lbs.).
6. Lower the vehicle to the ground.