
Contour V6-153 2.5L DOHC (1996)
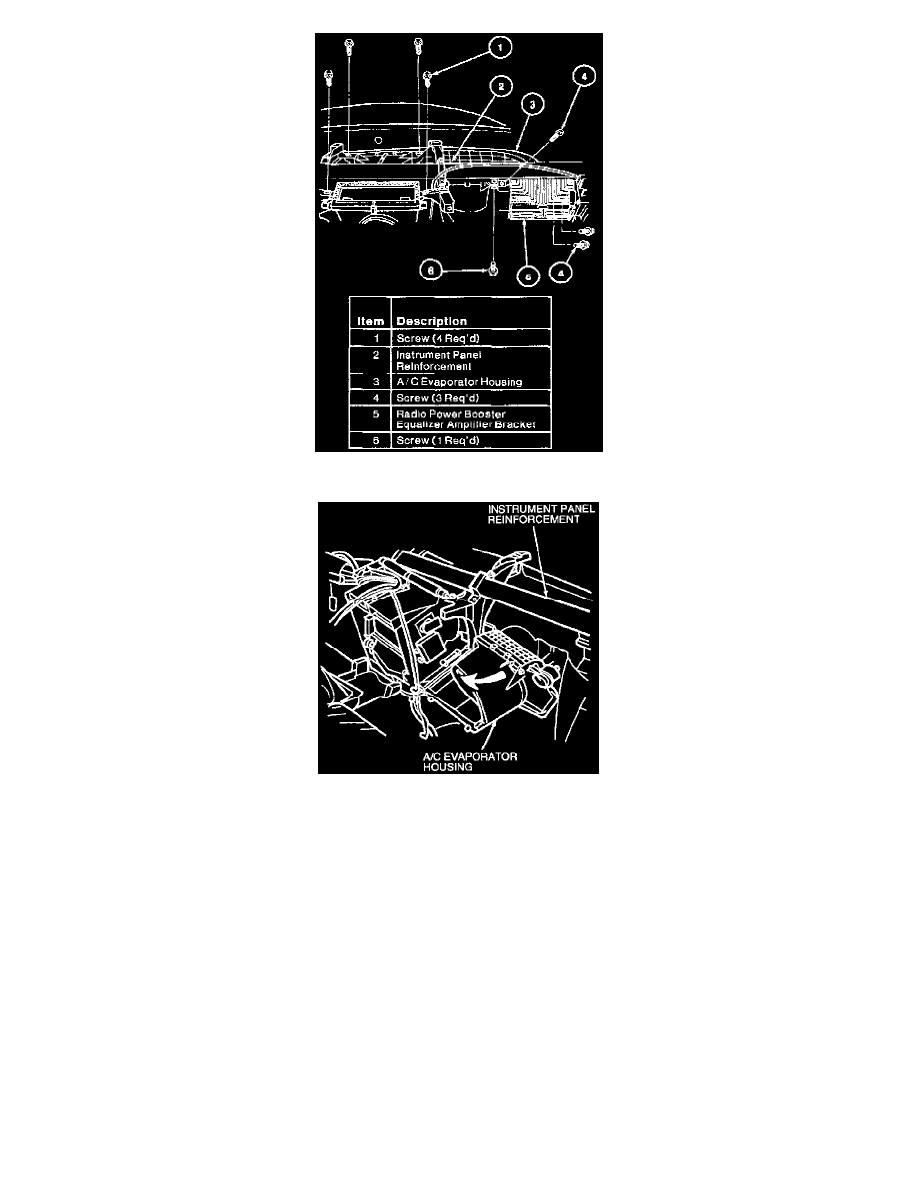
19. Remove three screws, amplifier and radio power booster equalizer amplifier bracket from vehicle, if equipped.
20. Remove five screws retaining A/C evaporator housing to instrument panel reinforcement. Rotate A/C evaporator housing away from instrument
panel reinforcement and remove A/C evaporator housing from vehicle.
Installation
1. Rotate A/C evaporator housing into position on instrument panel reinforcement. Secure A/C evaporator housing to instrument panel reinforcement
with five screws.
2. Align locating pins and install heater core cover with heater core and vacuum hose to A/C evaporator housing. Install two attaching clips and use
additional metal service clips, W703056-5300, if required.
3. Install heater outlet floor duct to heater core cover. Secure with three screws and additional metal service clips. Slide air transfer duct down to
engage with rear seat airflow duct. Secure air transfer duct in this position with screw.
4. Attach module bracket to heater outlet floor duct with four retaining screws.
5. Install ram air intake duct to A/C evaporator housing and secure with two screws.
6. Install RH and LH A/C plenum demister adapters to A/C evaporator housing.
7. Install A/C vacuum reservoir tank and bracket to A/C evaporator housing and secure with screw. Connect two vacuum hoses and A/C vacuum
check valve to A/C vacuum reservoir tank and bracket.
8. Install radio power booster equalizer amplifier bracket with three retaining screws, if equipped.
9. Secure upper crossmember brace with nut.
10. Secure bottom mounting bracket with bolt.
11. Install instrument panel.
12. Working from inside engine compartment, install nut retaining A/C evaporator housing to cowl panel.
13. Connect discharge line and evaporator to jumper line to A/C evaporator core tubes at cowl panel. Follow procedures for Refrigerant Lines.