
Courier L4-2299cc Courier (1982)
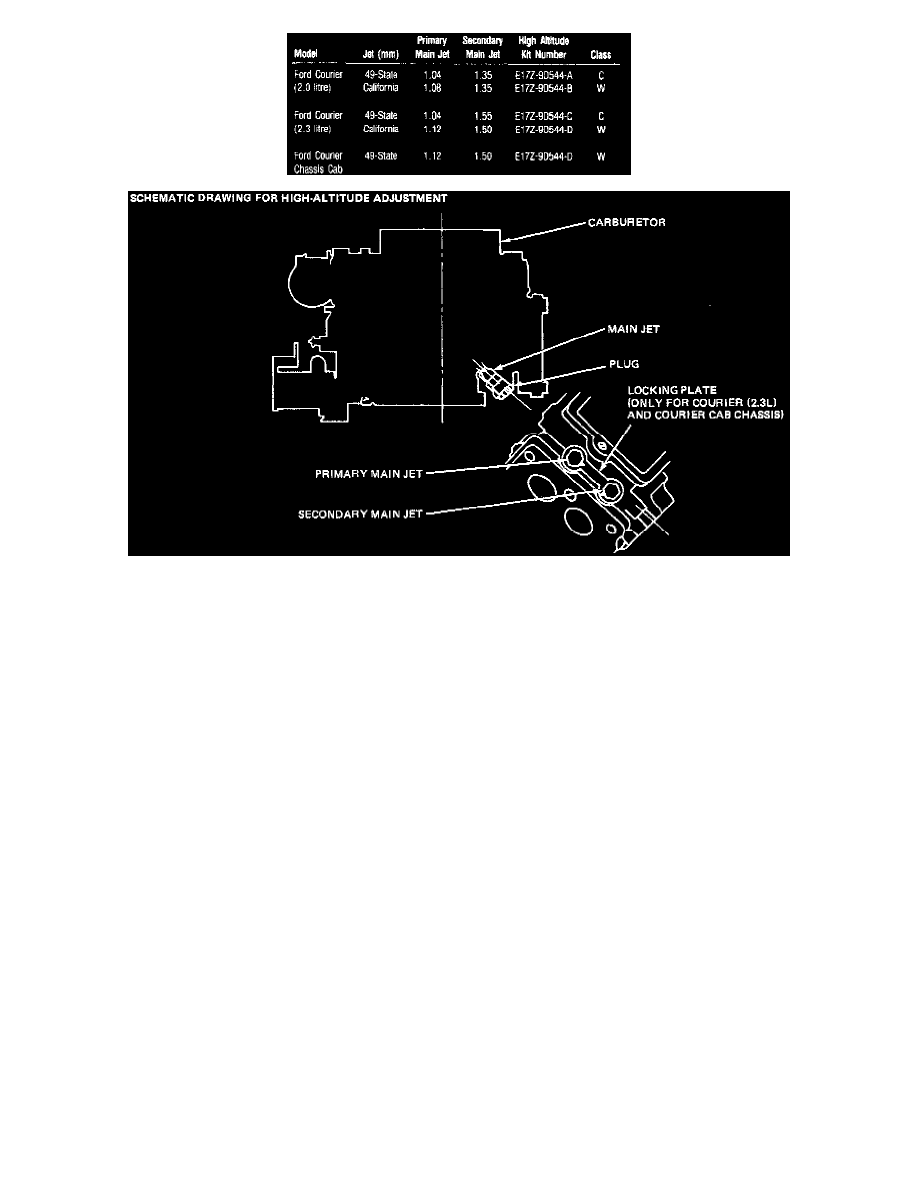
Figure 7
9.
Install the high altitude jets indicated in the table (Figure 7.)
10.
Install the plugs.
11.
Install the locking plate (only for Courier 2.3 litre and Courier chassis cab).
12.
Position the carburetor and a new gasket on the intake manifold and install the attaching nuts.
13.
Connect the throttle return spring (2.3 litre only).
14.
Connect the accelerator shaft to the throttle lever and install the attaching bolts.
15.
Connect the slow fuel cut valve, automatic choke, and coasting richer (2.3 litre only) leads at the quick disconnect.
16.
Connect the carburetor-to-distributor vacuum line. Connect the vacuum hose for the purge control valve.
17.
Connect the fuel line and fuel return line to the carburetor. Install the air cleaner and duct assembly.
18.
Start the engine and check for fuel leaks.
19.
For 2.3 litre California Courier with manual transmission, adjust the dash pot as per "1981 Ford Courier Truck Shop Manual", Deceleration
Control System, Section 29-03-05.
20.
For 2.0 litre Courier, adjust the throttle positioner system as per "1981 Ford Courier Truck Shop Manual", Deceleration Control System, Section
29-03-06.
Install a Courier Vehicle Emission Control Information Update Label (available at all Ford or Lincoln-Mercury dealers) in a prominent place
adjacent to the Vehicle Emission Control Information Label. Do not install the label on any component that can be easily detached from the
vehicle. Clean the area before installing the label.