
Crown Victoria V8-281 4.6L SFI (1998)
1.
Record radio stations.
2.
Disconnect the battery ground cable.
NOTE:
Upon reassembly, the control arms must be tightened with the vehicle suspension at ride height. Therefore, the shock absorbers must be marked
while the vehicle is still on the ground to show ride height before the control arms are removed.
3.
While parked on a level surface, mark the rear suspension shock absorbers relative to the position of their protective sleeves.
4.
Raise the vehicle on a hoist and remove the rear wheels.
NOTE:
Inspect both sides of the vehicle.
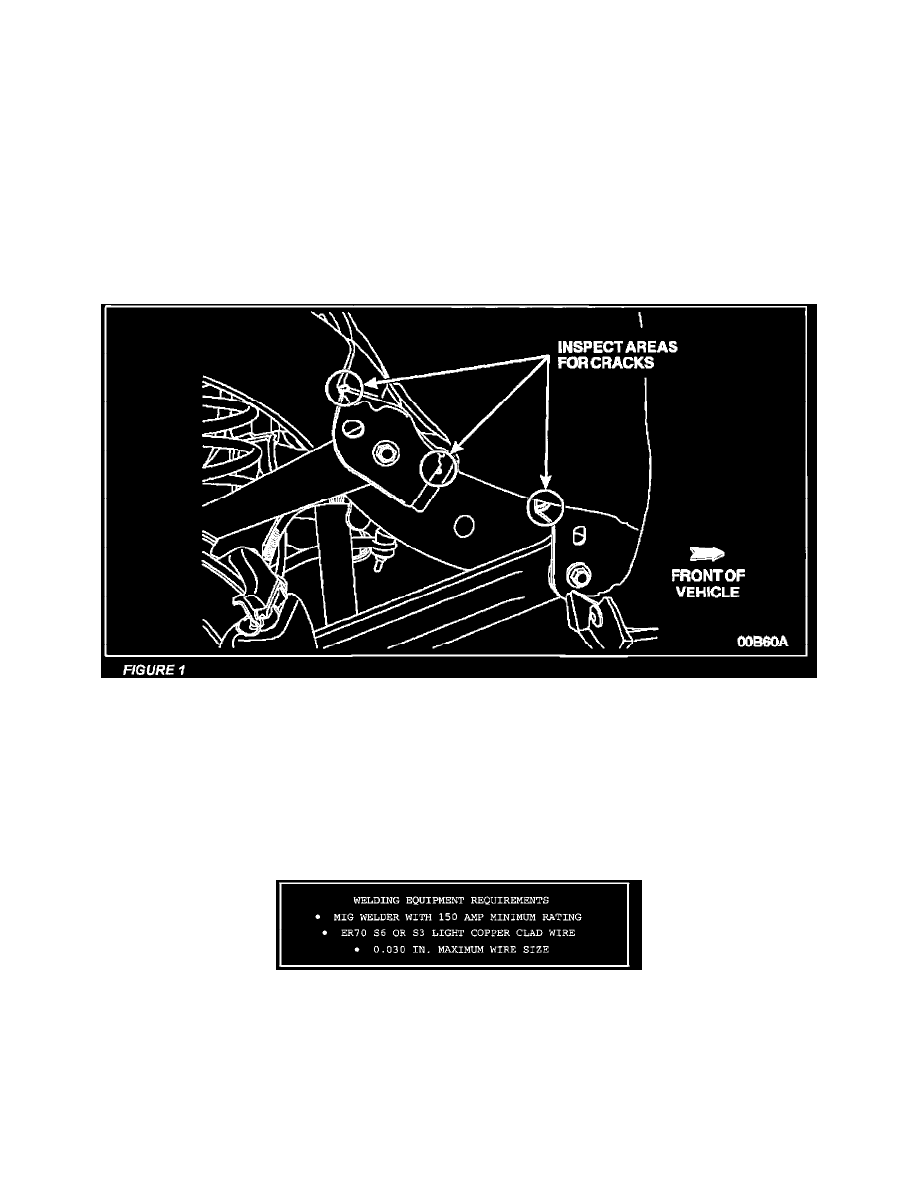
5.
Clean and inspect the areas of the upper and lower control arm mounts for cracks as indicated in the illustration. Measure the length of any cracks
that are located. See Figure 1.
A.
If any of the control arm mounts have separated from the frame rail, do not continue with this procedure. Contact the recall hotline at
1-800-325-5621 for further instruction.
B.
If no cracks are located, install reinforcement brackets on ALL control arm mounts. Perform REINFORCEMENT BRACKET
INSTALLATION.
C.
Vehicles with only cracks of less than one-half inch in length, proceed as follows.
^
Perform CRACK REPAIR AND COACH WELD PLACEMENT, repairing all cracks and strategically placing coach welds on ONLY
the control arm mount(s), which contain cracks.
^
Perform REINFORCEMENT BRACKET INSTALLATION, installing reinforcement brackets on ALL control arm mounts.
D.
Vehicles with any cracks 1/2 inch long or greater, proceed as follows.
^
Perform CRACK REPAIR AND COACH WELD PLACEMENT, repairing all cracks and placing coach welds on ALL the control arm
mounts.