
Crown Victoria V8-4.6L Flex Fuel (2008)
-
Do not smoke, carry lighted tobacco or have an open flame of any type when working on or near any fuel-related component. Highly flammable
mixtures are always present and may be ignited. Failure to follow these instructions may result in serious personal injury.
-
Do not carry personal electronic devices such as cell phones, pagers or audio equipment of any type when working on or near any fuel-related
component. Highly flammable mixtures are always present and may be ignited. Failure to follow these instructions may result in serious personal
injury.
-
When handling fuel, always observe fuel handling precautions and be prepared in the event of fuel spillage. Spilled fuel may be ignited by hot
vehicle components or other ignition sources. Failure to follow these instructions may result in serious personal injury.
NOTE:
-
If the liquid or vapor tube is damaged (torn, holes or delaminated), a new tube assembly must be installed. Do not use aftermarket sleeving. Do not
re-adhere loose sleeving material.
-
When reusing liquid or vapor tube couplings, make sure to use compressed air to remove any foreign material from the coupling retaining clip area
before separating from the tube. Apply clean engine oil to the end of the tube before inserting the coupling onto the tube.
-
Fuel injection equipment is manufactured to very precise tolerances and fine clearances. It is therefore essential that absolute cleanliness is
observed when working with these components. Always install plugs to any open orifices or tubes.
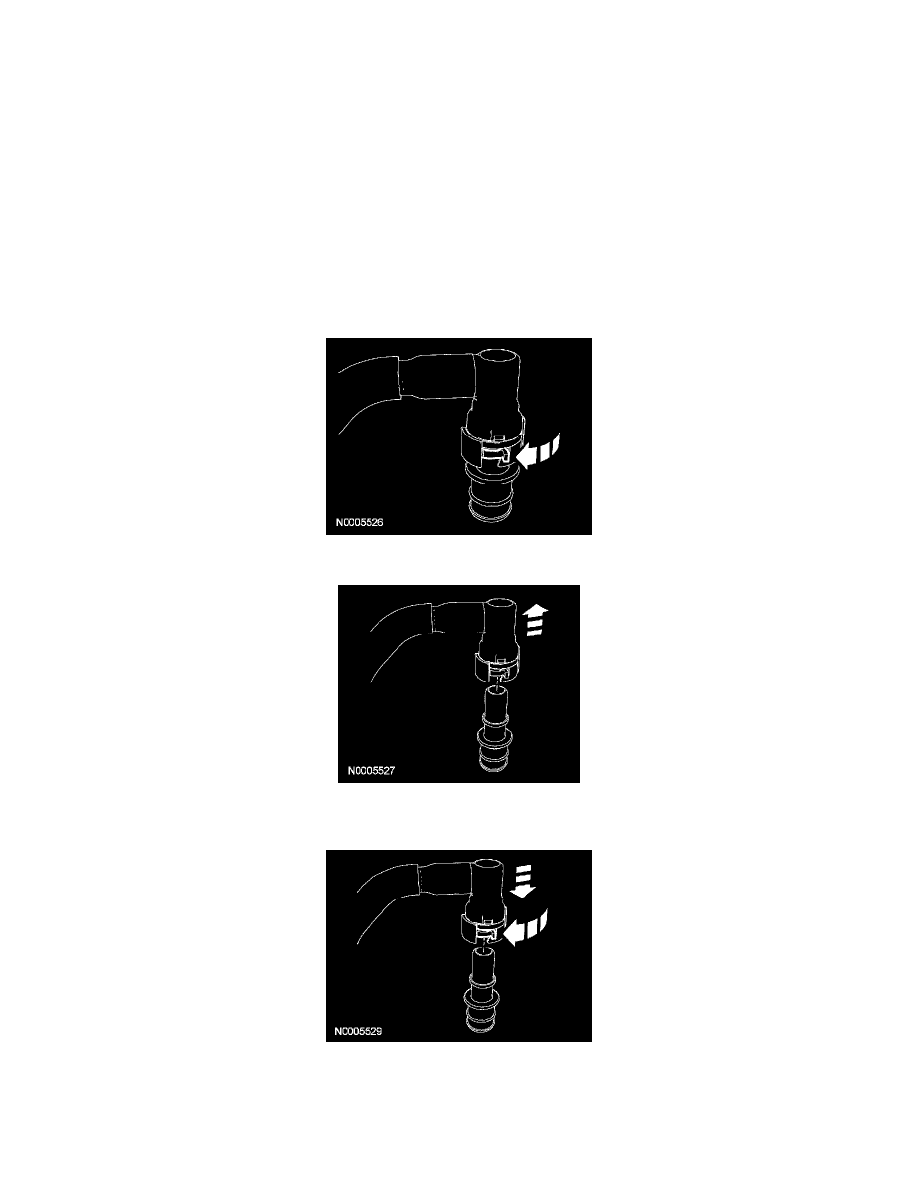
1. Release the lock tab on the quick connect coupling.
2. Disconnect the quick connect coupling from the fitting.
Connect - Type II
1. Release the lock tab and install the quick connect coupling onto the fitting.
2. NOTE:
-
Apply clean engine oil to O-ring seals.
-
Make sure the fitting clicks into place when installing the quick connect coupling onto the fitting. To make sure that the fitting is fully seated,
pull on the coupling.