Crown Victoria V8-4.6L SOHC VIN 6 (1996)

Heater Core: Service and Repair
1. Disconnect battery ground cable, then drain cooling system. See: Engine, Cooling and Exhaust/Cooling System/Service and Repair
2. Disconnect heater hoses from heater core. Plug heater hoses and core fittings to prevent coolant spillage.
3. Remove bolt located below windshield wiper motor, attaching left end of plenum to dash panel.
4. Remove nut attaching upper left corner of evaporator or heater case to dash panel.
5. Disconnect vacuum control system supply hose from vacuum source, then push grommet and hose into passenger compartment.
6. Remove all instrument panel retaining screws and pull instrument panel back as far as possible without disconnecting any wire harnesses.
7. Loosen right door sill plate and remove side cowl trim panel.
8. Disengage temperature control cable housing from bracket on top of plenum. Disconnect cable from temperature blend door crank arm.
9. On models w/Automatic Temperature Control (ATC), remove cross body brace and disconnect wiring harness from temperature blend door
actuator and disconnect ATC sensor tube from evaporator case connector.
10. Disconnect vacuum harness at vacuum connector near floor air distribution duct.
11. Disconnect white vacuum hose from outside recirculating air door vacuum motor.
12. Remove two hush panels.
13. Remove one plastic push fastener retaining floor air distribution duct to left end of plenum. Remove left screw and loosen right screw on rear face
of plenum. Remove floor air distribution duct.
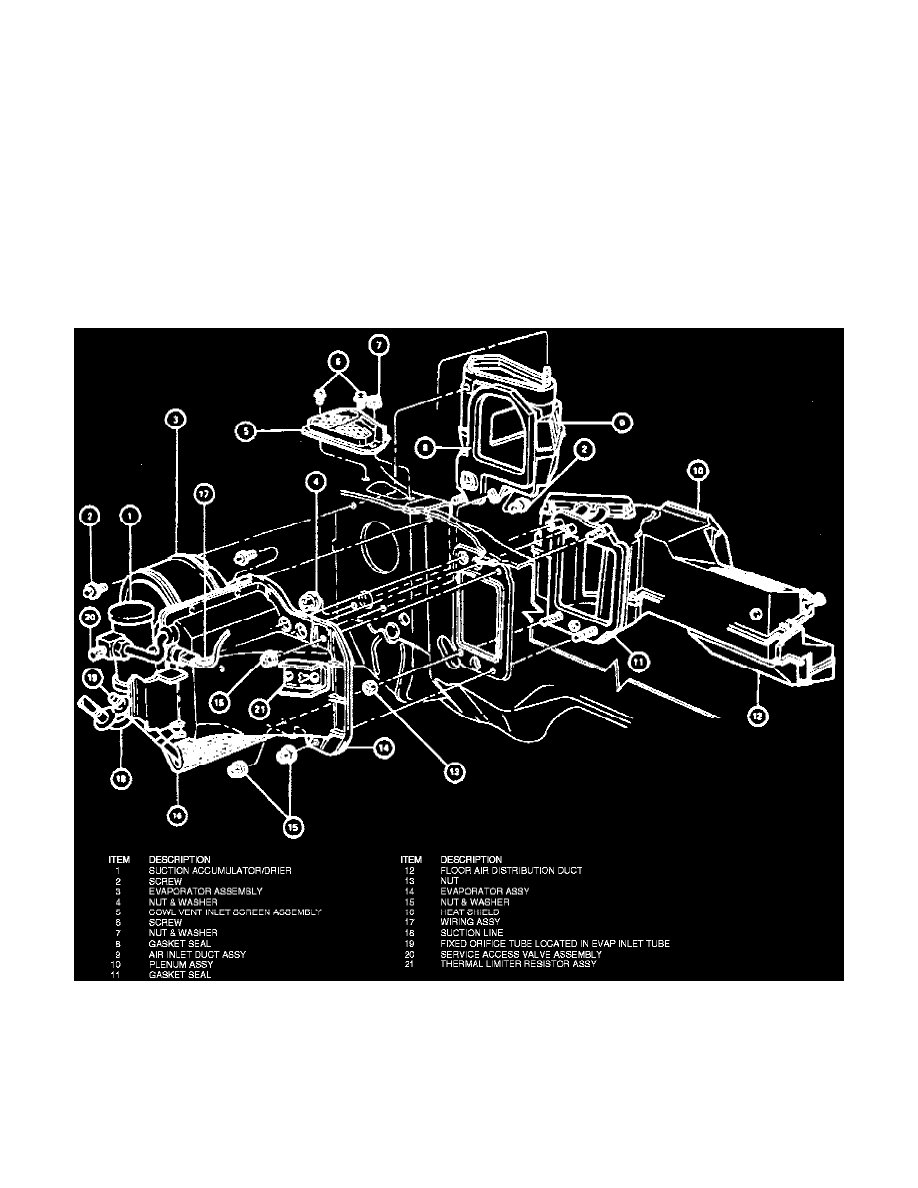
A/C-heater Core System Components
14. Remove two screws from rear side of floor air distribution duct to plenum. To remove right screw, it may be necessary to remove the two screws
attaching lower panel door vacuum motor to mounting bracket.
15. Remove push fastener attaching floor air distribution duct to left end of plenum, then remove floor air distribution duct.
16. Remove two nuts located along lower flange of plenum.
17. Carefully move plenum rearward, so that heater core tubes and plenum case upper stud clear openings in dash panel, then remove plenum from
vehicle by rotating upper portion of the plenum forward, down and out from under instrument panel. It may be necessary to carefully pull lower
edge of instrument panel rearward while plenum is being removed from behind instrument panel.
