
Crown Victoria V8-4.6L SOHC VIN 6 (1996)
Removal
1. Raise the front of the vehicle and position safety stands under both sides of the frame just behind the front suspension lower arms. Remove the
wheel and tire.
2. Remove disc brake caliper, front disc brake rotor and front brake anti-lock sensor if equipped. Discard disc brake caliper locating pins.
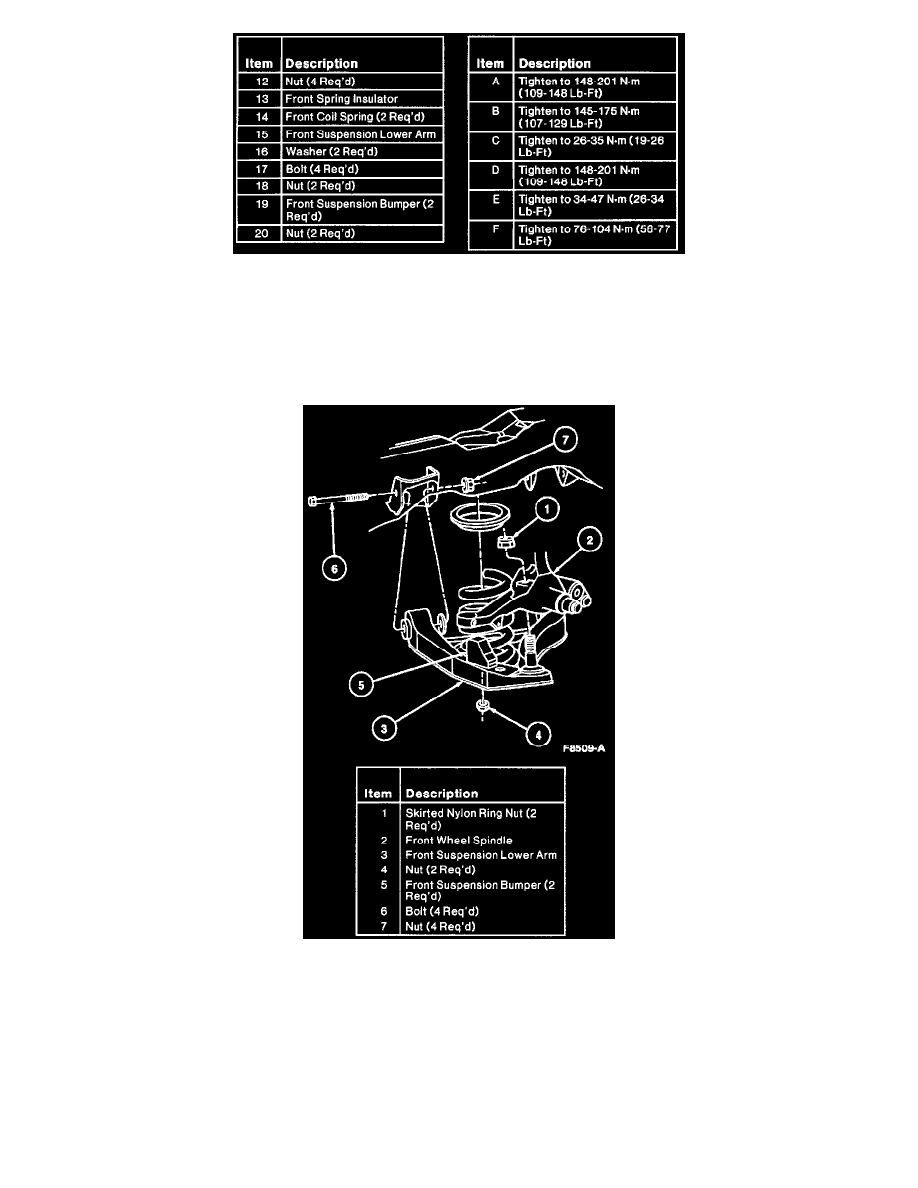
3. Remove the front suspension bumper; inspect and save for installation if in good condition.
4. Remove front shock absorber.
5. Disconnect the steering sector shaft arm drag link from the pitman arm.
CAUTION: Do not remove the nut from the ball joint stud at this time to prevent injury.
6. Loosen the lower ball joint stud nut one or two turns.
7. Tap the front wheel spindle sharply, near the lower stud, with a hammer to loosen the stud in the front wheel spindle.
8. Place a floor jack under the front suspension lower arm.
9. Install the coil spring compressor, and remove the front coil spring.
10. Remove the ball joint nut and remove front suspension lower arm assembly.
11. Remove fasteners at frame brackets and remove front suspension lower arm.
Installation
1. Position front suspension lower arm in frame brackets and loosely assemble fasteners.