
Crown Victoria V8-4.6L SOHC VIN 6 (1996)
Fluid Pump: Service and Repair
DISASSEMBLE
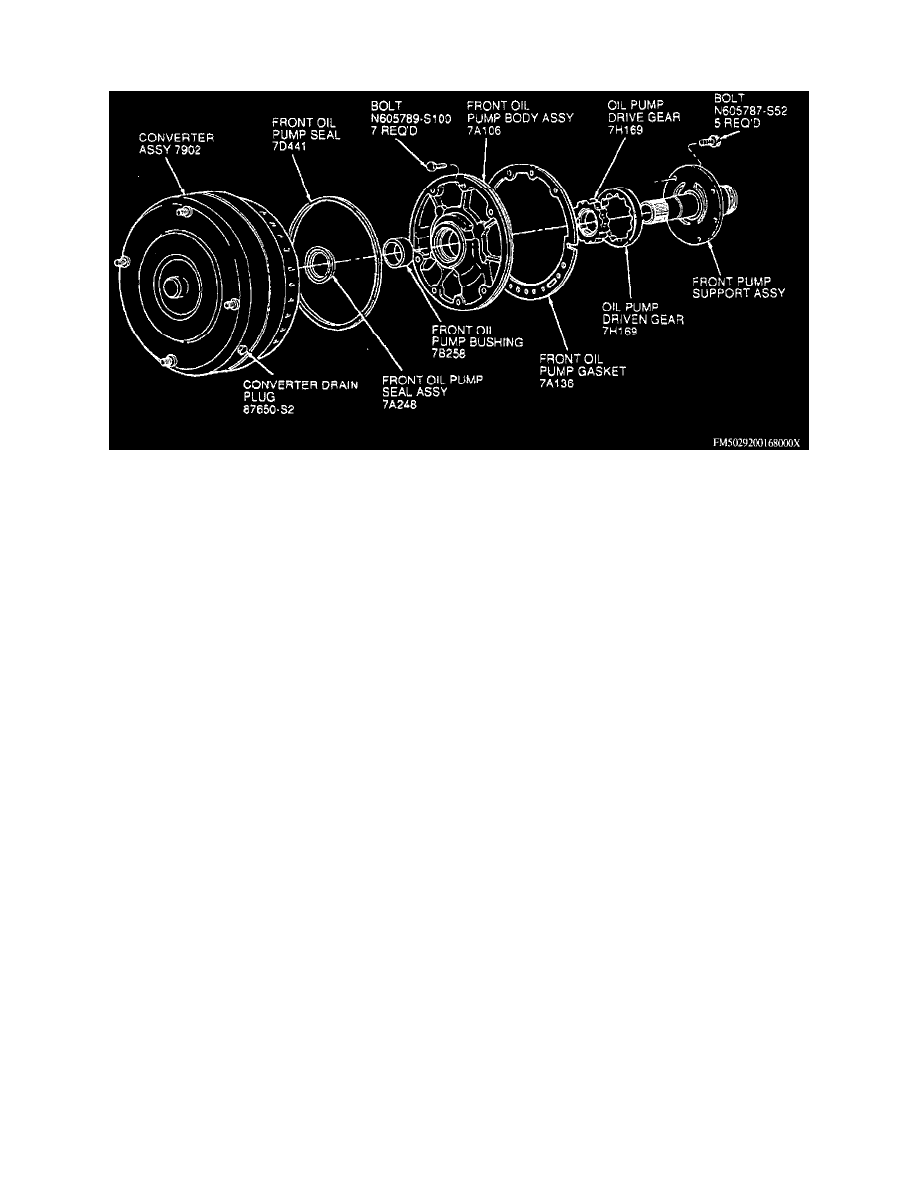
Exploded View Of Pump & Intermediate Clutch Piston
1. Remove No. 1 thrust washer.
2. Remove five stator support bolts, then separate stator and pump assembly.
3. Remove four pump seal rings. The reverse clutch rings are larger than the forward clutch rings.
4. Remove drive and driven pump gears from pump body.
5. Remove spring retainer assembly by carefully dislodging tabs.
6. Remove clutch piston, inner, and outer lip seals.
7. Remove and discard pump body to case seal.
8. If required, remove bushing using bushing remover tool No. T80L-77268-B or equivalent.
9. Install bushing using bushing installed tool No. T80L-77268-A or equivalent.
ASSEMBLE
1. Using front pump seal replacer tool No. T63L-77837-A or equivalent, install seal.
2. Install new inner and outer seals on intermediate clutch piston.
3. Note location of piston bleed hole. Hole must be located at 12 o'clock position (toward top of transmission). Piston bleed hole is the only round
hole in piston assembly.
4. Install clutch piston as follows:
a. Coat piston seals and pump body.
b. Install piston in seal protector tool No. T80L-77005-A or equivalent.
5. Install piston in pump body and push piston to bottom of bore by exerting even pressure.
6. Snap spring retainer assembly into place on pump body.
7. Install drive and driven pump gears in pump body. Flats have steps that must face the pump body for ease of installing converter.
8. Install stator support seal rings.
9. Position stator support to pump body, then install retaining bolts. Torque bolts to 12-16 ft lbs.