
Crown Victoria V8-4.6L SOHC VIN W (2005)
22.
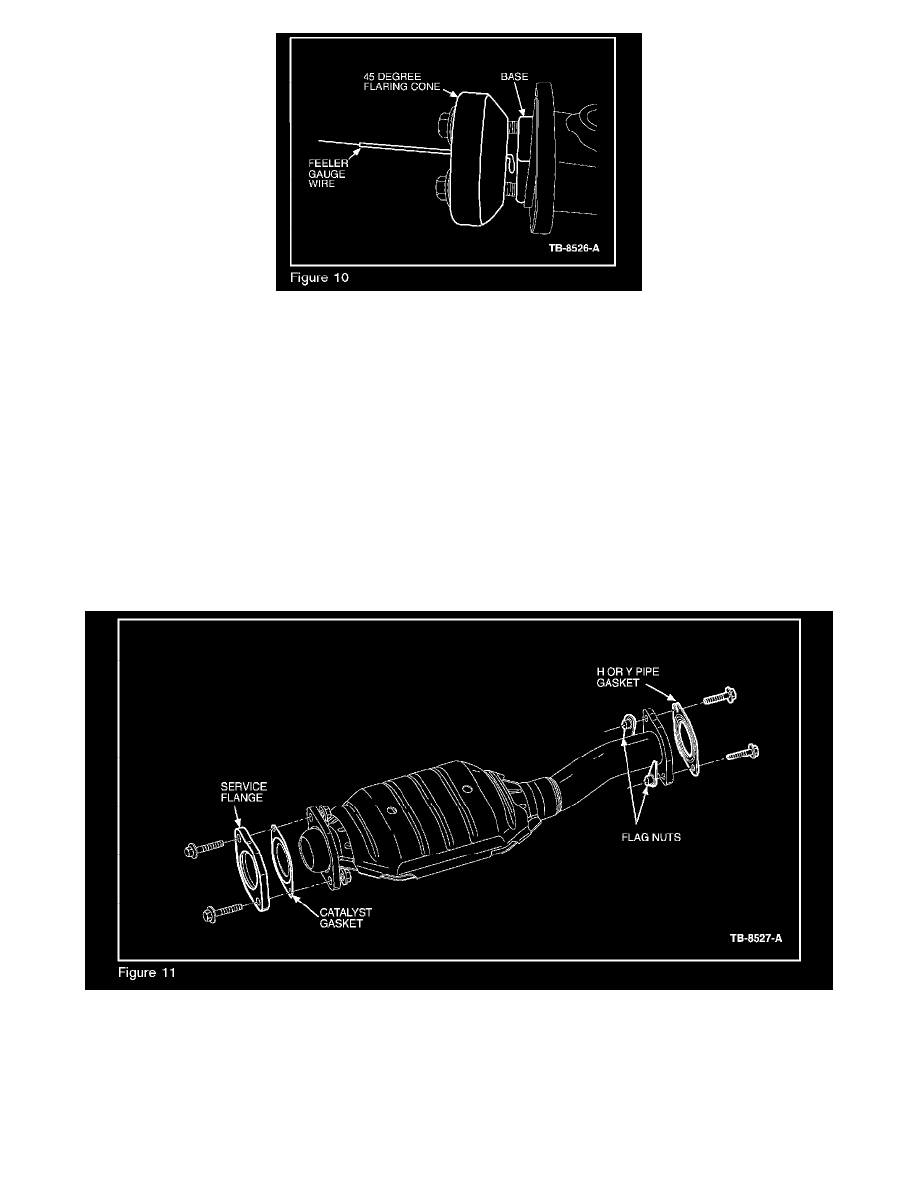
In order to prevent the flare tool cone from bottoming out against the flare base, it will be necessary to fabricate a feeler gauge using a piece of
metal wire (Figures 8, 9, and 10). Use this to ensure the flare cone stops short of the base at the end of the flaring process.
CAUTION
DO NOT USE POWER/AIR TOOLS. THIS WILL DAMAGE THE FLARING TOOL!
23.
Tighten the four (4) bolts a 1/4 turn at a time until a flare has been formed or the flaring cone stops short of the base. Refer to Step 22 to prevent
flare tool damage. Periodically check the flare progress. If more flare is needed at one position, turn that bolt more to keep the flare as uniform as
possible. Check to make sure that the service flange is not binding or interfering with the flare.
24.
Once a flare has been achieved the flaring procedure is complete.
25.
Remove the flaring tool.
NOTE
REMOVE BURRS OR SHARP EDGES FROM THE LIGHT OFF CATALYTIC CONVERTER FLARE OR DAMAGE TO THE GASKET MAY
RESULT.
26.
Remove and discard the old exhaust manifold nuts and loosely install the new exhaust manifold nuts to secure the light off catalyst to the exhaust
manifold.
NOTE
DO NOT TORQUE NUTS AT THIS TIME.
27.
Install new bolts and gasket onto the service flange of the light off catalyst. (Figure 11)