
Crown Victoria V8-4.6L SOHC VIN W (2005)
Compass: Adjustments
Information and Message Center
Compass Zone Adjustment
COMPASS ZONE ADJUSTMENT
1. NOTE:
-
The compass exits the zone setting mode and returns to its previous zone setting after one minute of no activity.
-
If power is interrupted during the zone setting process, the compass resets to the same zone it was set to before the zone change process was
started.
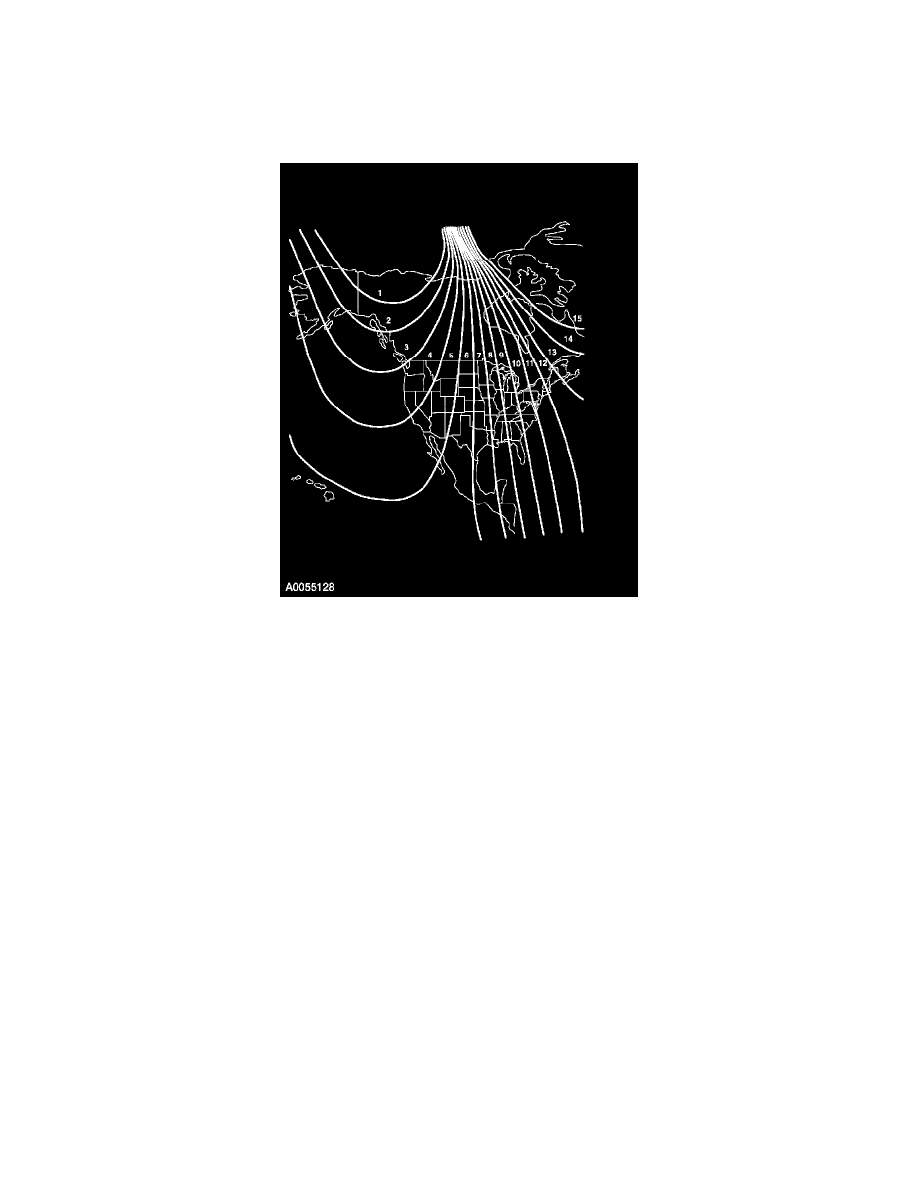
Refer to the compass calibration zone map to select the correct compass zone setting for your geographical location.
2. Turn the ignition key to the ON position.
3. Press and release the MODE button until the compass directional heading is displayed.
4. Hold down the MODE button for 5 seconds to enter ZONE mode.
5. The display will read PRESS RESET TO SET ZONE XX where XX is the current zone.
6. Repeatedly press and release the Reset button to advance through the zones (1-15) until the desired zone is displayed.
7. Press the MODE button to save the new zone setting and return to the compass normal mode.
Compass Calibration
COMPASS CALIBRATION
1. NOTE:
-
For optimum calibration, drive to an open, level location away from large metallic objects or structures. Switch off all non-essential electrical
accessories (rear window defrost, heater, A/C, map lamps, wipers, etc.) and make sure all the doors are shut.
-
If power is interrupted during the calibration process, the compass resets to the original calibration data from before the calibration process
started.
Start the vehicle.
2. Press and release the MODE button until the compass directional heading is displayed.
3. Hold down the MODE button for 10 seconds to enter Calibration mode.
4. The display will read PRESS RESET TO DECAL.
5. NOTE: If the Reset button is not pressed the compass will exit calibration mode after three minutes of no input activity and the original
calibration data will be restored.