
Crown Victoria V8-4.6L SOHC VIN W (2005)
2.
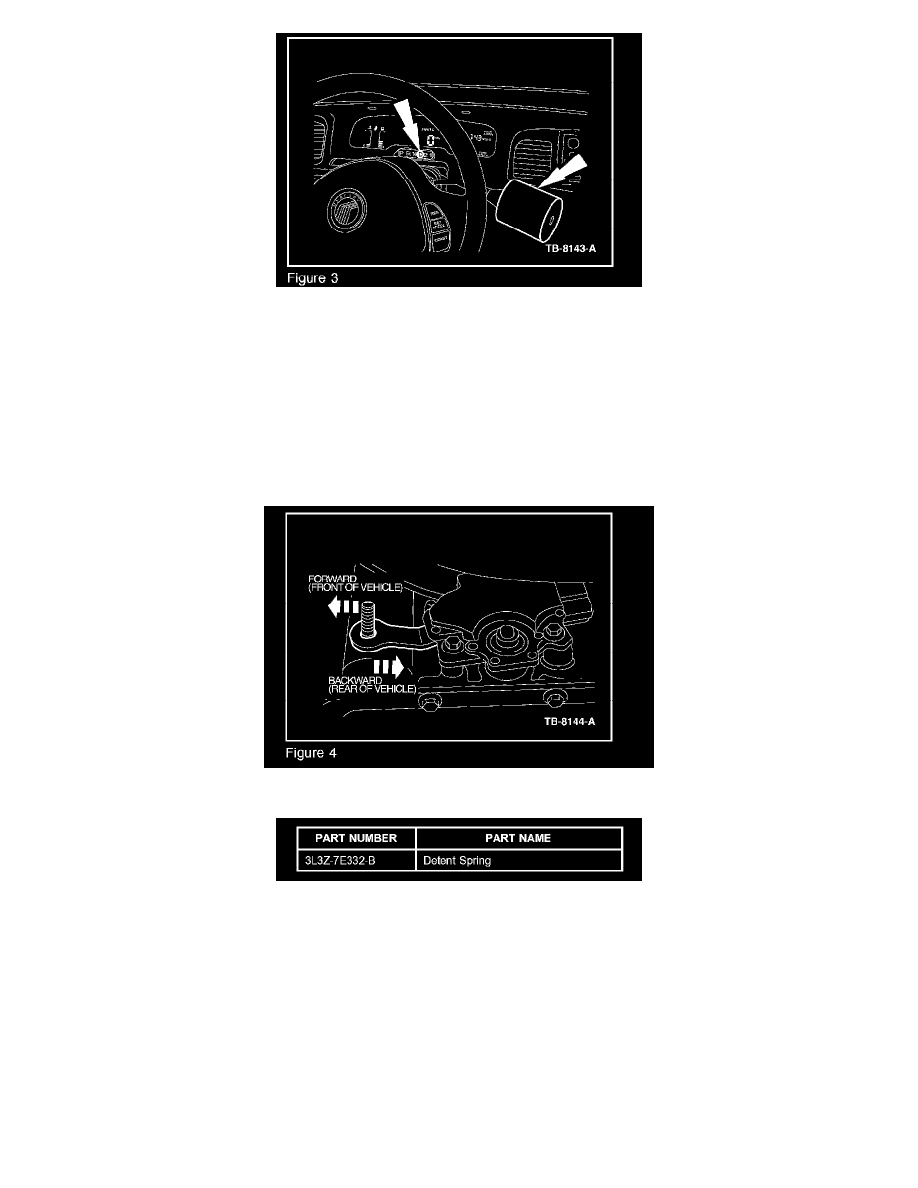
Place a 3 lb weight on the end of the gear selector lever (to hold the lever against the drive shift gate in the steering column) (Figure 3).
NOTE
IF A 3 LB WEIGHT IS NOT AVAILABLE, HAVE AN ASSISTANT HOLD THE SHIFT LEVER DOWN MANUALLY WHILE PERFORMING
THE SHIFT CABLE ADJUSTMENT PROCEDURE.
3.
Remove the shift linkage adjustment nut and disconnect the shift cable from the manual control lever (Figure 1).
4.
Position the manual control lever in the (D) position by:
^
Pulling the manual control lever forward (toward the front of the vehicle) until travel stops, then
^
Pushing the manual control lever backward (toward the rear of the vehicle) two (2) detents to the (D) position (Figure 4).
5.
Connect the shift cable to the manual control lever (Figure 1). Using hand tools, torque the adjuster nut to 22 lb-ft (30 N.m). Do not use power
tools as this may affect the adjustment.
6.
Remove the 3 lb weight from the gear selector lever.
7.
Move the gear selector lever from detent to detent and ensure the column shift gates align with the transmission detents.
8.
Verify that the engine will start in park (P) and neutral (N). Make sure also that the reverse lamps illuminate in reverse (R). If not, check the digital
transmission range (DIR) sensor adjustment, adjust if necessary. For additional information refer to Workshop Manual Section 307-01.
9.
Lower the vehicles and reactivate the air suspension (if equipped).
10.
Verify that the delayed reverse engagement condition is corrected.