
E 350 1 Ton Van V10-6.8L VIN S (1997)
Seat Belt Tensioner: Service and Repair
REMOVAL
1. Disconnect the battery ground cable. On vehicles equipped with dual batteries:
-
Disconnect primary battery ground cable.
-
Disconnect auxiliary battery frame ground bolt. Pull cable away from the frame and make sure cable does not contact frame.
NOTE: Failure to accurately follow the battery disconnect procedures will result in vehicle or component damage.
NOTE: When the battery has been disconnected and reconnected, some abnormal drive symptoms may occur while the Powertrain Control
Module (PCM) relearns its adaptive strategy. The vehicle may need to be driven 16 km (10 miles) or more to relearn the strategy.
2. On the driver side, remove the front seat back latch lower cover.
3. On the passenger side, remove the front seat back pivot side outer cover.
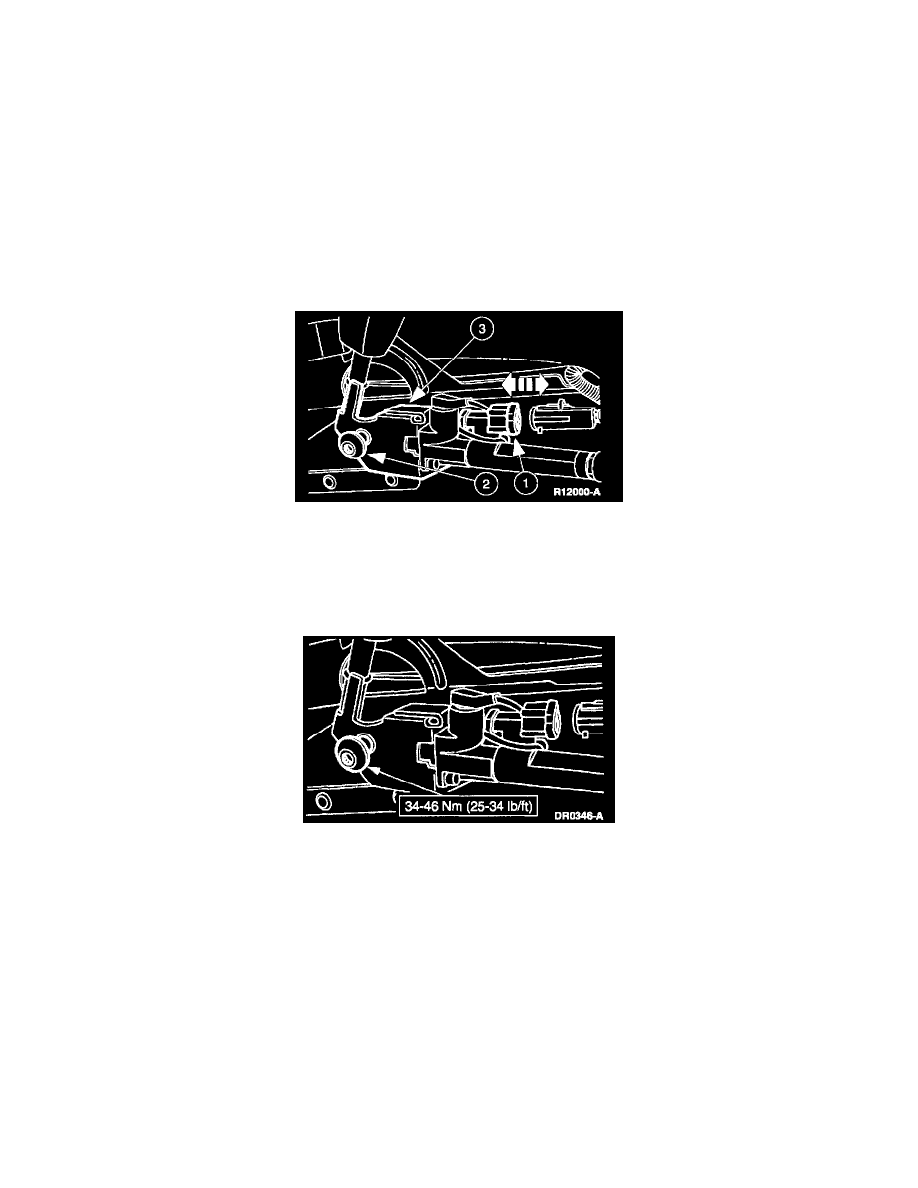
4. Remove the belt and buckle assembly pretensioner.
1
Disconnect the belt and buckle assembly pretensioner harness connector.
2
Using the Safety Belt Bolt Bit, remove the belt and buckle assembly pretensioner retaining bolt.
3
Remove the belt and buckle assembly pretensioner.
INSTALLATION
1. Follow the removal procedure in reverse order.
-
Align both anti-rotation tabs on the belt and buckle assembly pretensioner into the seat track prior to tightening the bolt.
NOTE: Make sure to tighten bolts to specification.
2. Reconnect negative battery ground cable.
On vehicles equipped with dual batteries:
-
Reconnect the auxiliary battery frame ground.
-
Reconnect the primary battery ground cable.