
E 350 Van V8-7.3L DSL Turbo VIN F (1995)
3.
Pressure test the system again. If the leak persists, check the radiator hose clamp for damage. If damage is observed, replace the damaged part per
the following installation steps. The clamps to be used are as shown.
4.
If only the clamp is to be removed, residual glue (located 180° away from the tangs) may exist on the hose. The glue will generally dissipate over
time with the thermal cycling of the engine. If necessary, remove the glued clamp by applying a heat gun at 420°F (21500) to the glued portion for
approximately 1 minute. If any foreign material remains on (or if any material is removed from) the hose, a sealing discontinuity will result and the
hose must be replaced.
Proper installation of the hose and clamp is essential for the joint to be effective. The following steps should be taken to ensure a robust hose joint.
ENSURING A ROBUST HOSE JOINT
1.
Push the hose onto the connector until it is completely seated against the hose stop.
2.
Release the "Mega" clamp by carefully removing the retaining clip using pliers or vise grips. During removal, the clip should be held securely at
all times. Do not pry or pop the clip off the clamp.
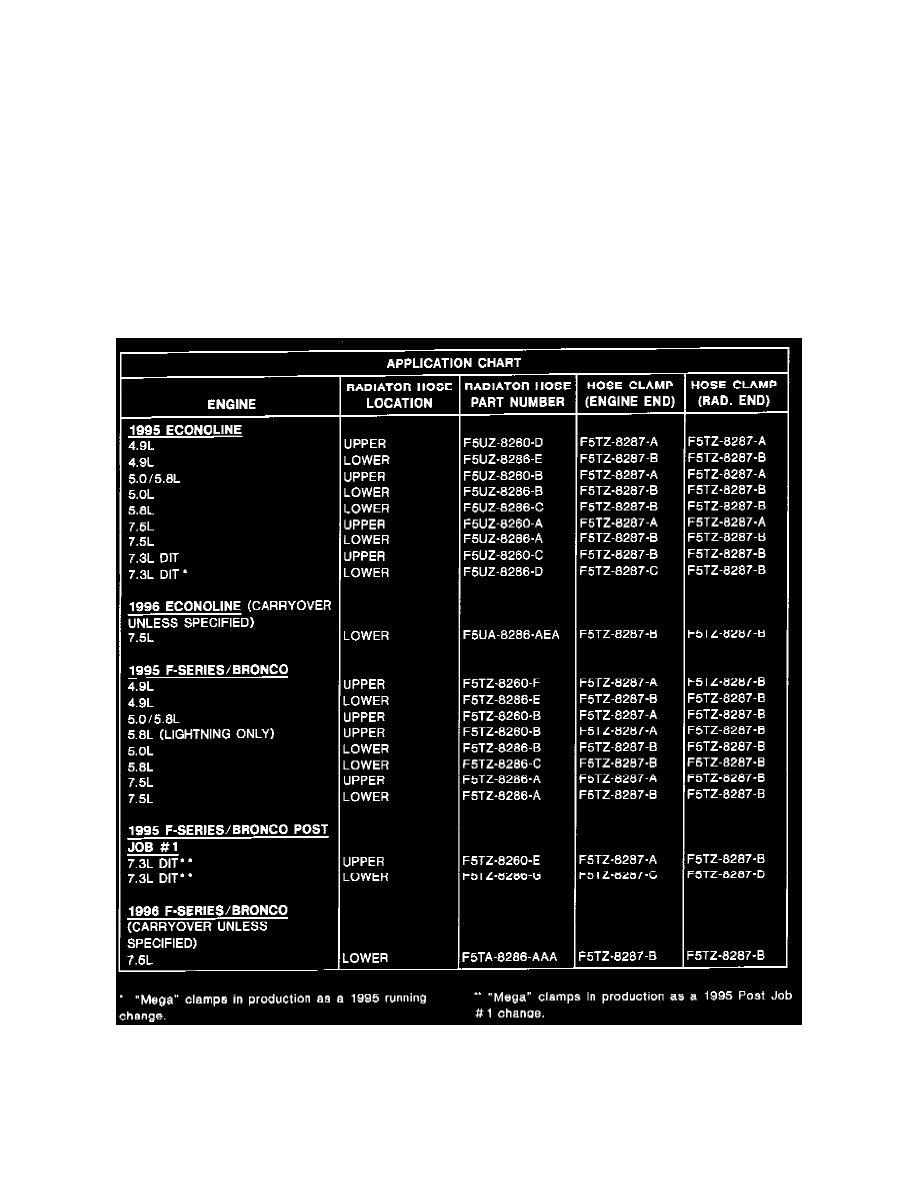
Application Chart
3.
Check that the clamp is straight, fully released and seated on the sealing area of the hose and connector. The clamp should not be partially or
completely cocked over or on top of the bead at the end of the connector. The connector, radiator hose and clamp are shown in Figure 1.