
E 450 V8-5.4L (2009)
3. Remove and discard the shock absorber lower nut and bolt.
4. Remove and discard the 4 U-bolt nuts, the plate and the 2 U-bolts.
5. Remove and discard the leaf spring front bracket bolt and flagnut.
6. Remove and discard the leaf spring shackle-to-bracket bolt and flagnut, then remove the leaf spring assembly.
7. Remove the shackle-to-leaf spring nut, bolt and shackle.
-
Discard the bolt and nut.
Installation
1. Position the leaf spring shackle and install the new bolt and nut.
-
Tighten until snug.
2. Position the rear spring and install the new shackle-to-rear bracket bolt and flag nut until snug.
3. Install the new spring-to-front bracket bolt and flag nut until snug.
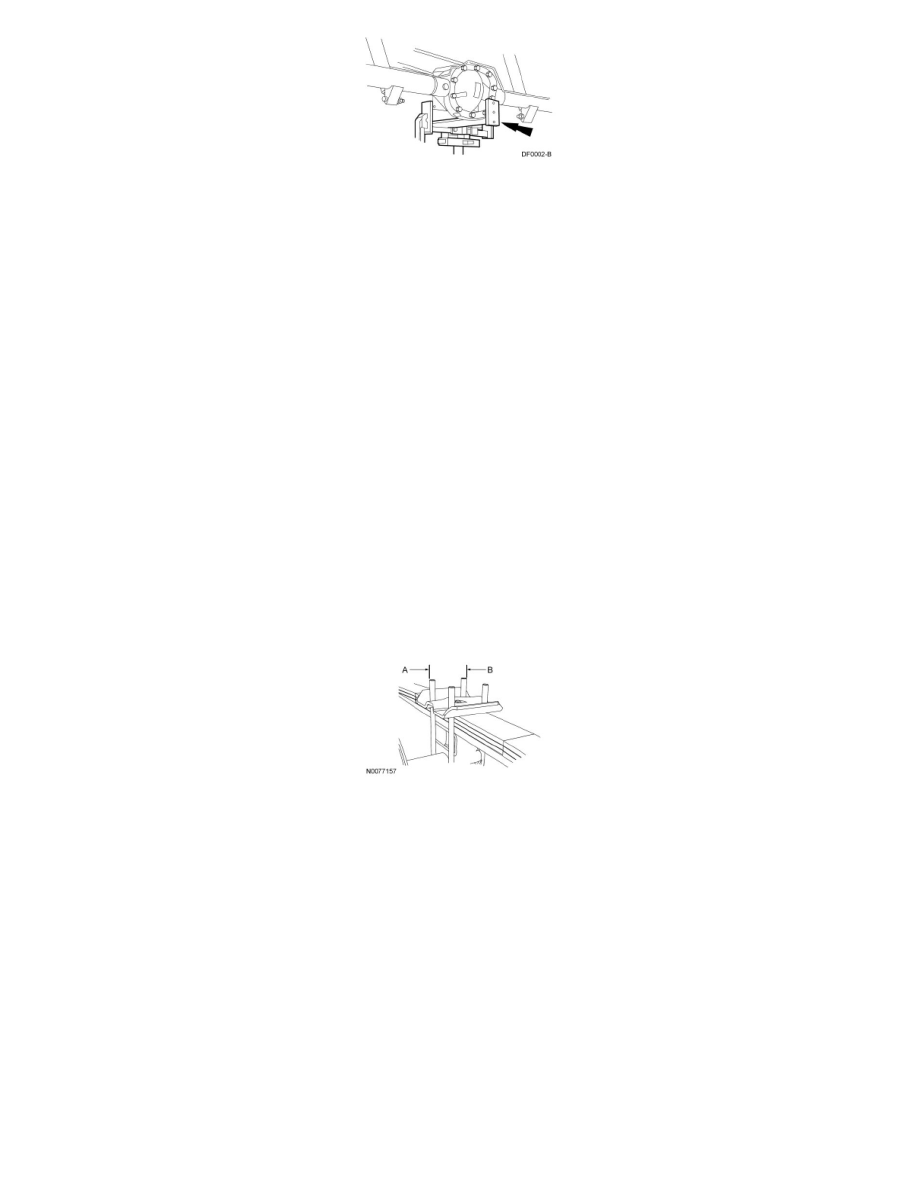
4. NOTE: When installing new U-bolts, the measurement between A and B should be 107 mm (4.21 in) ± 3 mm (0.12 in) for E150/E250/E350
vehicles and 112 mm (4.41 in) ± 3 mm (0.12 in) for E450 vehicles. This is important for providing the correct U-bolt clamp load and retention of
parts.
Position the spring upper plate and install the U-bolts and nuts.
-
Tighten until snug.
5. Install the new shock absorber lower nut and bolt.
-
Tighten until snug.
6. Install the wheel and tire.
7. Lower the vehicle until the weight of the vehicle is resting on the wheels and tires (curb height).
8. Tighten the new shackle-to-rear bracket bolt to 133 Nm (98 lb-ft).
9. Tighten the shackle-to-leaf spring nut to 133 Nm (98 lb-ft).
10. Tighten the spring-to-front bracket bolt to 350 Nm (258 lb-ft).
11. Tighten the U-bolt nuts evenly in an X-type pattern in 5 stages.
-
Stage 1: Tighten to 50 Nm (37 lb-ft).
-
Stage 2: Tighten to 100 Nm (74 lb-ft).
-
Stage 3: Tighten to 150 Nm (111 lb-ft).
-
Stage 4: Tighten to 200 Nm (148 lb-ft).