Econoline E350 1 Ton V10-6.8L VIN S (1998)

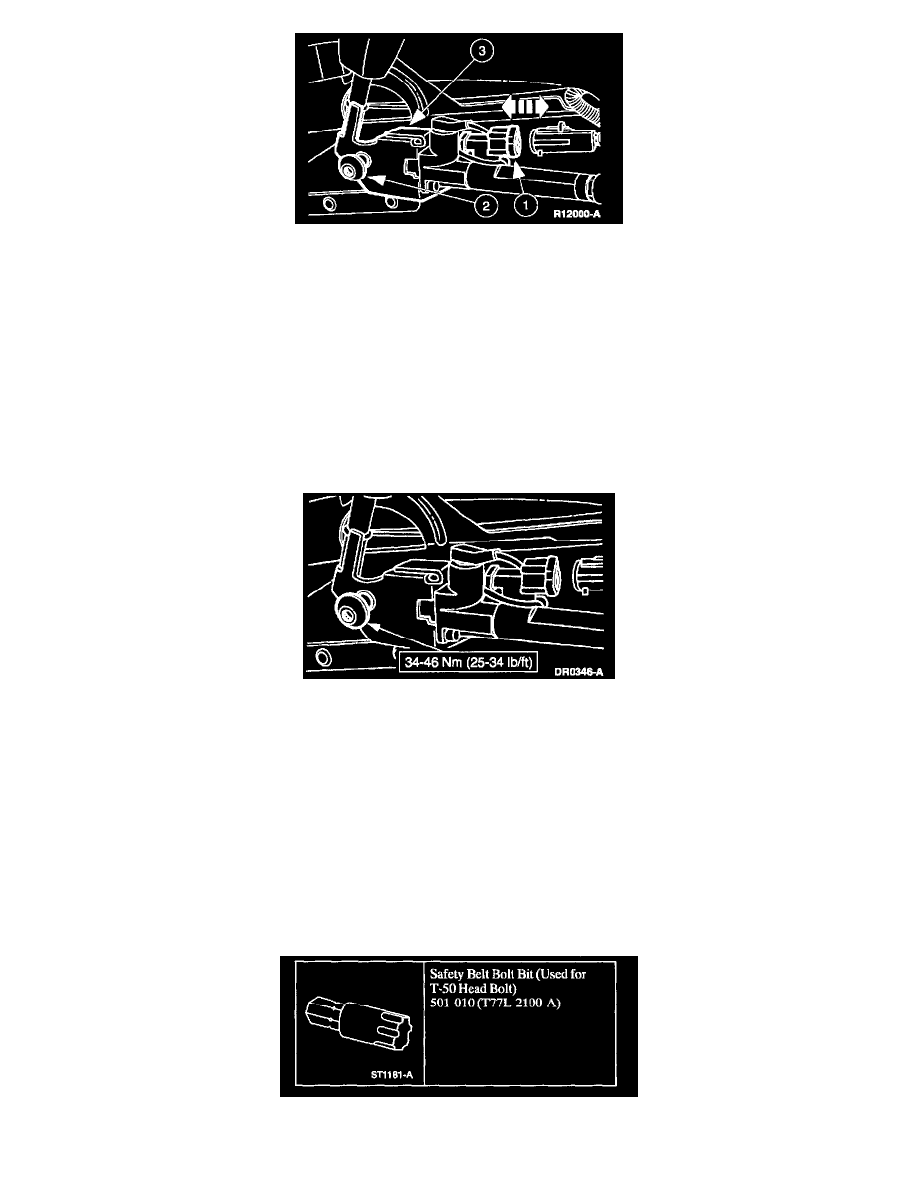
4. Remove the belt and buckle assembly pretensioner.
1. Disconnect the belt and buckle assembly pretensioner harness connector.
2. Using the Safety Belt Bolt Bit, remove the belt and buckle assembly pretensioner retaining bolt.
3. Remove the belt and buckle assembly pretensioner.
Installation
WARNING:
-
THE BELT AND BUCKLE ASSEMBLY PRETENSIONER IS A PYROTECHNIC DEVICE. ALWAYS WEAR SAFETY GLASSES
WHEN SERVICING AN AIR BAG-EQUIPPED VEHICLE AND WHEN HANDLING A BELT AND BUCKLE ASSEMBLY
PRETENSIONER.
-
THE BELT AND BUCKLE ASSEMBLY PRETENSIONER IS A PYROTECHNIC DEVICE. NEVER PROBE THE CONNECTORS
ON THE BELT AND BUCKLE ASSEMBLY PRETENSIONERS. DOING SO COULD RESULT IN BELT AND BUCKLE ASSEMBLY
PRETENSIONER OR AIR BAG DEPLOYMENT AND COULD RESULT IN PERSONAL INJURY.
1. Follow the removal procedure in reverse order. Align both anti-rotation tabs on the belt and buckle assembly pretensioner into the seat track prior
to tightening the bolt.
2. Reconnect negative battery cable. On vehicles equipped with dual batteries:
-
Reconnect primary battery terminal connections.
-
Reconnect positive battery cable.
-
Reconnect the negative battery cable.
-
Unwrap the secondary battery positive cable and reconnect it to the primary battery positive terminal.
NOTE:
-
When the battery has been disconnected and reconnected, some abnormal drive symptoms may occur while the Powertrain Control Module (
PCM) relearns its adaptive strategy. The vehicle may need to be driven 16 km (10 miles) or more to relearn the strategy.
-
Make sure to tighten bolts to specification shown in image(s).
Front Shoulder Seat Belt Height Adjuster
Safety Belt Bolt Bit
