
Econoline E350 1 Ton V8-5.4L Prop SOHC VIN Z (1998)
WARNING
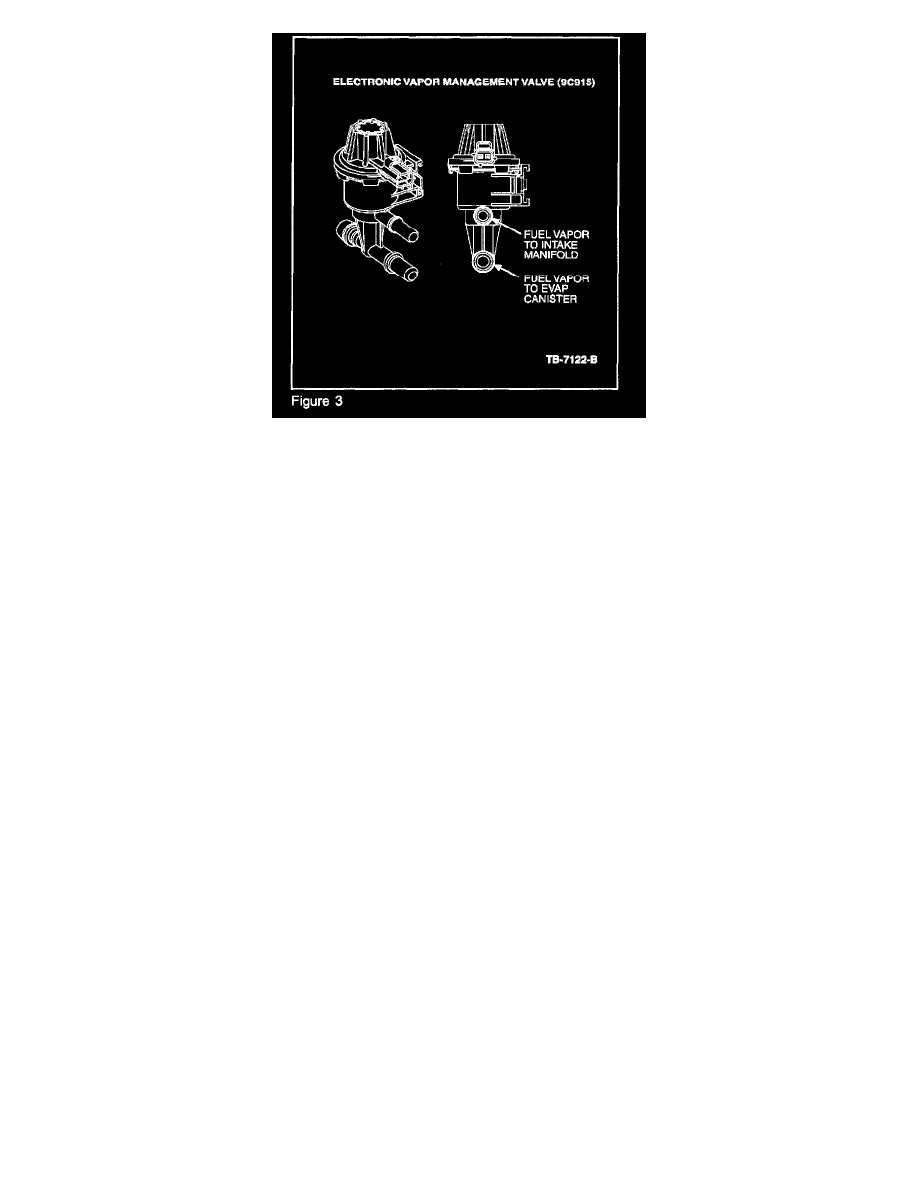
DO NOT REMOVE THE SCHRADER VALVE. REMOVING THE SCHRADER VALVE FROM THE TEST PORT ON VEHICLES EQUIPPED
WITH THE ELECTRONIC VAPOR MANAGEMENT VALVE (9G641) AND/OR ELECTRONIC VAPOR MANAGEMENT VALVE &
BRACKET ASSEMBLY (9G683) (SEE FIGURE 3), OR EVAP CANISTER PURGE VALVE (9C915) AND/OR EVAP CANISTER PURGE
VALVE & BRACKET ASSEMBLY (9F933) (SEE FIGURE 2) WILL PERMANENTLY DAMAGE THE VALVE.
5.
Install the EVAP Emission Test Port Adapter that is provided with the Rotunda's Smoke Machine to EVAP Canister Purge Valve test port.
NOTE
SPECIAL PROCEDURES HAVE BEEN DESIGNATED FOR WINDSTAR, LS, THUNDERBIRD & PZEV FOCUS BECAUSE THEY HAVE A
CHECK VALVE THAT WILL PREVENT SMOKE FROM ENTERING THE FILLER NECK.
6.
Connect black smoke hose nozzle tip to the EVAP Emission Test Port Adapter. For all except Windstar, LS, Thunderbird & PZEV Focus Use
NGS or WDS to close CVS. (CVS WILL REOPEN AFTER NINE (9) MINUTES OF CONTINUOUS OPERATION).
7.
For all except Windstar, LS, Thunderbird & PZEV Focus - Remove the fuel cap from the vehicle. Depress remote starter button: Smoke will be
introduced into the EVAP Emission System. Secure the fuel cap once smoke is seen exiting from the fuel tank's neck area. For Windstar, LS,
Thunderbird & PZEV Focus, do not remove fuel cap. Depress starter button and introduce smoke to system until it can be seen exiting the CVS
(located by filler neck). Once smoke is seen, use NGS or WDS to close CVS. (CVS WILL REOPEN AFTER NINE (9) MINUTES OF
CONTINUOUS OPERATION).
8.
Press and release the remote starter button in intervals of approximately 15 seconds on and 15 seconds off. Use the halogen light provided with the
Smoke Machine to look for smoke in the engine compartment, EVAP hoses to EVAP Canister Purge Valve, CVS, carbon canister and area around
the fuel cap. Wiggle fuel vapor lines to check for leaks. Check for leaks in areas that are difficult to access, such as connections on top of the tank
where connections may be or inside frame rails. Use the black light to ensure that there are no leaks. If a leak is detected, repair as necessary. If the
leak is not detected from the top, check under the bottom of vehicle. Inspect the EVAP hoses running to the carbon canister, fuel filler neck, CVS,
and EVAP Canister Purge Valve. Go to LEAK VERIFICATION to verify any repair or if no leak is found.
LEAK VERIFICATION (METERED AIR SYSTEM)
1.
Position the selector valve located on the Smoke Machine control panel to "METER".
2.
Verify calibration of the flow meter by using the .020" calibrated leak orifice. To do this, insert air supply hose (transparent hose) nozzle tip into
appropriate EVAP System calibrated leak orifice located on the front of the Smoke Machine panel.
3.
TURN ON: Depress the remote starter button. Observe the position of the flow meter indicator ball. Position the flow meter red pointer flag so it
aligns with the measurement of the indicator ball. Release the button and remove the air supply hose nozzle tip from the EVAP System calibrated
leak orifice.
NOTE
THIS FLOW METER CALIBRATION MEASUREMENT INDICATES THE VEHICLE PASS OR FAIL CRITERIA BASED ON THE .020"
EVAP SYSTEM LEAK STANDARD.