
Econoline E350 1 Ton V8-5.4L Prop SOHC VIN Z (1998)
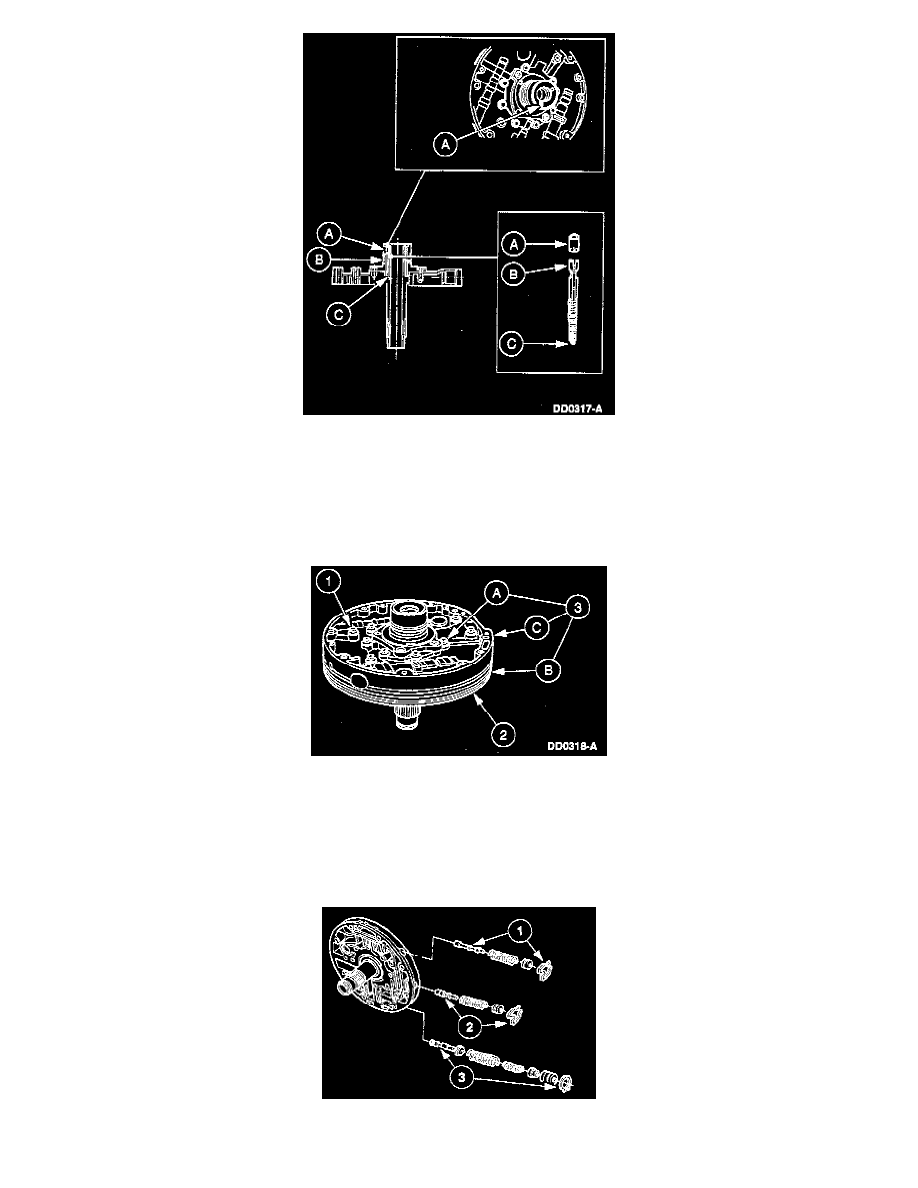
5. Remove and discard the (A) orifice cup plug and the (B) spring and stop assembly. Make sure the old (C) rubber stop is removed. Clean and
inspect the bore, making sure it is clean of any debris.
CAUTION: Do not reuse the orifice cup plug or spring and stop assembly. Failure to replace these parts may cause repeat repairs. Make sure the
old rubber stop is removed (it may become separated from the spring assembly).
CAUTION: Use care not to damage any machined surfaces of the stator support.
6. Separate the pump control body from the pump body.
1. Remove the 11 bolts.
2. Support the pump body.
3. Remove the (A) bolt and separate the (B) pump body from the (C) pump control body.
NOTE: Obtain Pump Banding Tool and one 10 mm bolt prior to removing the pump body bolts. This tool is needed to align the pump with
the control body assembly during reassembly.
7. Remove the converter clutch shift valve assembly, converter regulator valve assembly, and main regulator boost valve and sleeve assembly.
1. Remove the retainer clip with a small screwdriver or tweezers then remove the converter clutch shift valve assembly.