
Edge AWD V6-3.5L (2009)
Lower the engine to allow installation of the engine mount bracket and lower bolt.
-
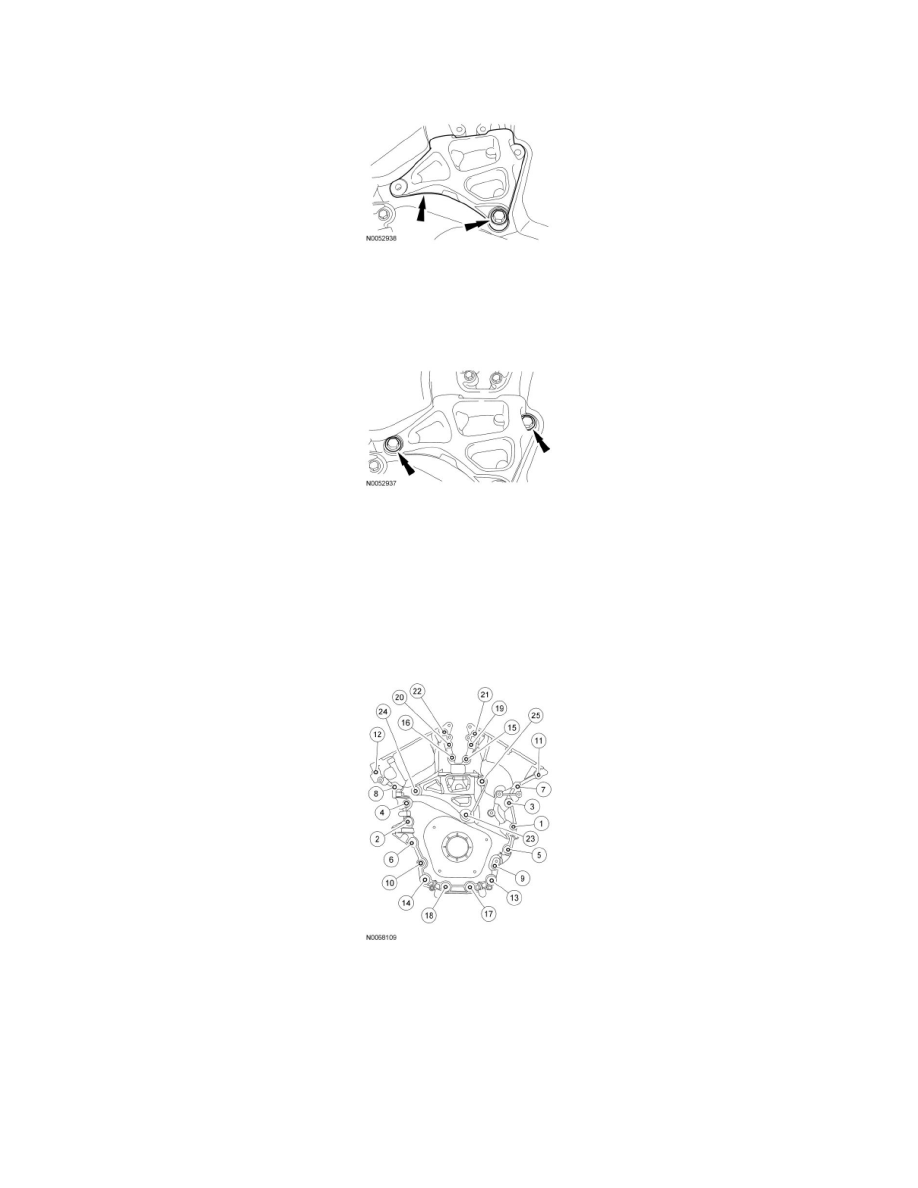
Install the engine mount bracket and lower bolt as an assembly.
9. NOTE: Do not tighten the bolts at this time.
Raise the engine to the installed position.
-
Install the 2 upper engine mount bracket bolts.
10. NOTICE: Do not expose the Motorcraft(R) High Performance Engine RTV Silicone to engine oil for at least 90 minutes after installing
the engine front cover. Failure to follow this instruction may cause oil leakage.
Install the remaining engine front cover bolts. Tighten all of the engine front cover bolts and engine mount bracket bolts in the sequence shown in
2 stages:
-
Stage 1: Tighten bolts 1 thru 22 to 10 Nm (89 lb-in) and bolts 23, 24 and 25 to 15 Nm (133 lb-in).
-
Stage 2: Tighten bolts 1 thru 22 to 24 Nm (18 lb-ft) and bolts 23, 24 and 25 to 75 Nm (55 lb-ft).
11. NOTICE: The thread sealer on the engine mount studs (including new engine mount studs if applicable) must be cleaned off with a wire
brush and new Threadlock and Sealer applied prior to installing the engine mount studs. Failure to follow this procedure may result in
damage to the engine mount studs or engine.
Install the engine mount studs in the following sequence.
1. Clean the front cover engine mount stud holes with pressurized air to remove any foreign material.
2. Clean all the thread sealer from the engine mount studs (old and new studs).
3. Apply new Threadlock and Sealer to the engine mount stud threads.