
Edge FWD V6-3.5L (2007)
1. NOTE: Avoid scratching the painted surfaces. For minor scratches or exposed metal, see the manufacturer's recommendations.
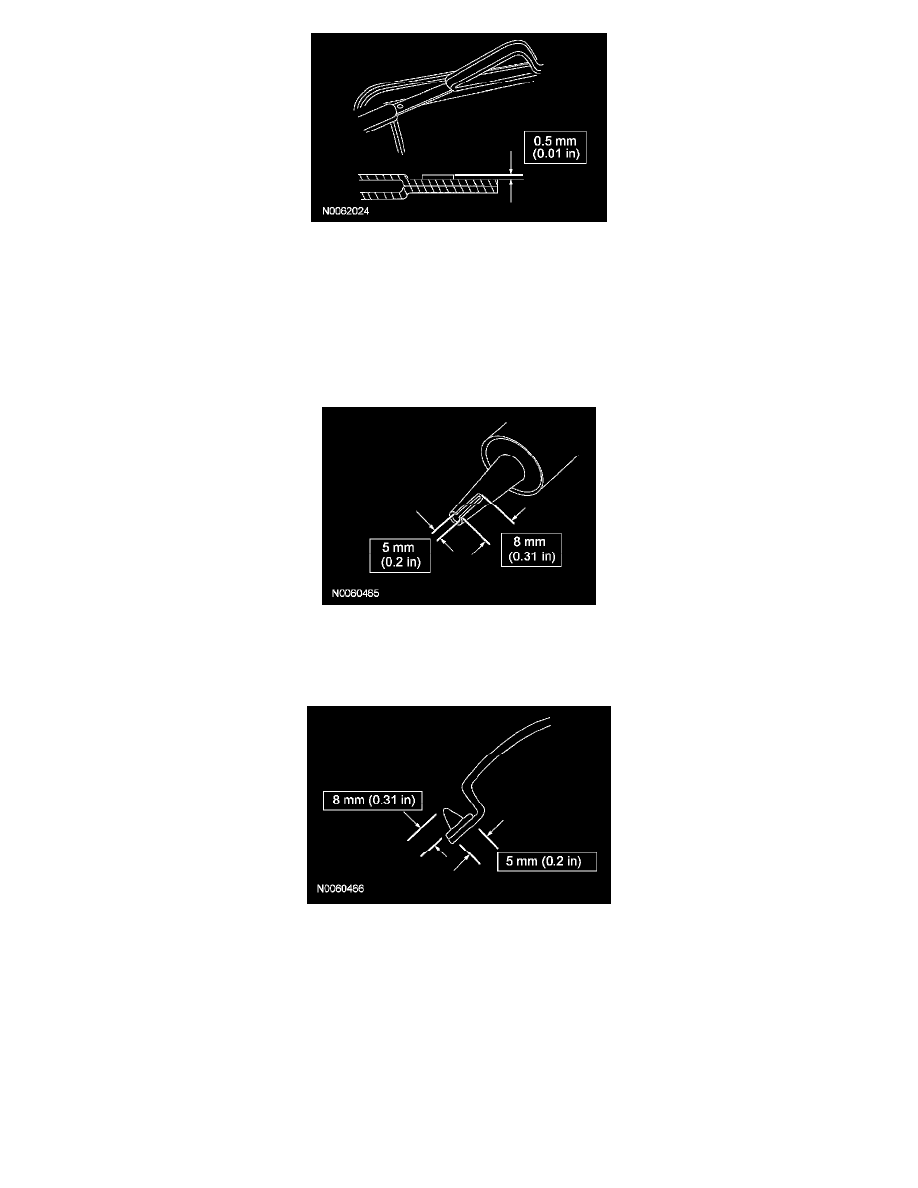
Using an appropriate tool, trim the urethane adhesive and pads leaving no more than 0.5 mm (0.01 in) base of original equipment urethane along
the roof opening module surface.
2. NOTE: Make sure the water channel is free from any foreign material.
Using a soft brush or vacuum, remove any dirt or foreign material from the roof opening panel module. Clean residual adhesive tape from the
housing using a suitable cleaner.
3. CAUTION: Be sure to use the same brand of cure-rate products for the adhesive and primer. Do not mix different brands of urethane
and primer.
Cut the urethane adhesive applicator tip to the specification.
4. NOTE: Use either a high-ratio, electric or battery-operated caulk gun that will apply the urethane with less effort and a continuous bead.
Apply urethane adhesive on top of the existing trimmed urethane adhesive bead. Make sure that all gaps in the urethane adhesive are smoothed
into one continuous bead.
5. CAUTION: Make sure the windshield moulding does not get pinched under the front trim panel. The windshield moulding should be
pulled over the top of the leading edge of the trim panel during installation.
NOTE: Position front trim panel to best overall appearance.
Apply the front trim panel assembly to the roof module. Work the trim panel down using only vertical pressure.
6. Install the antenna.