
Edge FWD V6-3.5L (2007)
Front Seat Backrest, Manual Recline With Fold Flat (Part 2)
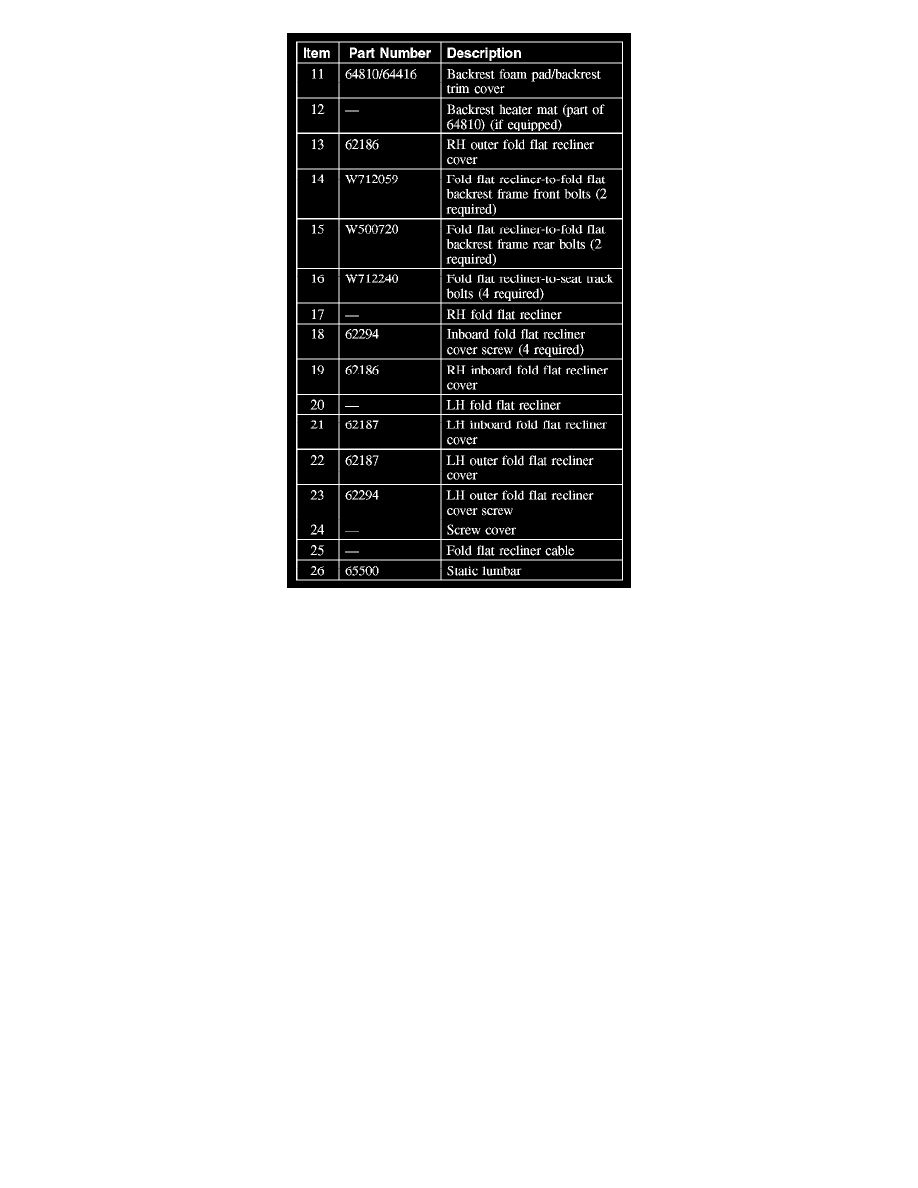
Disassembly and Assembly
WARNING:
-
Always wear safety glasses when repairing an air bag supplemental restraint system (SRS) vehicle and when handling an air bag module.
This will reduce the risk of injury in the event of an accidental deployment.
-
Carry a live side air bag module with the air bag and tear seam pointed away from your body. This will reduce the risk of injury in the
event of an accidental deployment.
-
Do not set a live side air bag module down on the cover tear seam. This will reduce the risk of injury in the event of an accidental
deployment.
-
After deployment, the air bag surface can contain deposits of sodium hydroxide, a product of the gas generant combustion that is
irritating to the skin. Wash your hands with soap and water afterwards.
-
Never probe the connectors on the air bag module. Doing so can result in air bag deployment, which can result in personal injury.
-
Side air bag modules with damaged covers must be replaced.
-
To reduce the risk of personal injury, do not use any memory saver devices.
NOTE:
-
The air bag warning lamp illuminates when the restraints control module (RCM) fuse is removed and the ignition switch is ON. This is normal
operation and does not indicate a supplemental restraint system (SRS) fault.
-
The SRS must be fully operational and free of faults before releasing the vehicle to the customer.
-
Only the front passenger seat can come equipped with optional fold-flat backrest.
All seats
1. Position the seat to access all the seat track-to-floor bolts and the safety belt retractor belt anchor nut.
2. Depower the supplemental restraint system (SRS).
3. Remove the front seat.
4. Remove the front seat backrest.
5. Remove the LH and RH outer fold flat recliner covers.
-
Pull to release the clips.
-
Slide up to disengage the retainer and remove.