
Edge FWD V6-3.5L (2007)
Removal and Installation
NOTE:
-
The O-ring seals used on this vehicle are not interchangeable with all similarly sized O-ring seals used on other Ford products. Use only the O-ring
seals specified for this vehicle in the Ford master parts catalog.
-
Installation of a new receiver/drier desiccant bag is not required when repairing the A/C system except when there is physical evidence of system
contamination from a failed A/C compressor or damage to the receiver/drier desiccant bag.
-
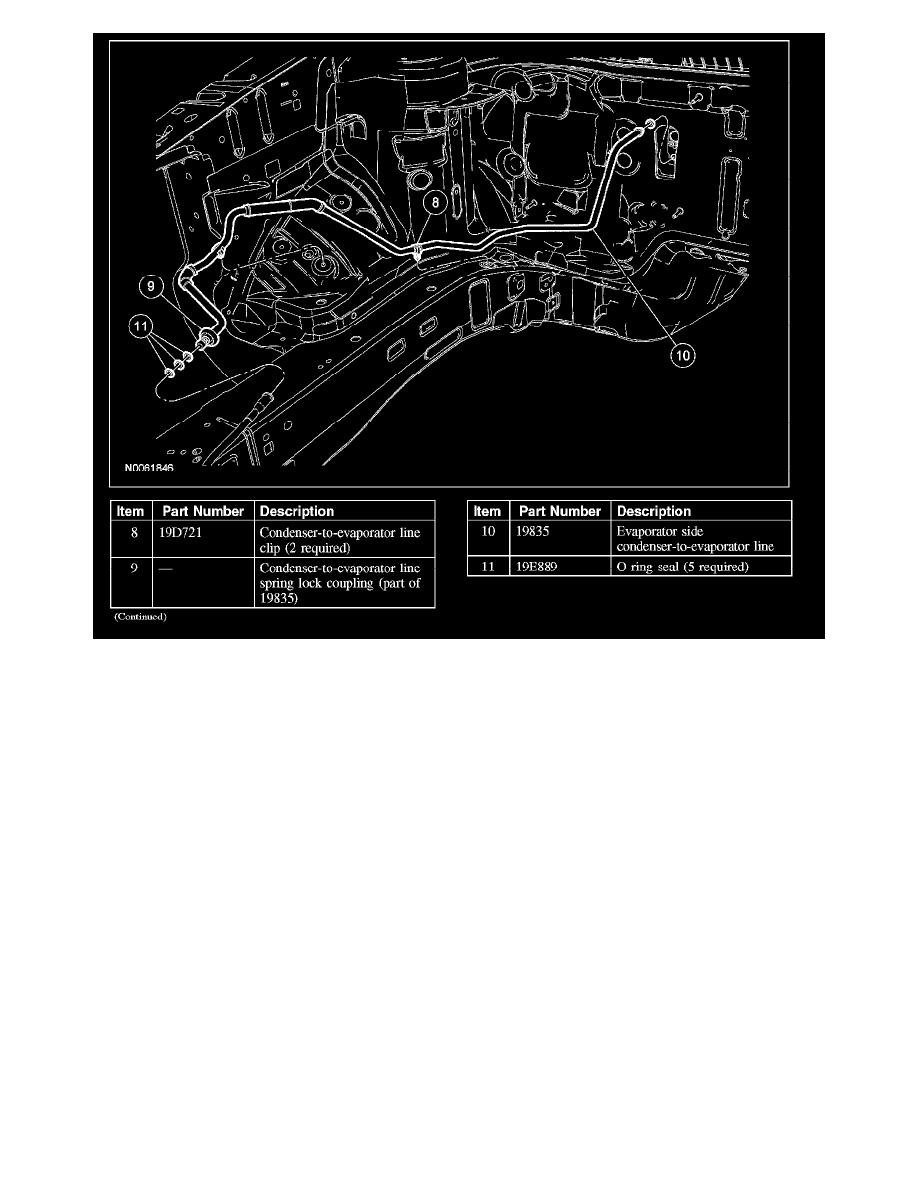
The condenser-to-evaporator line consists of 2 separately serviceable lines. If only one line is to be removed, only carry out the steps qualified for
that line.
Both condenser-to-evaporator lines
1. Recover the refrigerant.
2. Disconnect the condenser-to-evaporator line spring lock coupling.
-
Discard the O-ring seals.
Condenser-side condenser-to-evaporator line
3. Remove the front bumper cover.
4. Drain the engine coolant.
5. Release the upper radiator hose clamp at the radiator and disconnect the hose.
6. Remove the engine cooling fan.
7. Remove the condenser-to-evaporator line bracket bolt.
-
To install, tighten to 9 Nm (80 lb-in).
8. Release the 2 radiator bracket clips from the radiator support and position the radiator rearward.
9. Remove the condenser outlet fitting bolt and disconnect the fitting.
-
Discard the O-ring seal.
-
To install, tighten to 6 Nm (53 lb-in).
10. Detach the condenser-to-evaporator line radiator clip.