
Edge FWD V6-3.5L (2007)
during installation. For additional information, WSM, Section 501-17.
8.
Completely loosen the two (2) center rear idler track-to-housing screws. The screws will be captured inside the track rail. In some cases it may be
necessary to lift rails to completely remove screws from roof threads to allow idler track removal. (Figure 6)
9.
Slide idler track rearward to disengage the idler track from the front clip.
10.
Remove the idler track.
11.
Remove the two (2) center screws from the idler track and install back into the roof opening module. Hand tighten the two (2) center screws.
12.
Repeat Steps 6 through 10 for the opposite side idler track.
13.
Trim urethane adhesive to 0.01" (0.5 mm) base of original equipment urethane along the roof opening module surface.
14.
Using a soft brush or vacuum, remove any dirt or foreign material from the roof opening module surface.
15.
Touch up scratches on roof opening module from cutting old panels off. Refer to WSM, Section 501-35 Restoring Corrosion Protection Following
Repair.
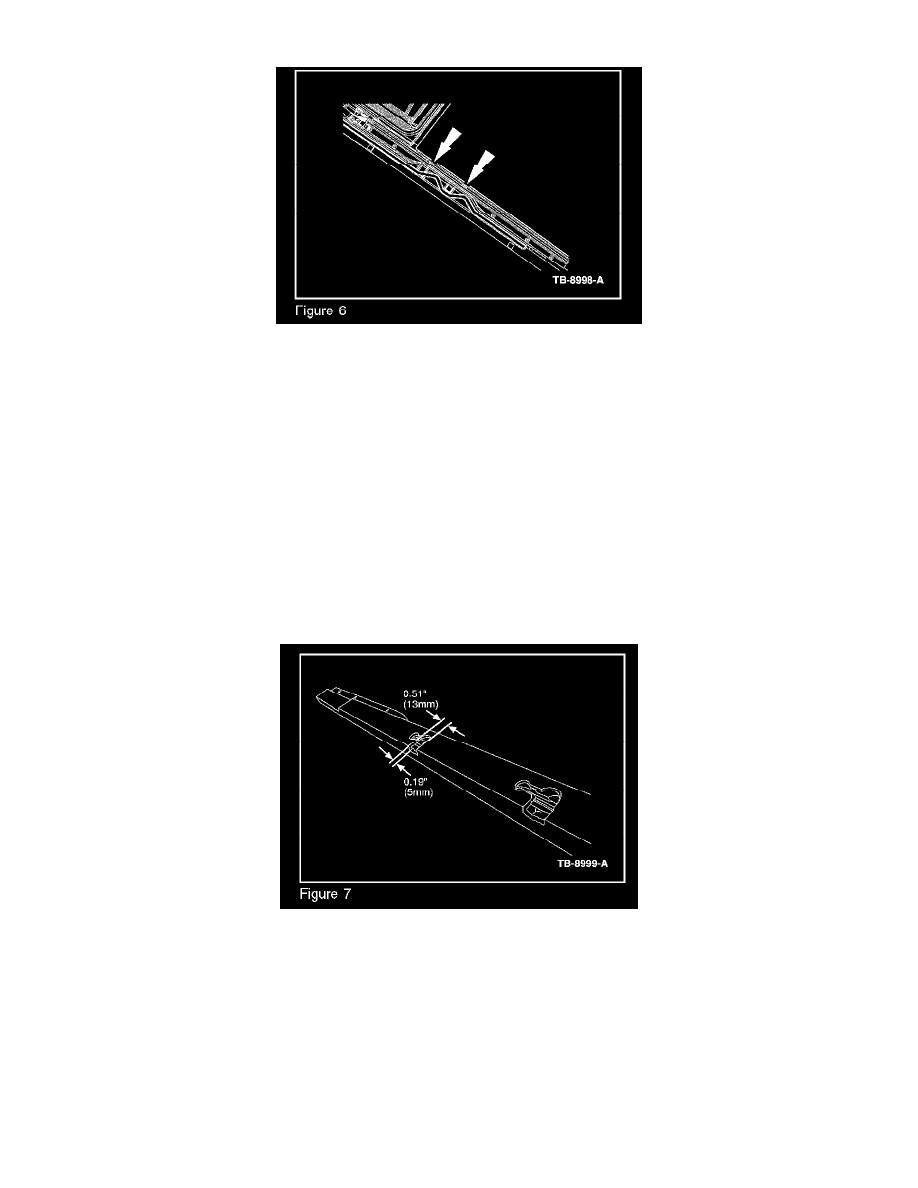
16.
Modify new idler tracks prior to installation. (Figure 7)
a.
Locate the screw head access in the new idler tracks.
b.
Measure and mark at the screw head access, 2 clearance slots on the inside edge of each new idler track, 1/2" (13 mm) wide and 3/16" (5
mm) deep.
c.
Cut slots using a small die grinder or equivalent. View shows after modification of a new idler track. (Figure 7)
17.
Install the new idler tracks.
a.
Using slots, position new idler track into module.