
Escape 2WD L4-2.5L (2009)
3. Inspect the exhaust intermediate pipe/exhaust Y-pipe and resonator flange studs for damage.
-
If damaged, replace stud(s), or if stud comes out when removing nut(s), replace the stud(s).
NOTE: If replacement of the exhaust intermediate pipe/exhaust Y-pipe flange stud(s) is required, perform Steps 4 and 5.
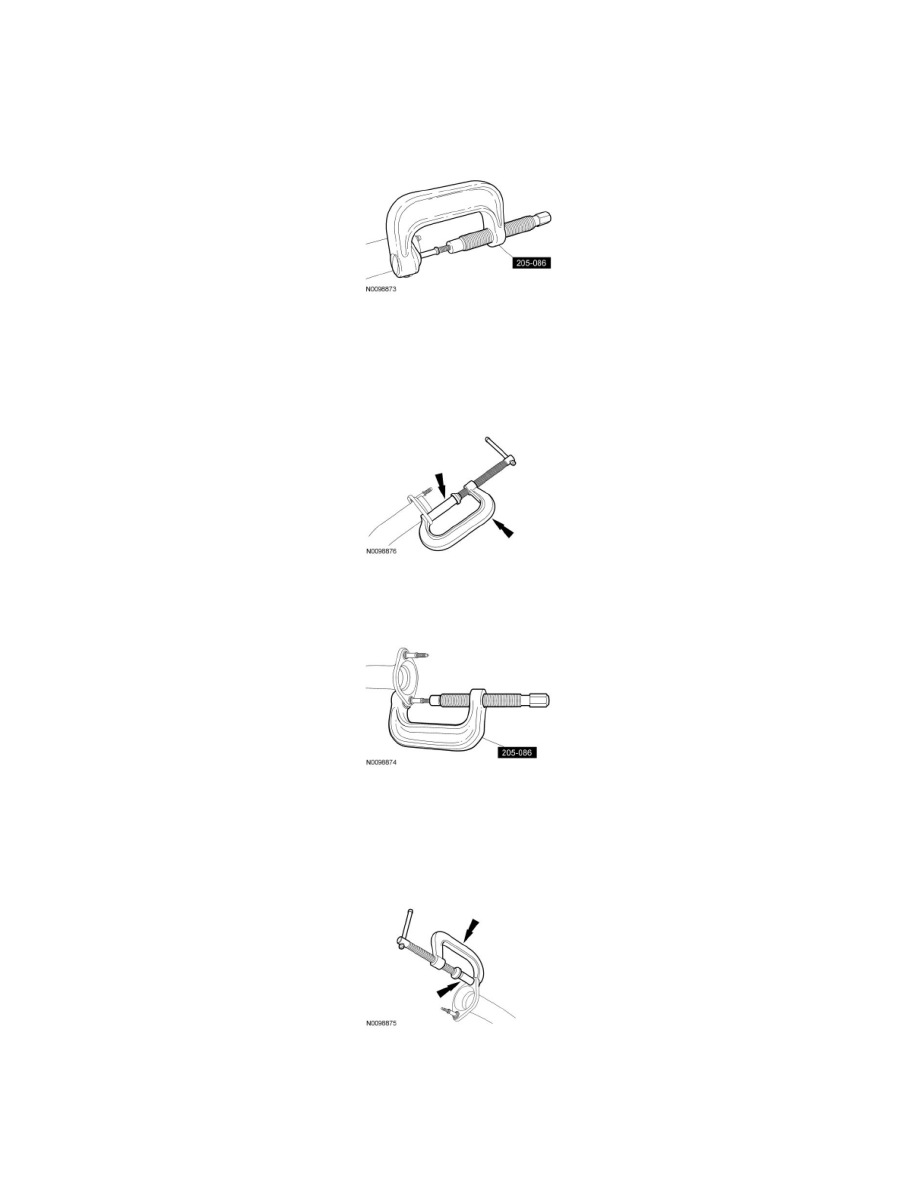
4. Use the C-Frame and Screw Installer/Remover to push the 10-mm stud out of the flange.
5. NOTE: When positioning the new 10-mm stud in the exhaust intermediate/exhaust Y-pipe flange, make sure to line up the new stud seat knurls
with witness knurl grooves in the exhaust intermediate/exhaust Y-pipe flange.
Use a C-clamp and a deep-well socket to push the 10-mm stud fully into the flange.
-
Make sure the stud is fully and evenly seated into the flange.
NOTE: If replacement of the resonator flange stud(s) is required, perform Steps 6 and 7.
6. Use the C-Frame and Screw Installer/Remover to push the 8-mm stud out of the flange.
7. NOTE: When positioning the new 8-mm stud in the resonator flange, make sure to line up the new stud seat knurls with witness knurl grooves in
the resonator flange.
Use a C-clamp and a deep-well socket to push the 8-mm stud fully into the flange.
-
Make sure the stud is fully and evenly seated into the flange.
8. NOTE: Do not tighten the service clamp at this time.
Attach the catalytic converter and muffler assembly to the 3 exhaust hangers.
9. NOTICE: Replace the gasket by hand. Do not rotate the gasket back and forth during installation. Doing so may lessen the gaskets ability
to seal and stay correctly positioned during assembly.