
Escape 4WD L4-2.5L Hybrid (2009)
Removal
NOTICE: Do not loosen or remove the crankshaft pulley bolt without first installing the special tools as instructed in this procedure. The
crankshaft pulley and the crankshaft timing sprocket are not keyed to the crankshaft. The crankshaft, the crankshaft sprocket and the pulley
are fitted together by friction, using diamond washers between the flange faces on each part. For that reason, the crankshaft sprocket is also
unfastened if the pulley bolt is loosened. Before any repair requiring loosening or removal of the crankshaft pulley bolt, the crankshaft and
camshafts must be locked in place by the special service tools, otherwise severe engine damage can occur.
NOTICE: During engine repair procedures, cleanliness is extremely important. Any foreign material (including any material created while
cleaning gasket surfaces) that enters the oil passages, coolant passages or the oil pan can cause engine failure.
1. With the vehicle in NEUTRAL, position it on a hoist.
2. Remove the accessory drive belt and tensioner.
3. Remove the crankshaft pulley. For additional information refer to Crankshaft Pulley See: Cylinder Block Assembly/Harmonic Balancer -
Crankshaft Pulley/Service and Repair/Crankshaft Pulley.
4. Remove the engine mount. For additional information, refer to Engine Mount See: Drive Belts, Mounts, Brackets and Accessories/Engine
Mount/Service and Repair/Removal and Replacement.
5. NOTICE: Use care not to damage the engine front cover or the crankshaft when removing the seal.
Using the Oil Seal Remover, remove the crankshaft front seal.
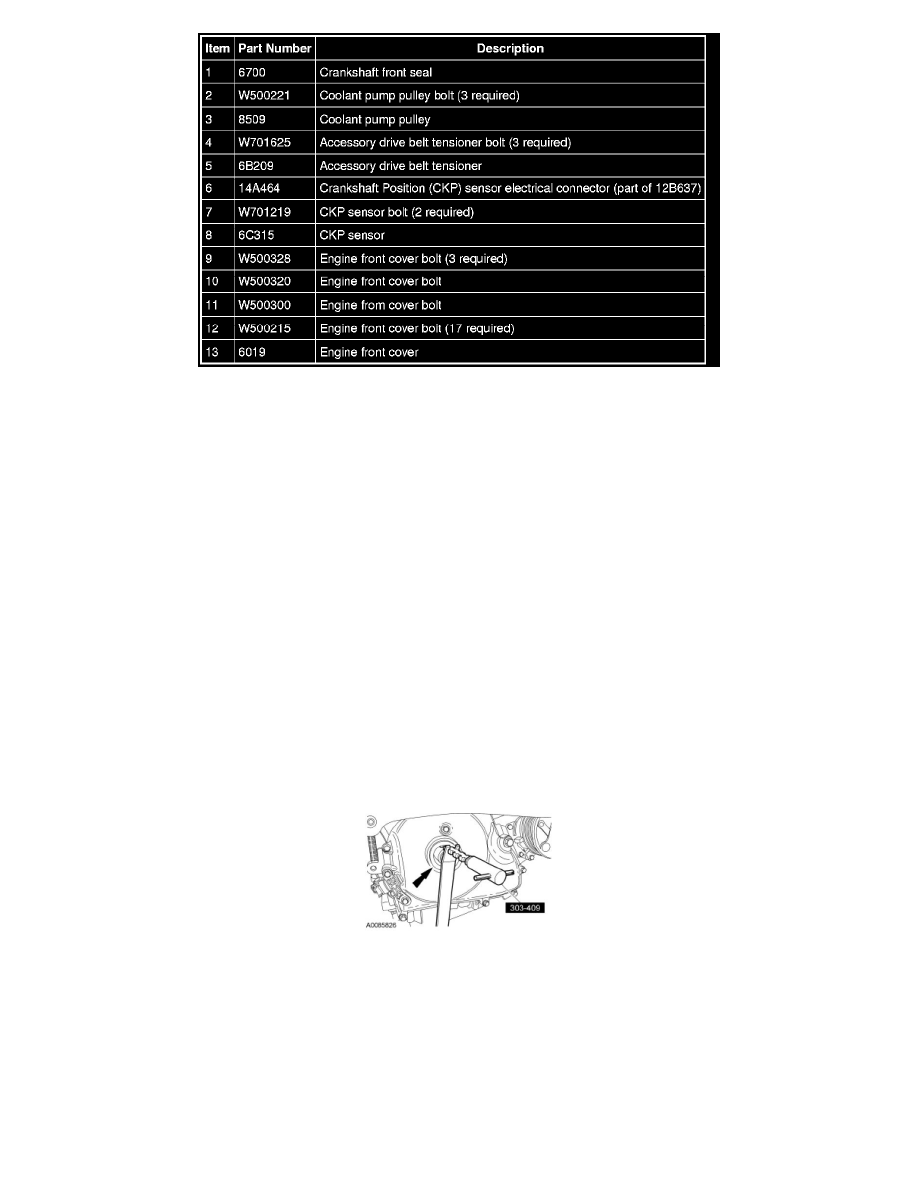
6. Remove the 3 bolts and the coolant pump pulley.
7. Disconnect the Crankshaft Position (CKP) sensor electrical connector.
8. Remove the 2 bolts and the CKP sensor.