
Escape 4WD V6-3.0L (2008)
Disconnect the crankcase ventilation tube from the air cleaner outlet pipe.
5. Detach the upper radiator hose from the 2 retainers on the cooling fan shroud and position the hose aside.
6. Detach the 4 wiring retainers from the valve cover stud bolts.
7. Detach the 3 wiring retainers from the valve cover stud bolts and position the B+ cable aside.
8. NOTE: Inspect the crankcase ventilation tube and valve cover sealing area. If either a new valve cover or crankcase ventilation tube is required,
both components must be installed new.
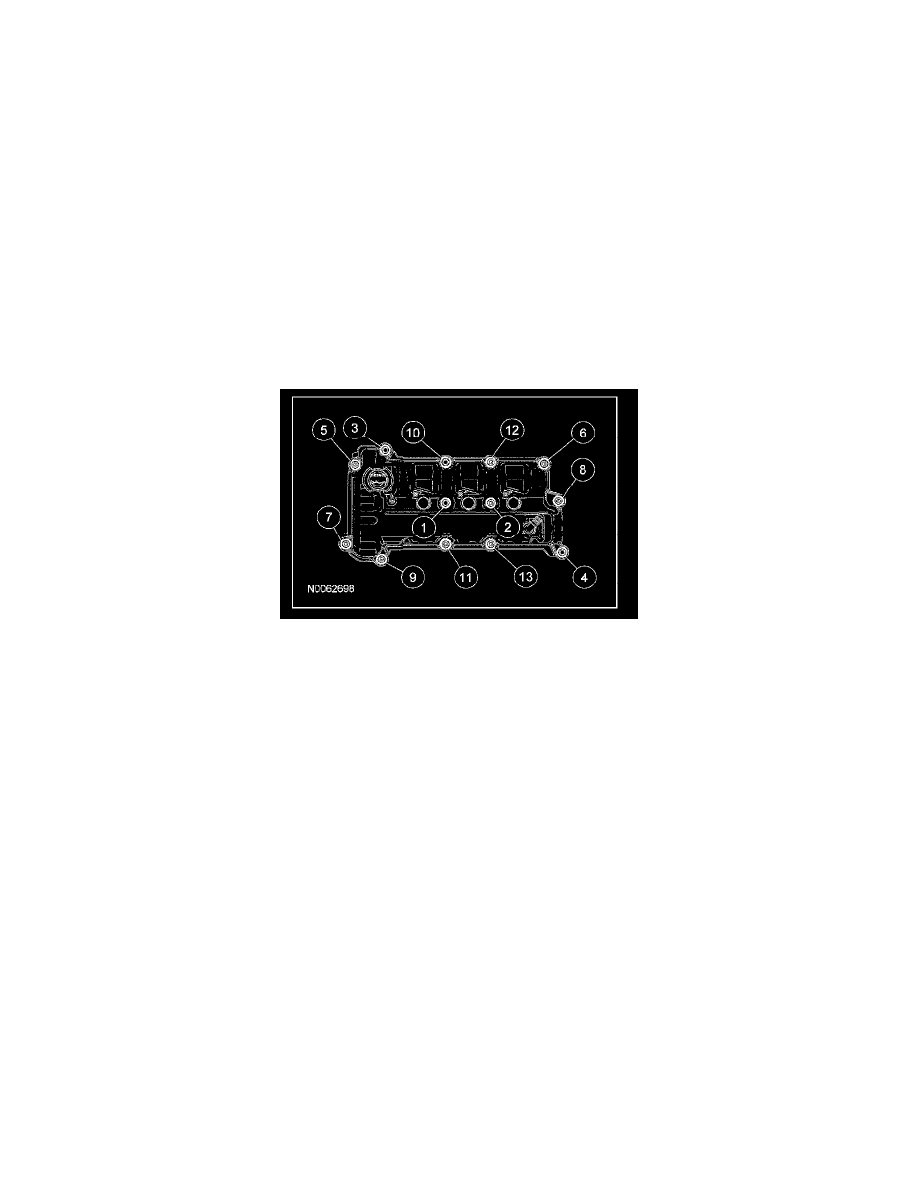
Remove the 5 bolts, 8 stud bolts and the valve cover.
^
Remove and discard the gasket.
Installation
1. Clean the valve cover, cylinder head and front cover sealing surfaces with metal surface cleaner and install a new valve cover gasket.
2. NOTE: The valve cover must be installed and the bolts and stud bolts tightened within 4 minutes of sealant application.
Apply a 5 mm (0.19 in) dot of silicone gasket sealant to the front cover-to-cylinder head joints.
3. Position the valve cover and install the bolts and stud bolts.
^
Tighten in the sequence shown to 10 Nm (89 lb-in).
4. Attach the 3 wiring (B+ cable) retainers onto the valve cover stud bolts.
5. Attach the 4 wiring retainers to the valve cover stud bolts.
6. Attach the upper radiator hose to the 2 retainers on the cooling fan shroud.
7. Attach the crankcase ventilation tube to the air cleaner outlet pipe.
8. Install the accelerator cable snow shield and the 2 bolts.
^
Tighten to 10 Nm (89 lb-in).
9. If equipped, install the engine lift bracket and the bolt.
^
Tighten to 118 Nm (87 lb-ft).
10. Install the LH ignition coil-on-plugs.