
Escape 4WD V6-3.0L (2008)
NOTE: The A/C clutch components should be reused unless obvious signs of damage are found.
1. Visually inspect the A/C clutch disc and hub, A/C compressor pulley and A/C clutch field coil for damage.
-
Inspect for physical damage, including cracked or melted components or discoloration due to excessive heat.
-
Inspect for excessive wear, including grooving in the A/C clutch disc and hub or A/C compressor pulley that is more than fingernail depth.
-
Inspect for roughness in the A/C compressor pulley bearing.
2. Clean the A/C clutch field coil and pulley mounting surfaces.
3. Install the A/C clutch field coil.
4. Install the 4 A/C clutch field coil screws.
5. CAUTION: The A/C compressor must be positioned on the press so that only the flat part of the A/C compressor housing is contacting
the base with the A/C compressor shaft aligned with the center of the press shaft. If the A/C compressor is not installed correctly on the
press, the A/C compressor and/or A/C compressor pulley will be damaged.
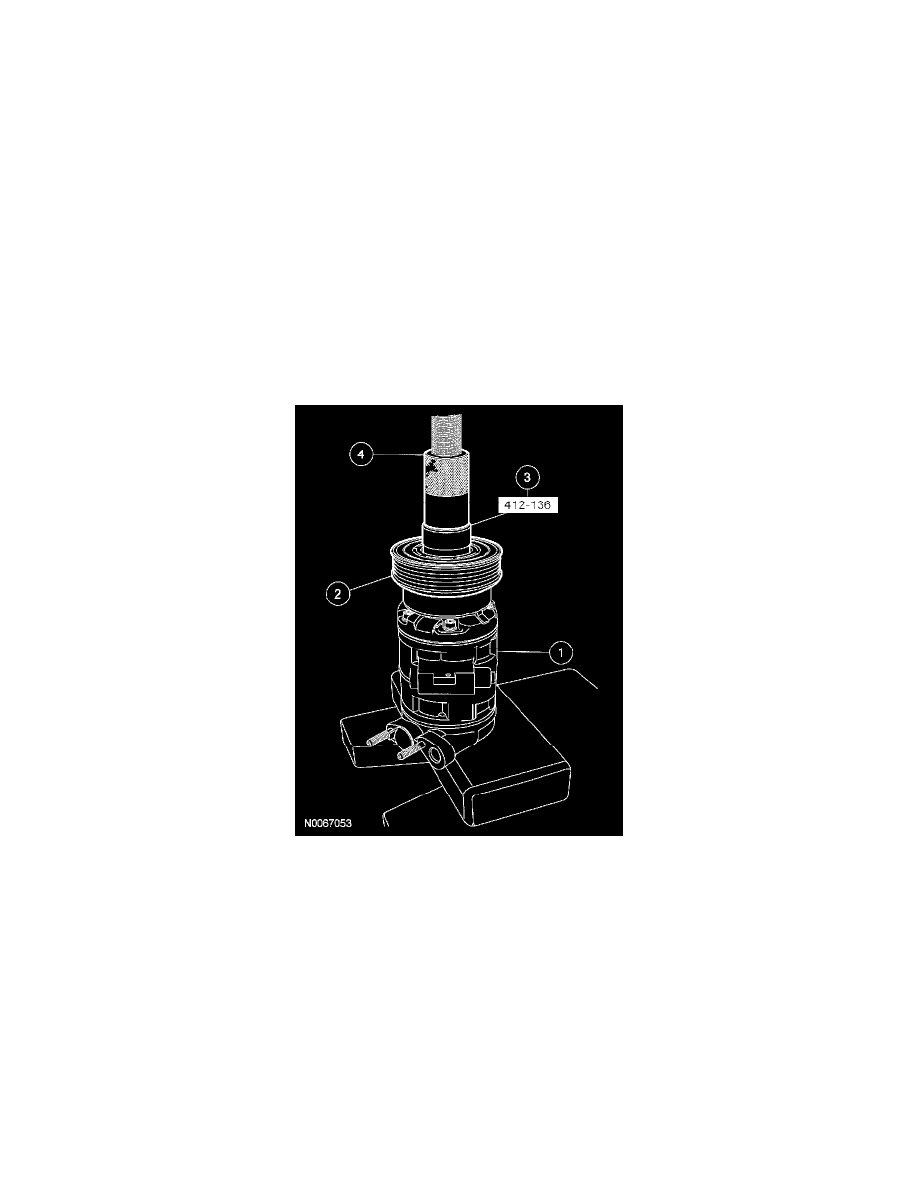
Install the A/C compressor pulley.
1
Install the A/C compressor on a suitable press.
2
Position the A/C compressor pulley on the A/C compressor.
3
Install the special tool on the A/C compressor pulley.
4
Using the press, install the A/C compressor pulley.
6. Install the A/C compressor pulley snap ring with the bevel side out.
7. Place one nominal thickness A/C clutch disc and hub spacer inside the clutch hub spline opening.
8. Install the A/C clutch disc and hub.
9. Install the A/C compressor clutch disc and hub bolt.
1
Hold the A/C clutch disc and hub with a suitable spanner-type wrench.
2
Tighten the bolt to 20 Nm (15 lb-ft).