
Escape 4WD V6-3.0L (2008)
3. If reinstalling the original windshield glass, remove the excess urethane adhesive and the windshield moulding.
4. Clean the inside of the windshield glass surface with glass cleaner making sure the ceramic-coated area is clean.
5. NOTE:
-
Be sure to use the same brand and cure-rate products for the adhesive and primer. Do not mix different brands of urethane and primer. Refer to
the Material Chart.
-
Sika uses the same black primer for the glass and pinch weld area.
If installing a new windshield glass, apply urethane glass primer according to manufacturer's instructions. Allow at least 6 minutes to dry.
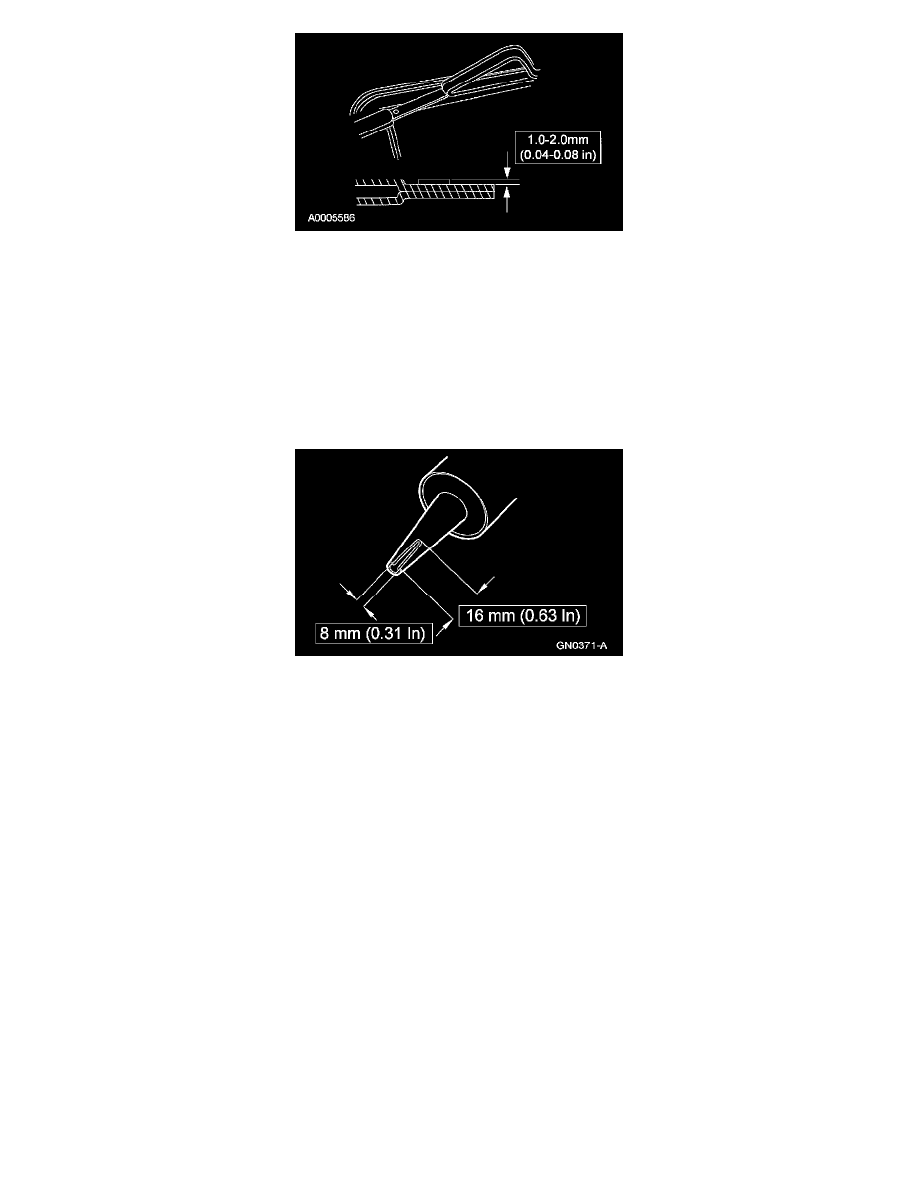
6. Cut the urethane adhesive applicator tip to specification.
7. NOTE: Use either a high-ratio electric or battery-operated caulk gun that will apply the urethane with less effort and a continuous bead.
Apply urethane adhesive on top of the existing trimmed urethane adhesive bead on the pinch weld. Make sure that all gaps in the urethane
adhesive are smoothed into one continuous bead starting and ending at the bottom of the windshield near the center.
8. Install the windshield glass, aligning it to the marks previously made.
9. NOTE: The urethane adhesive must cure for a minimum of one hour before testing for air and water leaks.
After the urethane adhesive has cured, check for water leaks and add urethane adhesive where needed.
10. If necessary, remove excess urethane adhesive from the exterior surface of the windshield glass.
11. Install the cowl panel grille.
12. Reposition the front portion of the headliner.
13. Install the LH and RH sun visors and visor clips.
-
If equipped, connect the electrical connectors.
14. Install the interior rear view mirror.
15. Position the overhead console and install the 2 overhead console screws.
-
If equipped, connect the electrical connector.
16. Install the 2 windshield side garnish mouldings.
17. Install the LH and RH A-pillar trim panels.