
Escort L4-110 1.8L DOHC (1994)
9. Check clutch drum for damage or deformation.
10. Check seal contact areas from damage.
11. Ensure check ball is not leaking or sticking.
12. Check spring and retainer assembly for separation.
13. Check return spring free length. Free length should be 1.173 inch.
ASSEMBLE
1. Apply small amount of automatic transaxle fluid to inner and outer faces of seal before installing reverse seal on piston. Face outer seal lip toward
the inside by gently rolling it down around circumference for easier installation.
2. Install coasting clutch drum in correct position in reverse and forward drum.
3. Install coasting piston by pushing evenly around circumference.
CAUTION: Ensure not to damage outer seal.
4. Install spring and retainer assembly, then compress spring and retainer using clutch spring compressor tool No. T65L-77515-A or equivalent.
5. Install snap ring, then the dished plate with dished side upward.
6. Install drive, driven plates, retaining plate, and snap ring.
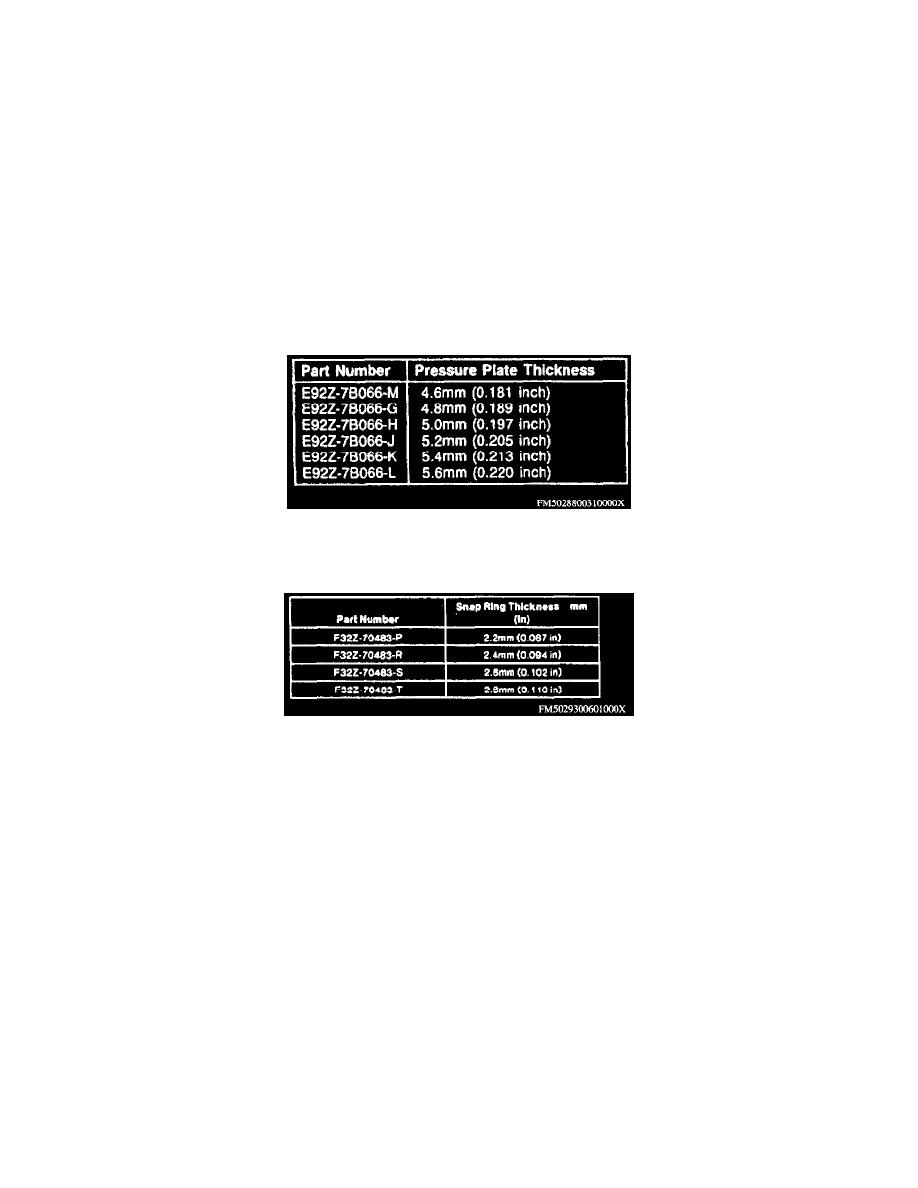
7. Measure clearance of snap ring and pressure plate. Clearance should be 0.040-0.047 inch. If clearance is not as specified, proceed as follows:
Coasting Clutch Pressure Plate Thickness Chart
a. On 1992 models, adjust clearance by selecting appropriate pressure plate from the Coasting Clutch Pressure Plate Thickness Chart.
Coasting Clutch Snap Ring Thickness Chart
b. On 1993-96 models, adjust clearance by selecting appropriate snap ring from the Coasting Clutch Snap Ring Thickness Chart.