
Escort L4-110 1.8L DOHC (1994)
Constant Velocity Joint Boot: Service and Repair
NOTE: The Birfield type CV joint on outboard end of halfshaft is serviced as a complete CV joint/halfshaft assembly. The tripot type inner CV joint
can be disassembled and serviced. If only the outer CV joint boot needs to be replaced, follow the applicable disassembly and assembly steps below:
1. Remove halfshaft from vehicle.
2. Secure halfshaft in a soft jawed vise.
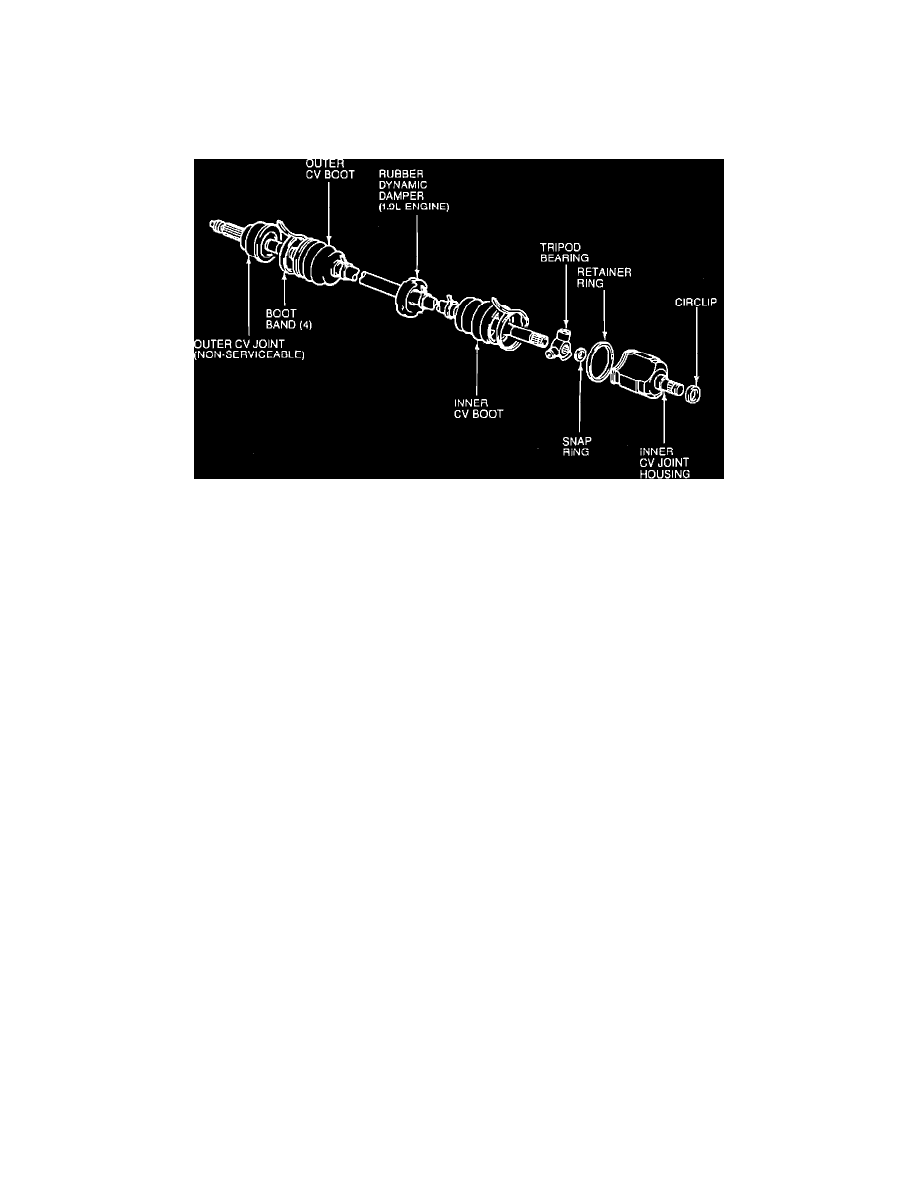
Fig. 5 Halfshaft Service
3. Using a screwdriver, pry up locking tabs of inner CV joint boot bands.
4. Remove bands with pliers.
5. Slide boot back to expose CV joint.
6. Mark shaft and CV joint housing to ensure proper assembly.
7. Remove retainer ring from CV joint housing.
8. Remove CV joint housing from halfshaft.
9. Mark tripot bearing and shaft to ensure proper assembly.
10. Remove tripot snap ring.
11. Gently tap tripot bearing off shaft using a suitable soft faced hammer.
12. Wrap tape around splines of shaft.
13. Remove inner CV joint boot.
14. If outer CV joint boot is to be replaced proceed as follows:
a. On righthand halfshaft, pry up rubber damper retaining band locking clip and remove.
b. Pry up on outer CV joint band clamp and remove.
c. Remove outer CV joint boot.
15. Inspect all CV joint grease for contamination. A contaminated CV joint must be completely disassembled, cleaned and inspected. If outer CV joint
has contaminated grease, assembly must be replaced.
16. Reverse procedure to install, noting the following: