Expedition 2WD V8-281 4.6L VIN W EFI (1997)

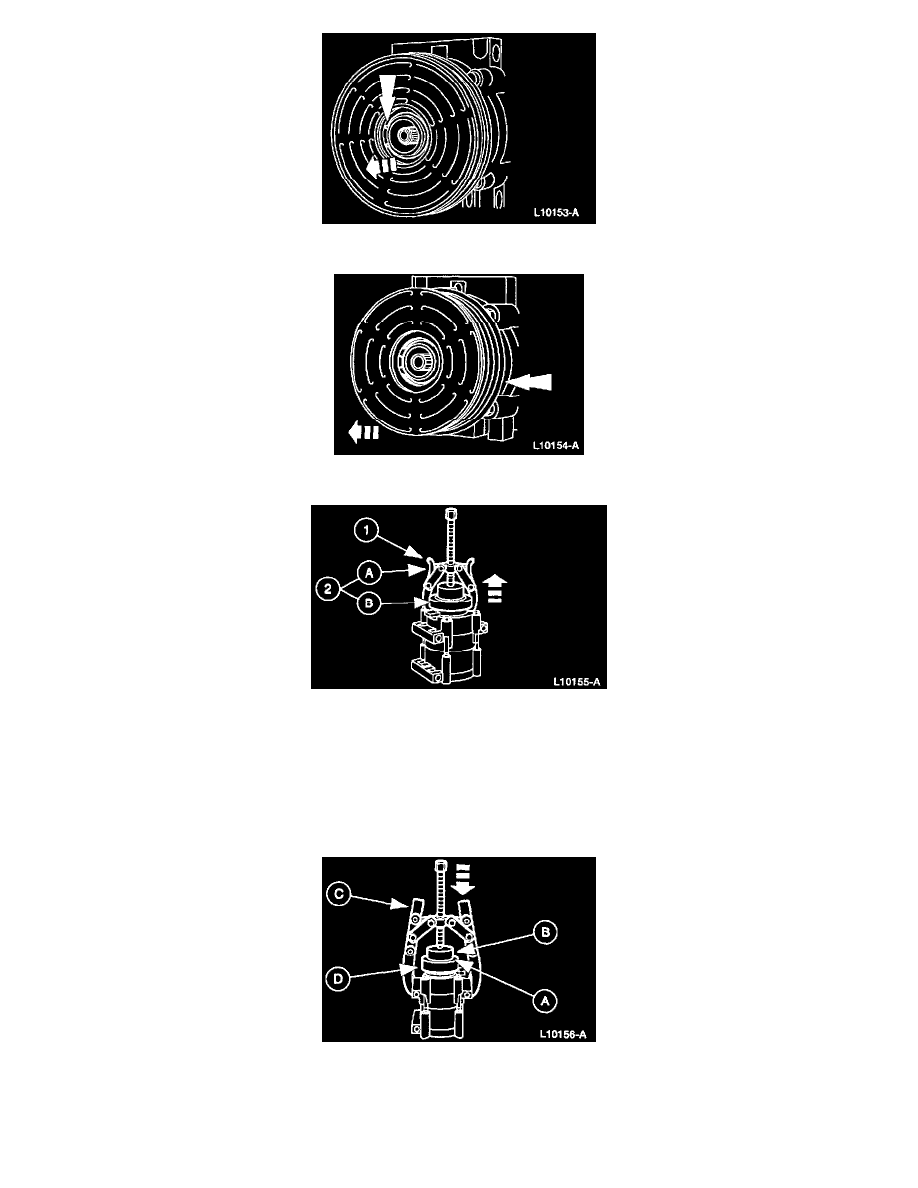
3. Remove the pulley snap ring.
4. Remove the A/C clutch pulley and the A/C compressor pulley bearing.
5. Remove the A/C clutch field coil.
1. Position Shaft Protector on the nose opening of the compressor.
2. Use (A) Differential Side Bearing Puller to remove the (B) field coil.
CAUTION: Do not use air tools.
INSTALLATION
1. Clean the A/C clutch field coil mounting surface head.
2. Use (A) Field Coil Replacer, (B) Coil Pressing Tool and (C) 2-Jaw Puller to install the (D) A/C clutch field coil.
NOTE: Check that the A/C clutch field coil outer diameter bottoms completely against the head. Ensure that the coil electrical connector is
correctly positioned.
