
Expedition 2WD V8-5.4L (2009)
Removal
1. With the vehicle in NEUTRAL, position it on a hoist.
2. Remove the RH inner fenderwell.
3. Remove the RH engine support insulator. For additional information, refer to Engine Support Insulators See: Engine/Drive Belts, Mounts,
Brackets and Accessories/Engine Mount/Service and Repair/Removal and Replacement.
4. Remove the 2 bolts and the exhaust manifold heat shield.
5. Remove the 8 exhaust manifold nuts, the 8 studs and the exhaust manifold.
-
Discard the exhaust manifold nuts and studs.
6. NOTICE: Do not use metal scrapers, wire brushes, power abrasive discs or other abrasive means to clean the sealing surfaces. These may
cause scratches and gouges resulting in leak paths. Use a plastic scraper to clean the sealing surfaces.
NOTE: Clean the sealing surfaces with metal surface prep. Follow the directions on the packaging.
Remove and discard the 2 exhaust manifold gaskets. Clean the sealing surfaces with metal surface prep.
7. Inspect the exhaust manifold.
Installation
1. Using 2 new exhaust manifold gaskets and 8 new studs, position the 2 gaskets and exhaust manifold and install the 8 studs.
-
Tighten to 12 Nm (106 lb-in).
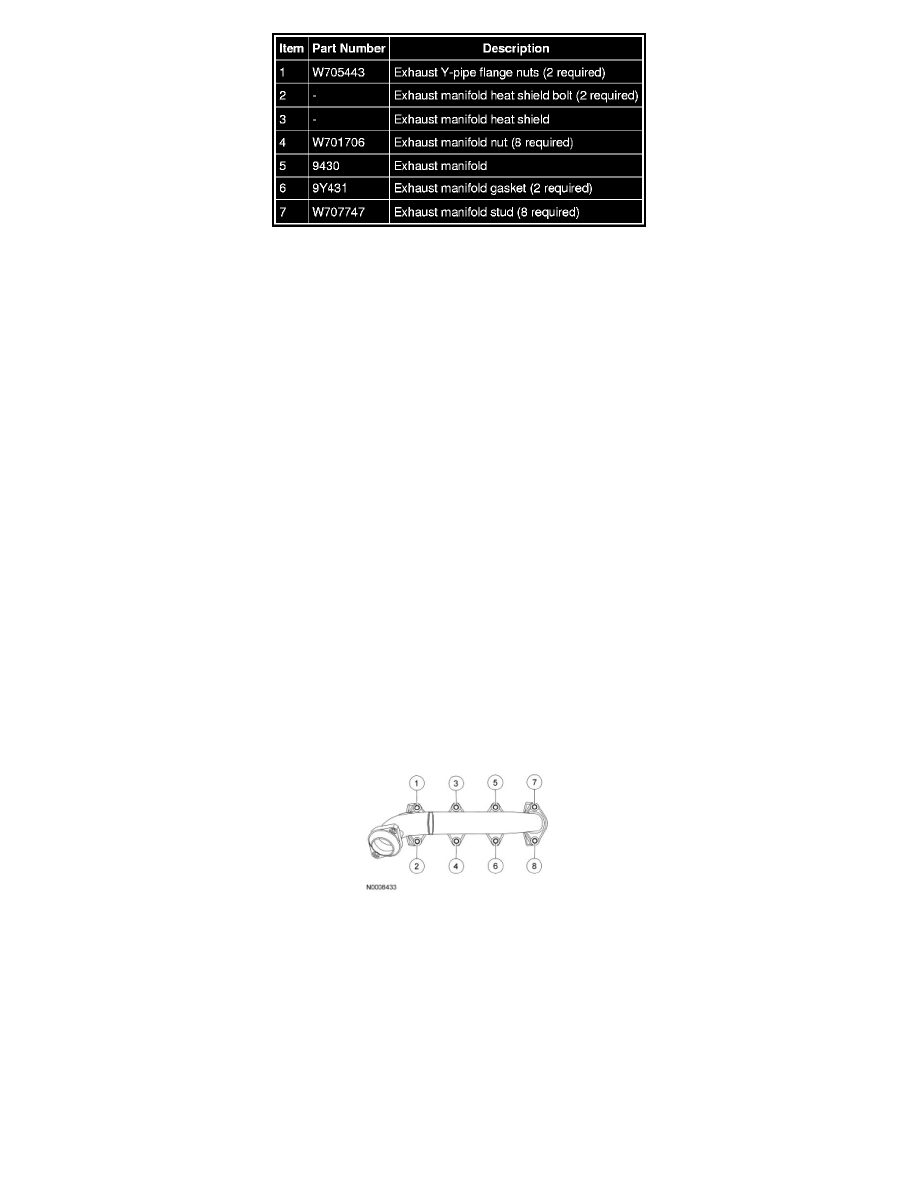
2. Using 8 new exhaust manifold nuts, install the 8 nuts.
-
Tighten to 25 Nm (18 lb-ft) in the sequence shown.
Exhaust Manifold - RH
3. Position the exhaust manifold heat shield and install the 2 bolts.
-
Tighten to 10 Nm (89 lb-in).
4. Install the RH engine support insulator. For additional information, refer to Engine Support Insulators See: Engine/Drive Belts, Mounts, Brackets
and Accessories/Engine Mount/Service and Repair/Removal and Replacement.
5. Install the RH inner fenderwell.