
Expedition 2WD V8-5.4L (2009)
Removal and Installation
WARNING: Do not smoke, carry lighted tobacco or have an open flame of any type when working on or near any fuel-related component.
Highly flammable mixtures are always present and may be ignited. Failure to follow these instructions may result in serious personal injury.
WARNING: Do not carry personal electronic devices such as cell phones, pagers or audio equipment of any type when working on or near any
fuel-related component. Highly flammable mixtures are always present and may be ignited. Failure to follow these instructions may result in
serious personal injury.
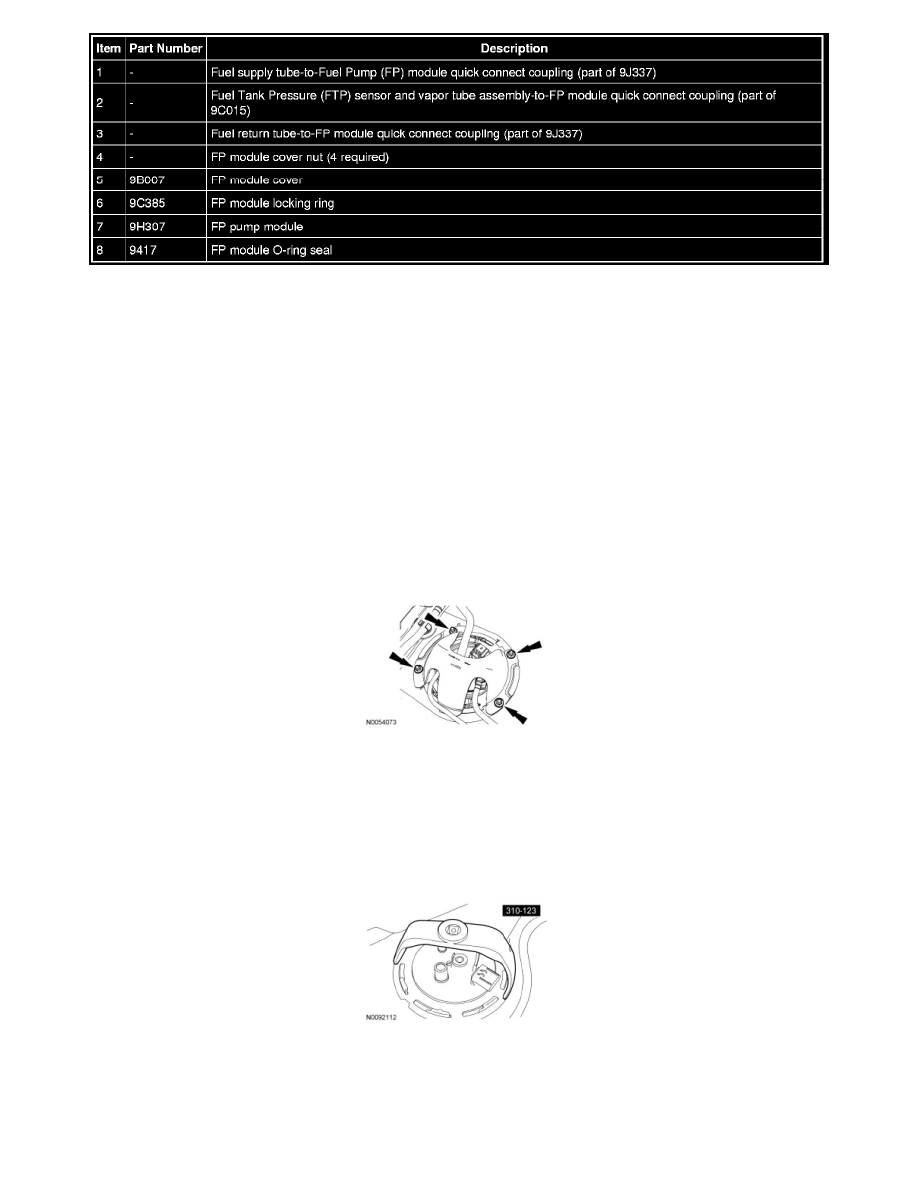
All fuel tanks
1. Remove the fuel tank. For additional information, refer to Fuel Tank See: Powertrain Management/Fuel Delivery and Air Induction/Fuel
Tank/Service and Repair/Removal and Replacement/Fuel Tank.
127L (33.5 gal) fuel tank
2. Remove the 4 nuts and the Fuel Pump (FP) module cover.
-
To install, tighten to 9 Nm (80 lb-in).
3. Disconnect the return fuel tube-to-FP module quick connect coupling.
All fuel tanks
4. Disconnect the Fuel Tank Pressure (FTP) sensor and vapor tube assembly-to-FP module quick connect coupling and the supply fuel tube-to-FP
module quick connect coupling.
5. Using the Fuel Tank Sender Unit Wrench, remove the FP lock ring.
106L (28 gal) fuel tank
6. NOTICE: Carefully remove the Fuel Pump (FP) assembly to avoid damaging the fuel level sensor.
NOTE: If the FP does not clear the FP mounting flange on the fuel tank, the use of a screwdriver may be necessary.