Expedition 2WD V8-5.4L (2009)

Stabilizer Link: Service and Repair
Rear Suspension
Stabilizer Bar and Link
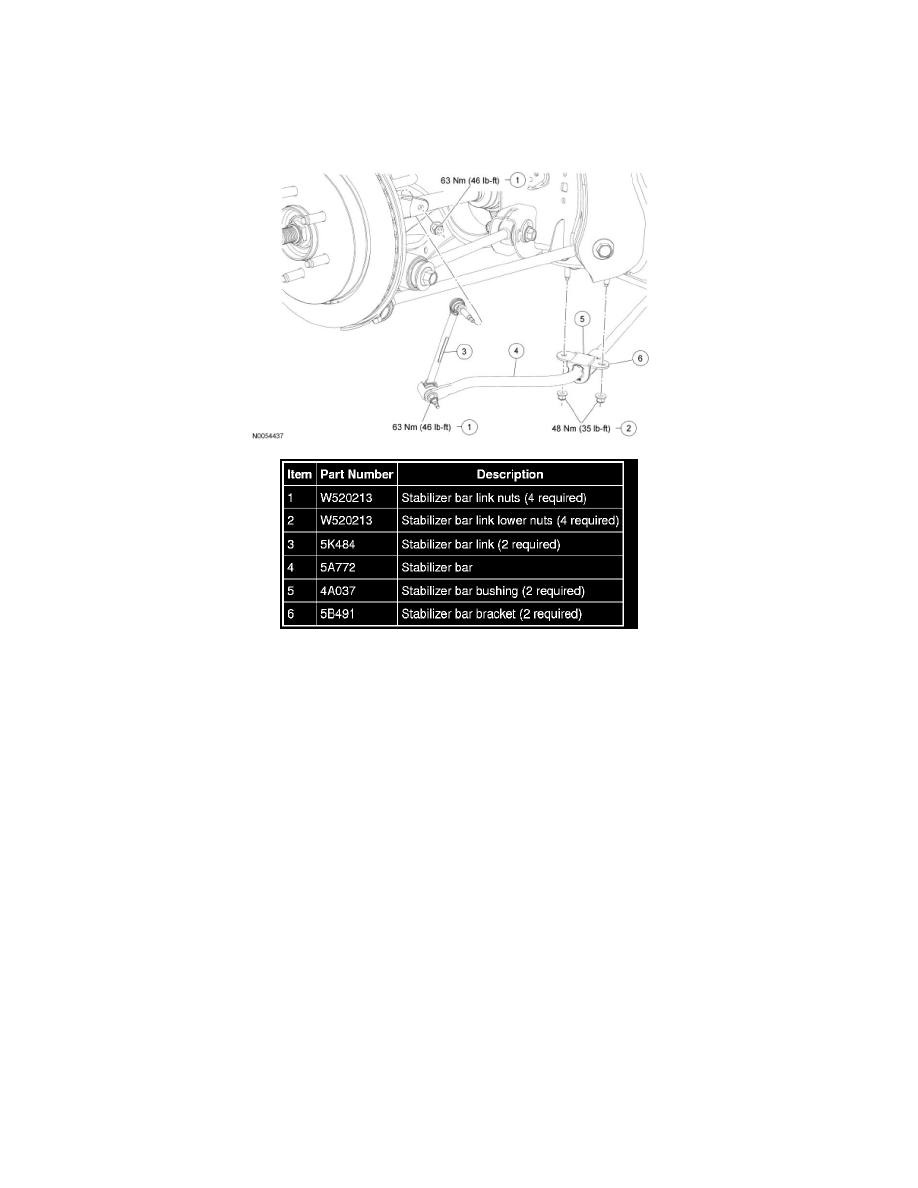
NOTE: RH side shown, LH side similar.
Removal and Installation
NOTICE: Suspension fasteners are critical parts because they affect performance of vital components and systems and their failure may result
in major service expense. New parts must be installed with the same part numbers or equivalent part, if replacement is necessary. Do not use a
replacement part of lesser quality or substitute design. Torque values must be used as specified during reassembly to make sure correct
retention of these parts.
1. With the vehicle in NEUTRAL, position it on a hoist.
2. NOTE: Use the hex-holding feature to prevent the stud from turning while removing the nut.
NOTE: The stabilizer bar links are designed with low friction ball joints that have a low breakaway torque.
Remove the 4 stabilizer bar link nuts and the links.
-
Discard the nuts.
-
Remove the stone shields.
-
To install, tighten the new nuts to 63 Nm (46 lb-ft).
3. Remove the 4 stabilizer bar bracket nuts, the 2 stabilizer bar brackets and the stabilizer bar.
-
Discard the nuts.
-
To install, tighten the new nuts to 48 Nm (35 lb-ft).
4. NOTE: Inspect and, if necessary, install new stabilizer bar bushings.
NOTE: The rear stabilizer bar must be installed with the center hump facing downward.
