
Expedition 2WD V8-5.4L (2009)
bearing damage will occur if the wheel bearing is unloaded with the weight of the vehicle applied.
With the vehicle in NEUTRAL, position it on a hoist.
2. Remove the wheel and tire.
3. NOTE: Have an assistant press the brake pedal to keep the axle from rotating.
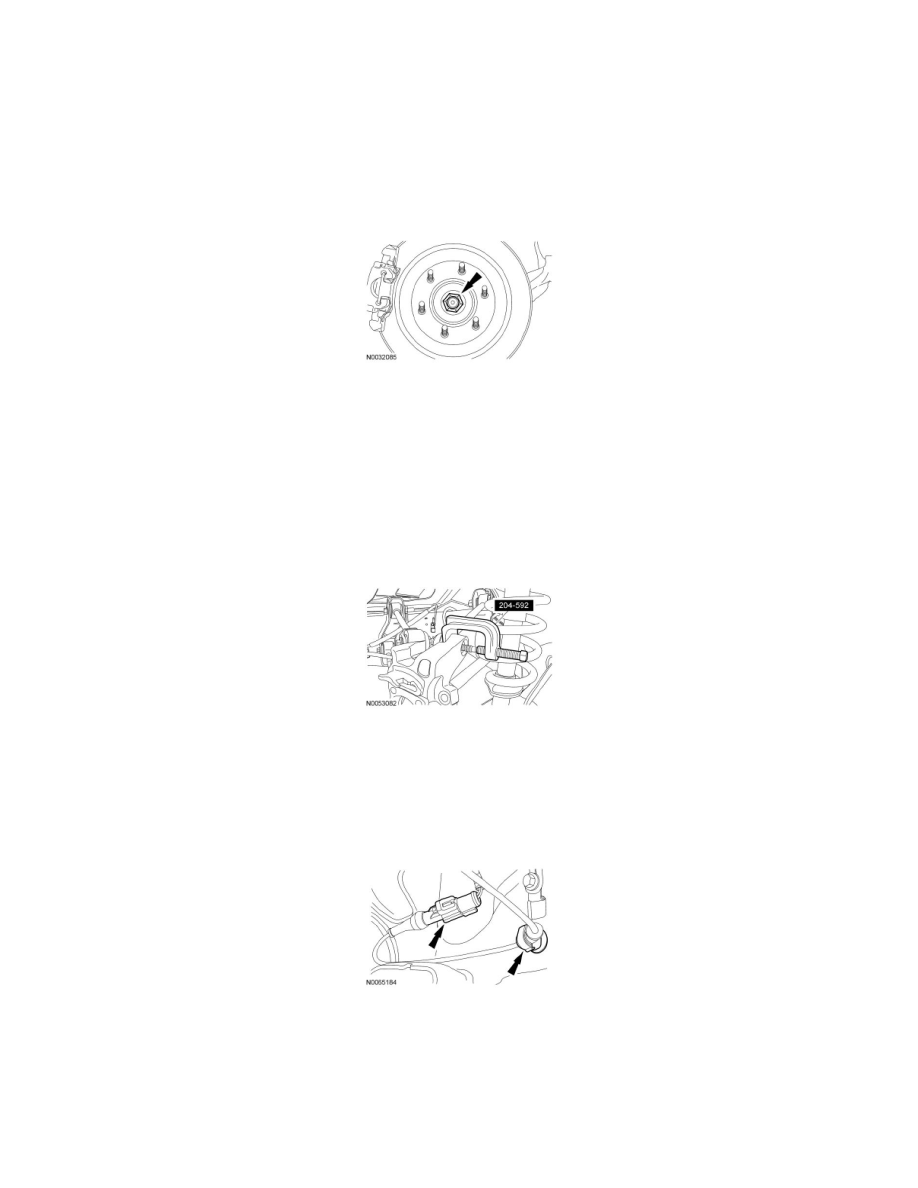
Remove and discard the rear axle wheel hub retainer and the washer.
-
To install, tighten to 350 Nm (258 lb-ft).
4. Separate the halfshaft from the knuckle.
5. Remove the brake disc rotor.
6. Remove the upper trailing arm bolt.
-
To install, tighten to 250 Nm (184 lb-ft).
7. Remove the upper trailing arm-to-wheel knuckle nut.
-
To install, tighten to 103 Nm (76 lb-ft).
8. Using the Ball Joint Separator, separate the upper arm from the wheel knuckle.
9. Remove and discard the stabilizer bar link nut.
-
To install, tighten the new nut to 63 Nm (46 lb-ft).
10. Remove the toe link-to-wheel knuckle bolt.
-
To install, tighten 225 Nm (166 lb-ft).
11. Disconnect the anti-lock brake sensor at the connector and open the wire retaining clips.
12. Compress the spring, depress the retaining tabs and detach the parking brake cable from the wheel knuckle.