
Expedition 4WD V8-5.4L SOHC VIN 5 (2005)
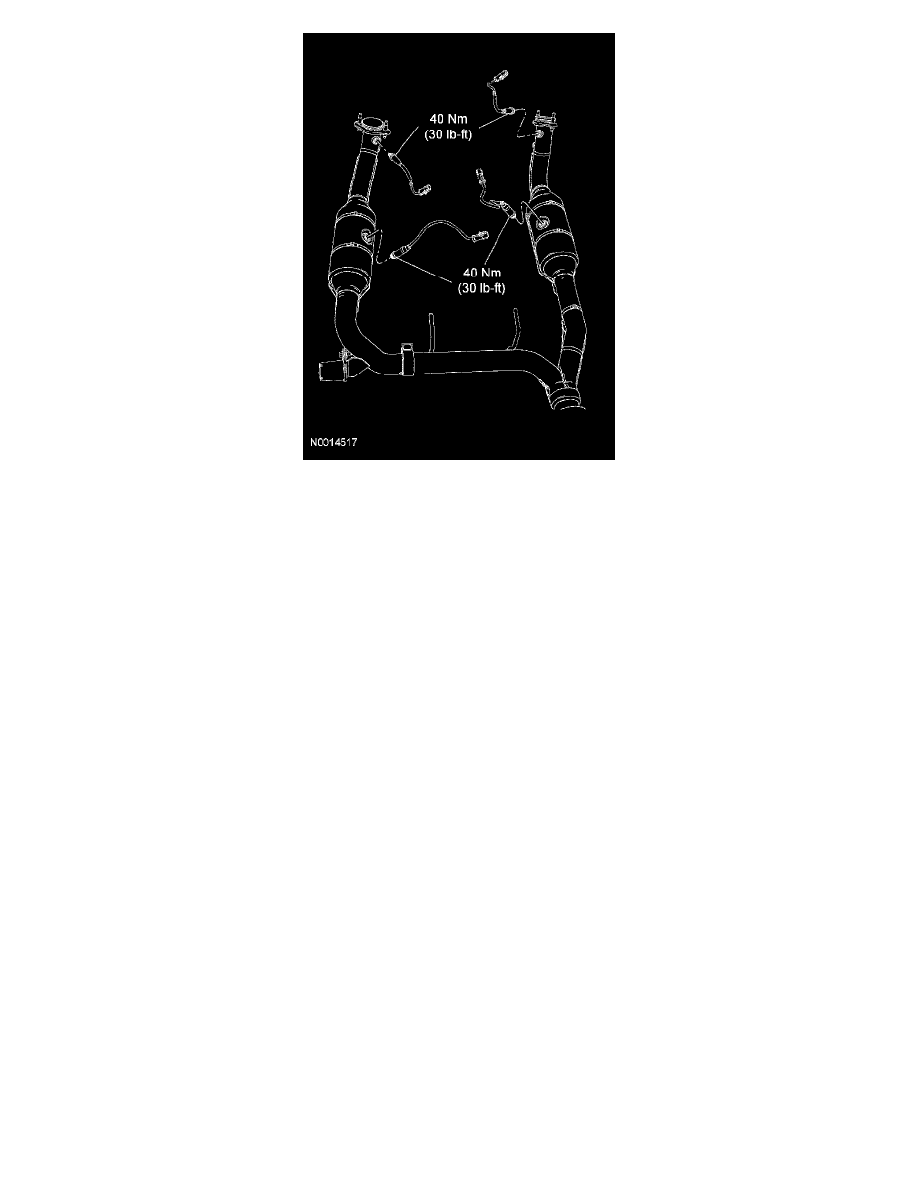
11. NOTE: Make sure to apply anti-seize lubricant to the threads of the sensors before installation.
If necessary, remove the heated oxygen and the catalyst monitor sensors.
12. CAUTION: Do not tighten the fasteners until all components are assembled, making sure to tighten all fasteners beginning at the front of the
vehicle.
NOTE: Clean the mating surfaces of the manifold outlet flare and the catalytic converter inlet flare.
Also clean the mating surfaces of the inlet pipe and catalytic converter.
Make sure not to damage the manifold outlet flare, the converter inlet flare or the studs.
NOTE: Always install new fasteners and gaskets.
To install, reverse the removal procedure.
^
Align the exhaust system to establish the maximum clearance. Begin at the front of the vehicle. For torque specifications, refer to
Specifications.
^
Tighten all the fasteners in the following order.
^
Tighten the RH lower catalytic converter-to-exhaust manifold nut.
^
Tighten the RH upper catalytic converter-to-exhaust manifold nut.
^
Tighten the transmission mount hanger bolt.
^
Tighten the exhaust clamp nut.
^
Alternately tighten the LH catalytic converter-to-exhaust manifold nuts to avoid an exhaust leak.
-
Install and snug the LH inner nut up.
-
Tighten the LH outer nut to specification.
-
Tighten the LH inner nut to specification.
^
Tighten the catalytic converter-to-muffler bolts.