
Expedition 4WD V8-5.4L VIN 5 (2006)
section for more information.
5.
Remove the right front wheel following Workshop Manual, Section 204-04 procedure.
6.
Remove right front fender splash shield.
7.
Expedition only: Remove transmission dipstick tube from vehicle.
8.
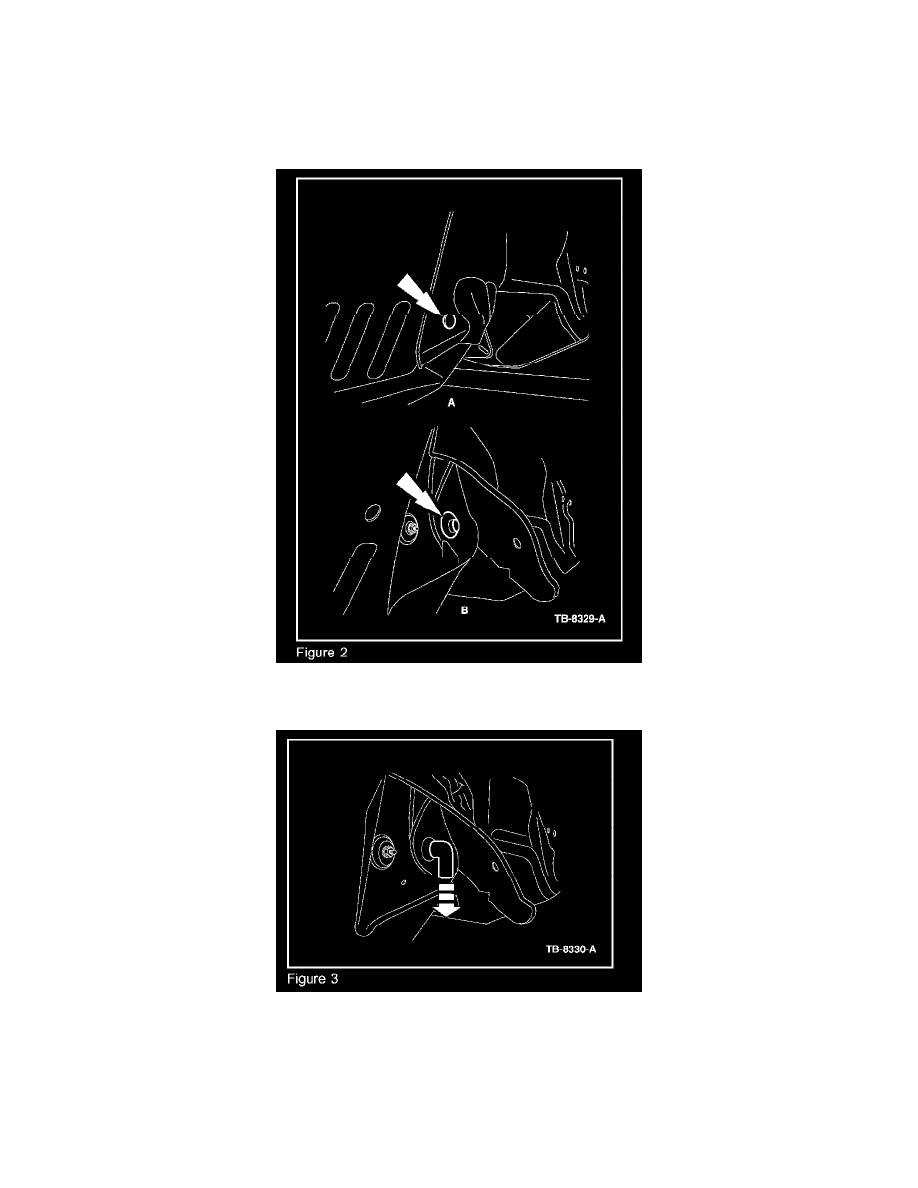
Pull back the engine compartment dash panel insulator far enough to expose the HVAC drain tube (Figure 2B) by removing the push pin to the
right of the drain (Figure 2A).
9.
Push elbow (P/N F3LY-6A614-A) onto drain tube to install. Make sure the short end of the elbow is pushed onto the drain tube, and the long end
is pointed straight down (Figure 3). Only water may be used to aid in pushing the elbow onto the drain tube. (Do not use soap or petroleum
products on the elbow).
10.
Re-seat the engine compartment dash panel insulator and replace the push pin.
11.
Expedition only: Install transmission dipstick and tube.