
Explorer 2WD V6-245 4.0L (1994)
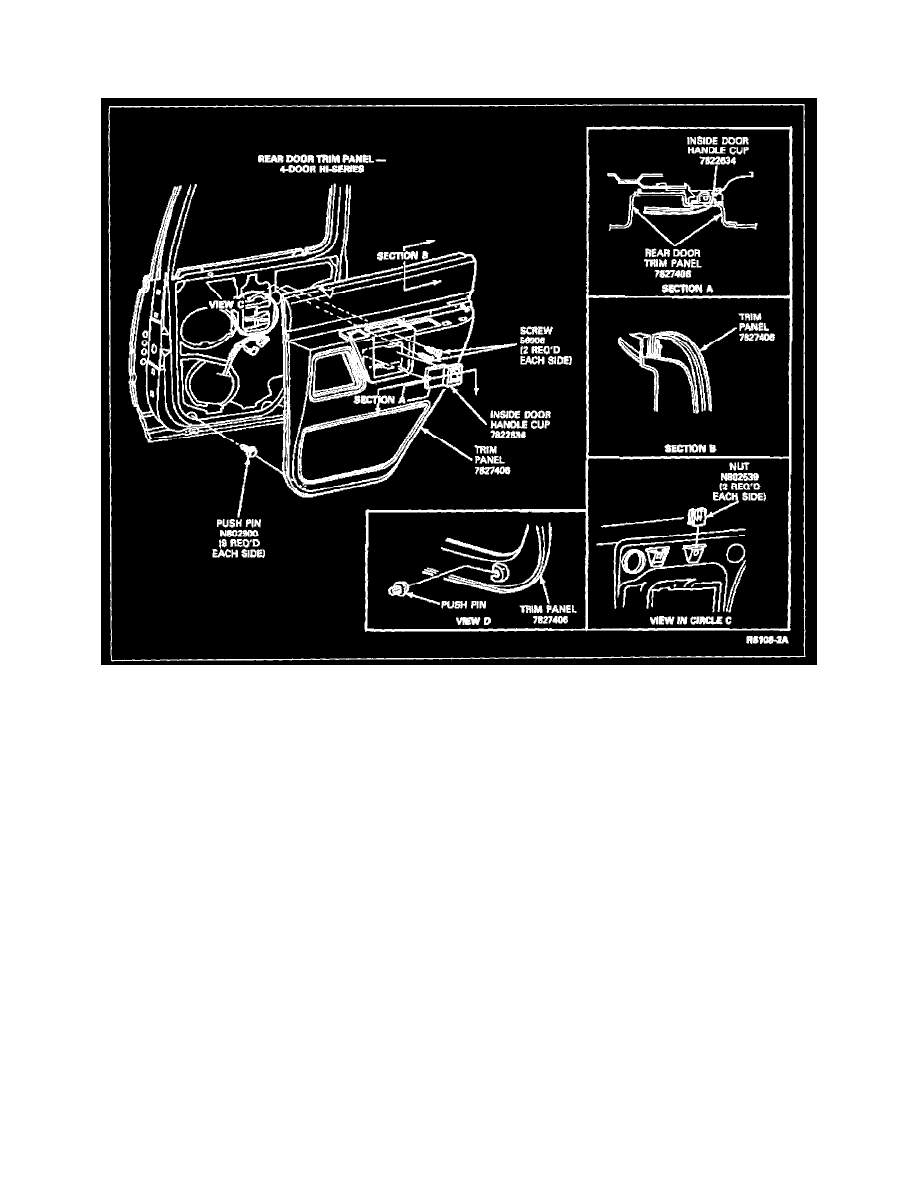
Rear Door Panel: Service and Repair
Hi-Series
Removal
1. Remove the two screws retaining the door trim panel located above the door handle.
2. Remove trim cup at the door handle using a screwdriver or sharp object. Retention nibs will flex for easy removal.
3. To remove power window control plate, use notch located at lower end of plate using a screwdriver to lift and remove.
4. Remove plate from door trim panel pulling wire harness from inside of panel.
5. From bottom of plate, remove two screws and disconnect connector from switch.
6. At each plastic clip location, pry the door trim panel away from the door inner panel using the door trim panel removing tool from Rotunda
Moulding/Trim Kit 107-00401 or equivalent.
7. When wiring and disengagement of trim clips is completed, it is recommended that to remove panel, lift slightly to remove flange at the top of
door trim panel from trough in the glass weatherstrip.
Installation
1. Replace any bent, damaged or missing plastic clips on the door trim panel to the door inner panel, firmly loading clips into slots provided on door
trim panel.
2. Load door trim panel to door assembly by first loading flange at top of door trim panel into trough in door glass weatherstrip. Align plastic clips to
holes in door inner panel and tap panel slightly to engage clips.