
Explorer 2WD V6-245 4.0L (1994)
4.
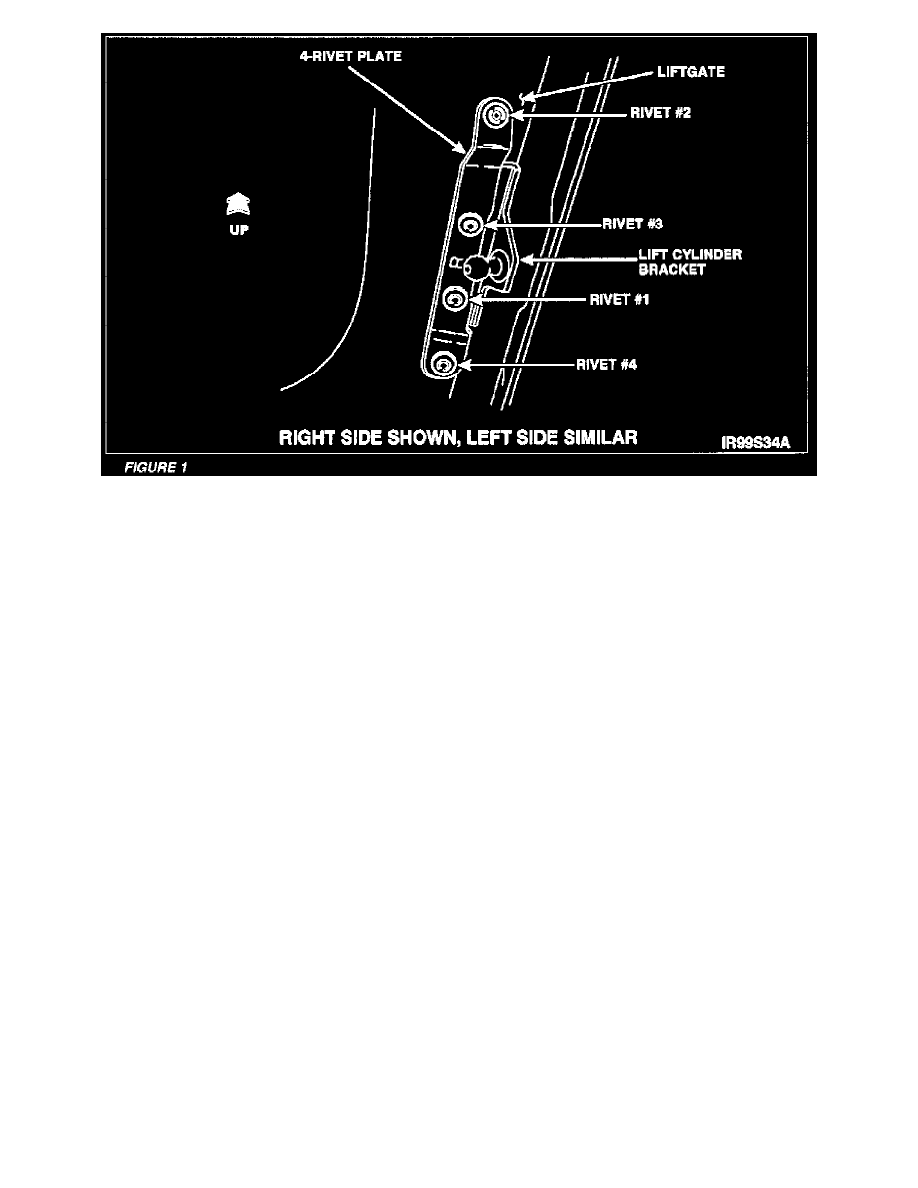
Following the sheet metal contours, position the 4-rivet plate over the upper lift cylinder bracket. See Figure 1. If the lift cylinder bracket welds
extend above the bracket surface, grind the welds flush with the bracket surface.
5.
Using the 4-rivet plate as a guide, center punch the location for rivet # 1. See Figure 1. This rivet location cannot be on an existing weld.
NOTE:
IF VARIATIONS EXIST BETWEEN THE 4-RIVET PLATE AND THE LIFTGATE SURFACE, MODIFY THE PLATE TO CONFORM TO
THE LIFTGATE INNER PANEL SURFACE WITH-OUT SCRATCHING OR BREAKING THE PAINT.
CAUTION:
Apply tape to a 5 mm (3/16-inch) drill bit to create a "drill stop" no more than one-half inch (1/2") from the tip of the drill. This will help prevent
drilling through the liftgate outer panel.
6.
Drill a 5 mm (3/16-inch) hole for rivet # 1. Apply Super Seal Anticorrosion Compound (F3AZ-19515-SA) or equivalent to the hole to protect the
bare metal from corrosion.
7.
Position the 4-rivet plate and install rivet # 1. Make sure the plate fits tightly against the liftgate.
8.
Using the 4-rivet plate as a guide, center punch the location for rivet # 2. See Figure 1.
9.
Drill a 5 mm (3/16-inch) hole for rivet # 2. Apply Super Seal to the hole, then install rivet # 2.
10.
Using the 4-rivet plate as a guide, center punch the locations for rivets # 3 and # 4.
11.
Drill 5 mm (3/16-inch) holes for rivets # 3 and # 4. Apply Super Seal to the holes, then install rivets # 3 and # 4.