
Explorer 2WD V6-245 4.0L (1994)
Evaporator Core: Service and Repair
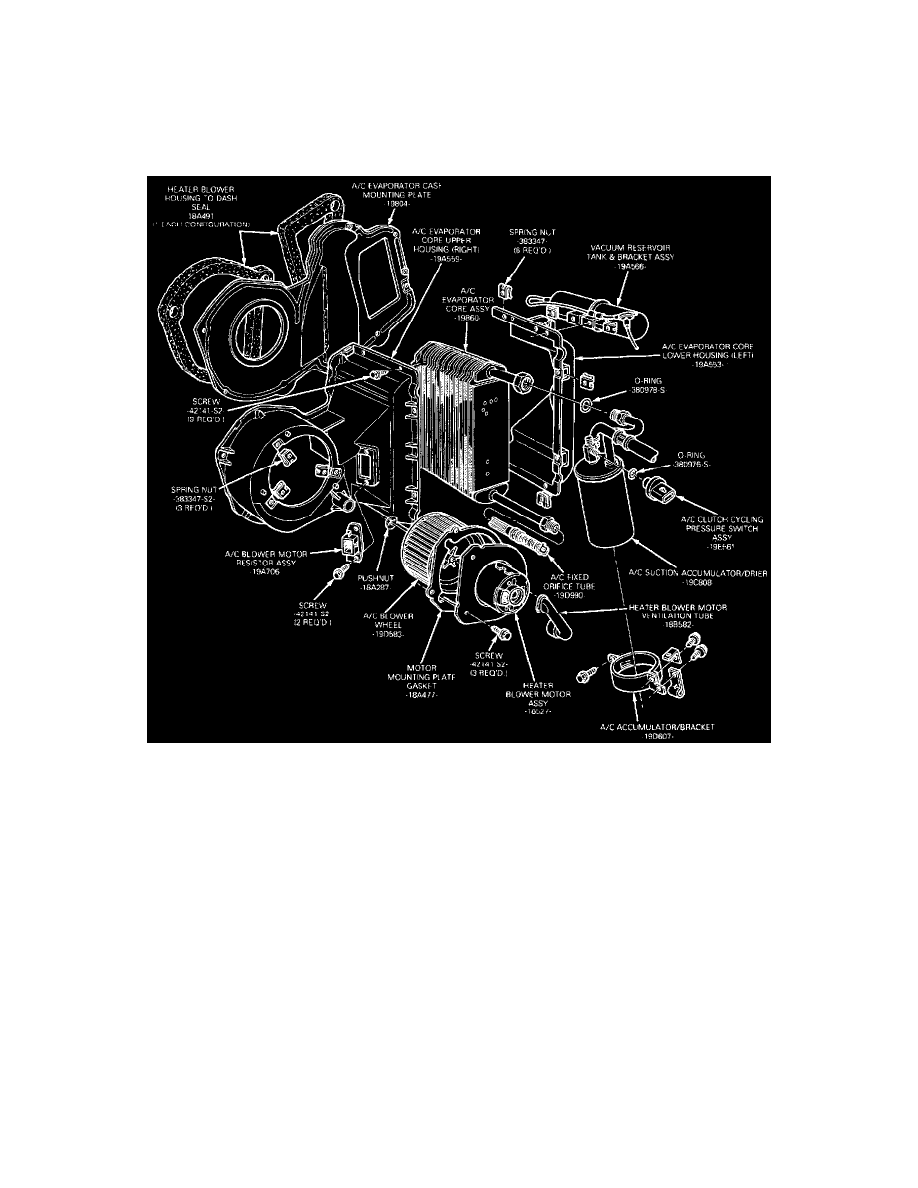
Evaporator Core Assembly
NOTE: If the evaporator core is replaced, the suction accumulator/drier must also be replaced.
Removal
1. Disconnect the cable from the battery negative (ground) terminal.
2. Discharge the refrigerant from the A/C system following the recommended service procedure in Air Conditioning General Service. Observe all
safety precautions. Please refer to Heating ad Air Conditioning/Service and Repair/ See: Service and Repair
3. Disconnect the electrical connector from the pressure switch located on top of the accumulator/drier.
4. Remove the pressure switch from the accumulator/drier.
5. Disconnect the suction hose from the accumulator/drier, using the Spring Lock Coupling Tool and cap openings to prevent dirt and/or moisture
from entering, please refer to Heating and Air Conditioning/Coupler HVAC/Service and Repair/
NOTE: Please refer to Heating and Air Conditioning/Coupler HVAC/Service and Repair/
6. Disconnect the liquid line from the evaporator core inlet tube using a backup wrench to loosen the fitting. Cap the openings to prevent dirt and/or
moisture from entering.
7. Remove the screws holding the evaporator case service cover and vacuum reservoir to the evaporator case assembly.
8. Store the vacuum reservoir in a secure position to avoid vacuum line damage.
9. Remove two dash panel mounting nuts.
10. Remove the evaporator case service cover from the evaporator case assembly.
11. Remove the evaporator core and suction accumulator/drier assembly from the vehicle.
Installation
1. Position the evaporator core and accumulator/drier assembly into the install evaporator case out-board half.
2. Position the evaporator case service cover into place on the evaporator case assembly.
3. Install the two dash panel mounting nuts.