
Explorer 4WD V6-4.0L (2009)
13. Remove the bolt and position the camshaft sprocket aside.
Both sides
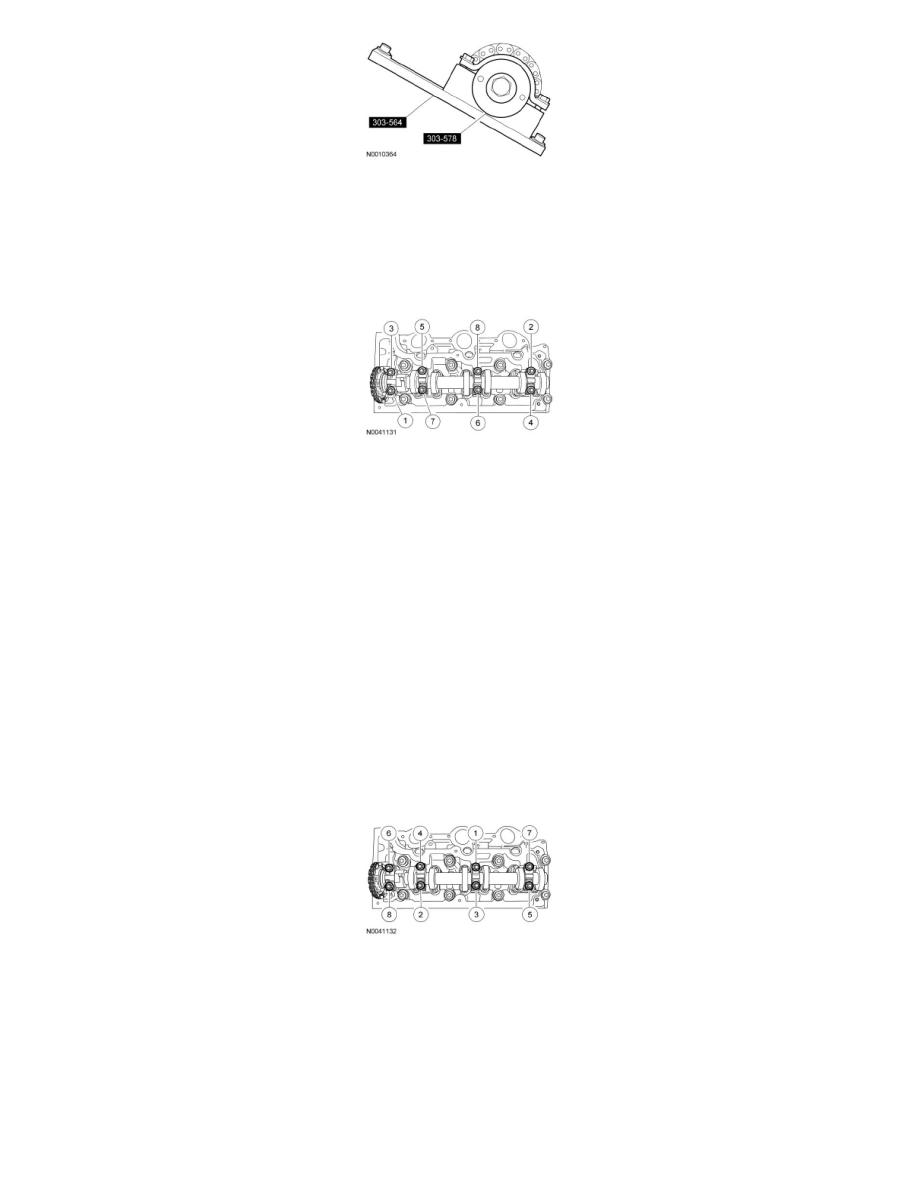
14. NOTE: Mark the position of the camshaft bearing caps so they can be installed in their original positions.
Remove the 8 bolts for each set of camshaft bearing caps in the sequence shown and remove the camshaft bearing caps.
15. Remove the camshaft.
Installation
NOTE: Lubricate the camshaft journal bearing surfaces on the cylinder head, the camshaft journals and the camshaft bearing caps with clean engine oil.
Both sides
1. Install the camshaft.
2. NOTE: The camshaft bearing caps must be installed in their original positions.
NOTE: After installing the bolts, check the camshaft for free rotation.
Position the camshaft bearing caps and the 8 bolts for each set of camshaft bearing caps.
-
Tighten the bolts in the sequence shown in 2 stages.
-
Stage 1: Tighten to 6 Nm (53 lb-in).
-
Stage 2: Tighten to 16 Nm (142 lb-in).
RH side
3. NOTICE: The camshaft gear must turn freely on the camshaft. DO NOT tighten the bolt at this time. Tightening the bolt may result in
incorrect engine timing.
NOTICE: The RH camshaft sprocket bolt is a LH-threaded bolt. Turning the bolt in the wrong direction can damage the bolt.
Install the camshaft sprocket and loosely install the bolt.
LH side