F 150 2WD Pickup V8-5.4L SOHC VIN 5 (2004)

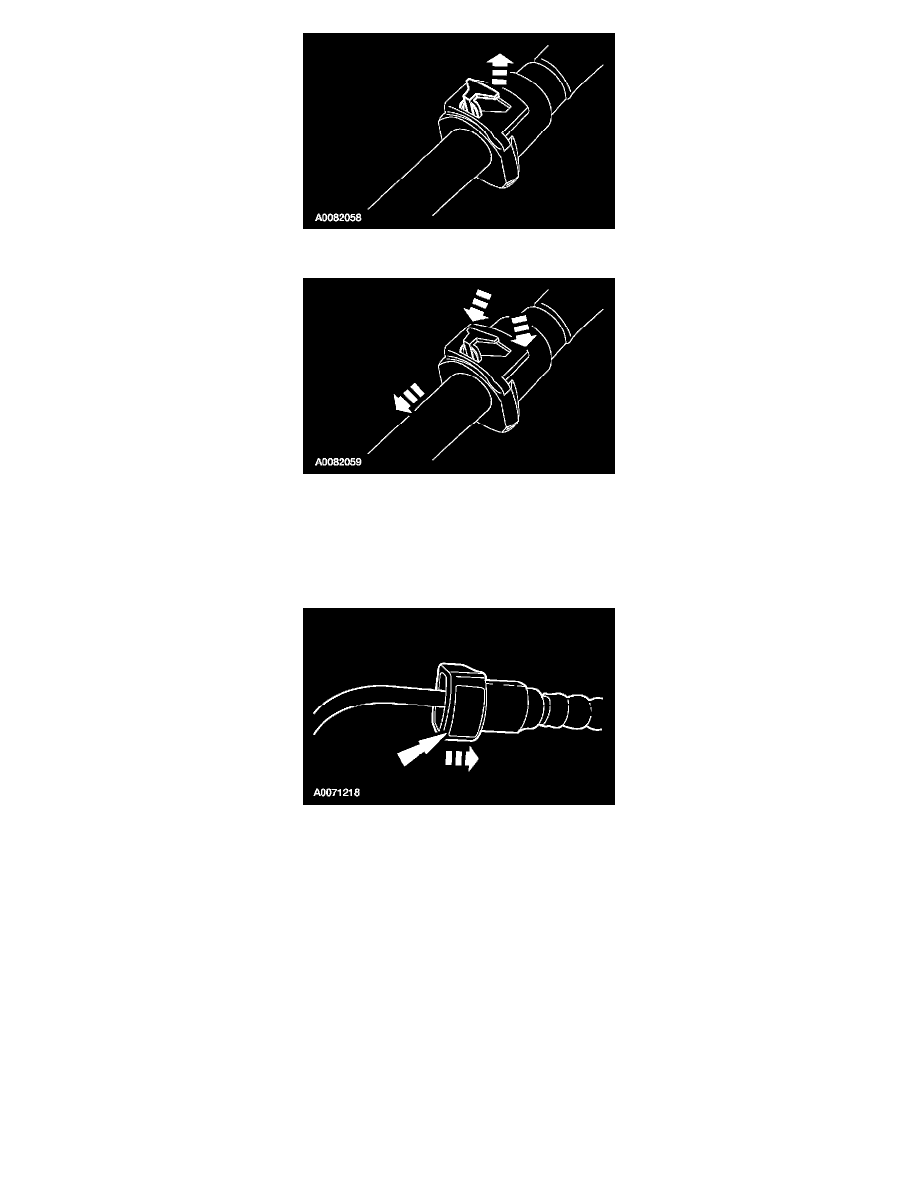
2. Pull the locking tab to the release position.
3. Disconnect the quick connect fitting.
-
Push the fitting toward the tube to release pressure.
-
Press the tab corners to release the fitting.
-
Disconnect the quick connect fitting.
Items 3: Vapor Tube Quick Connect Fitting Removal Note
1. CAUTION:
-
Fuel injection equipment is manufactured to very precise tolerances and fine clearances. It is therefore essential that absolute
cleanliness is observed when working with these components. Always install blanking plugs to any open orifices or tubes.
-
When reusing liquid or vapor tube connectors, make sure to use compressed air to remove any foreign material from the connector
retaining clip area before separating from the tube.
NOTE: If the fuel tube retainer clip is broken or damaged, install a new clip using a suitable fuel line disconnect tool to separate the retaining clip
legs. Once the retainer legs have been separated, lift the clip out of the connector housing, lifting from the stamped side of the connector body.
Disconnect the quick release fitting.
-
Push the connector toward the tube to release pressure.
-
Press the quick release fitting button and pull the fuel tube to disconnect.
Items 4, 5 and 9: Fuel and Vapor Tube Quick Connect Fittings, and Spring Lock Coupling Removal Note
WARNING: Fuel in the fuel system remains under high pressure even when the engine is not running. Before servicing or disconnecting any of
the fuel lines or fuel system components, the fuel system pressure must be relieved to prevent accidental spraying of fuel, causing personal
injury or a fire hazard.
