
F 150 4WD V8-4.6L VIN 8 (2010)
Antenna Cable: Service and Repair
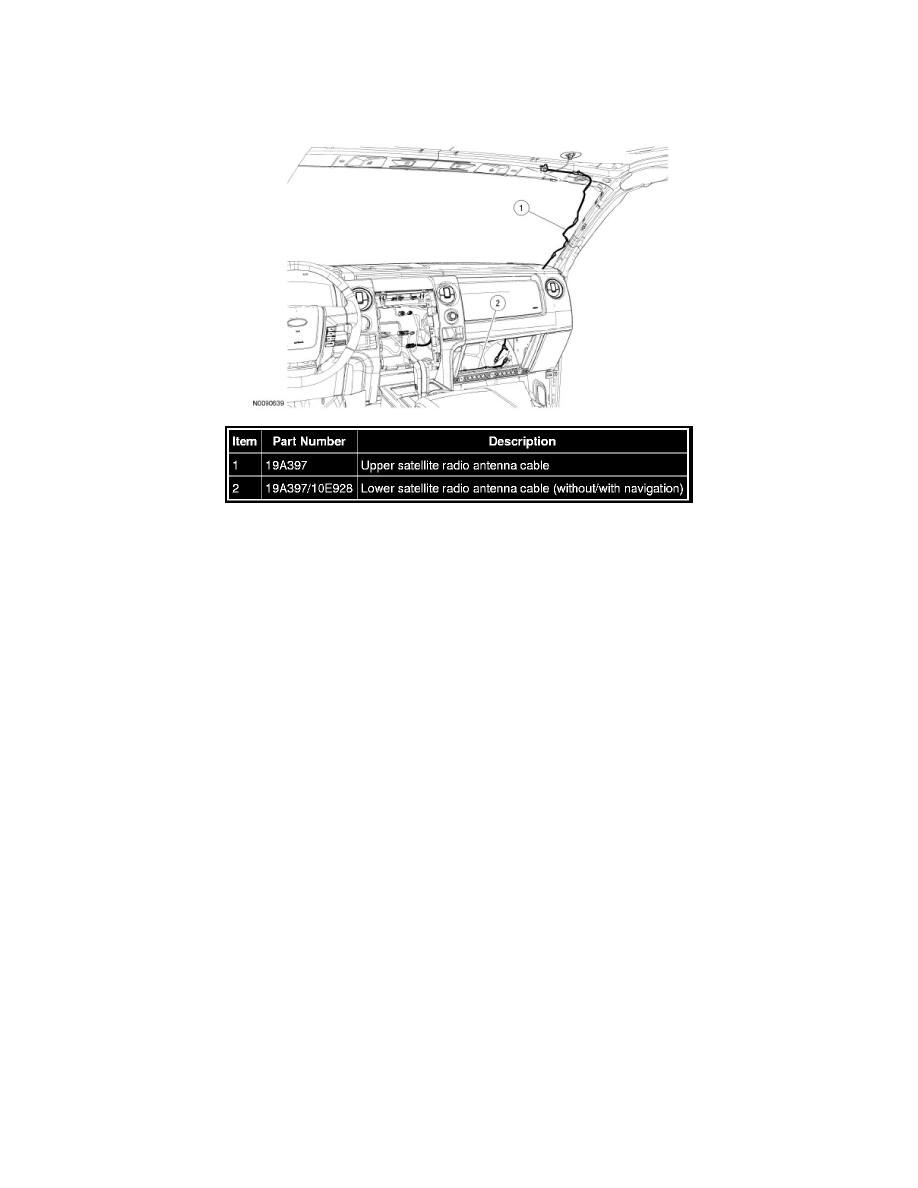
Antenna Cable - Satellite Radio
Antenna Cable - Satellite Radio
Removal and Installation
NOTE: For vehicles with navigation, a splitter is built-in to the lower satellite radio antenna cable to split the satellite radio and Global Positioning
System (GPS) signals.
Both cables
1. Lower the glove compartment completely.
2. Disconnect the upper-to-lower satellite radio antenna cable connection.
Upper cable
3. Remove the RH A-pillar trim panel.
4. Remove the 3 screws, the RH sun visor retaining clip, and the RH sun visor.
-
If equipped, disconnect the electrical connector.
5. Lower the front of the headliner enough to gain access to the satellite radio antenna electrical connector.
6. Remove the upper satellite radio antenna cable.
-
Disconnect the electrical connector.
-
Separate the pushpins from the A-pillar and instrument panel.
Lower cable
7. Remove the Audio Control Module (ACM). For additional information, refer to Audio Control Module (ACM) See: Cellular
Phone/Communications Control Module/Service and Repair/Removal and Replacement/Audio Control Module (ACM).
8. Remove the lower satellite radio antenna cable.
-
Disconnect the electrical connector.
-
Separate the pushpins from the instrument panel.
Both cables