
F 150 4WD Pickup V8-281 4.6L VIN W EFI (1997)
NOTE: Align the marks made during removal on the camber adjustment cam before tightening nuts.
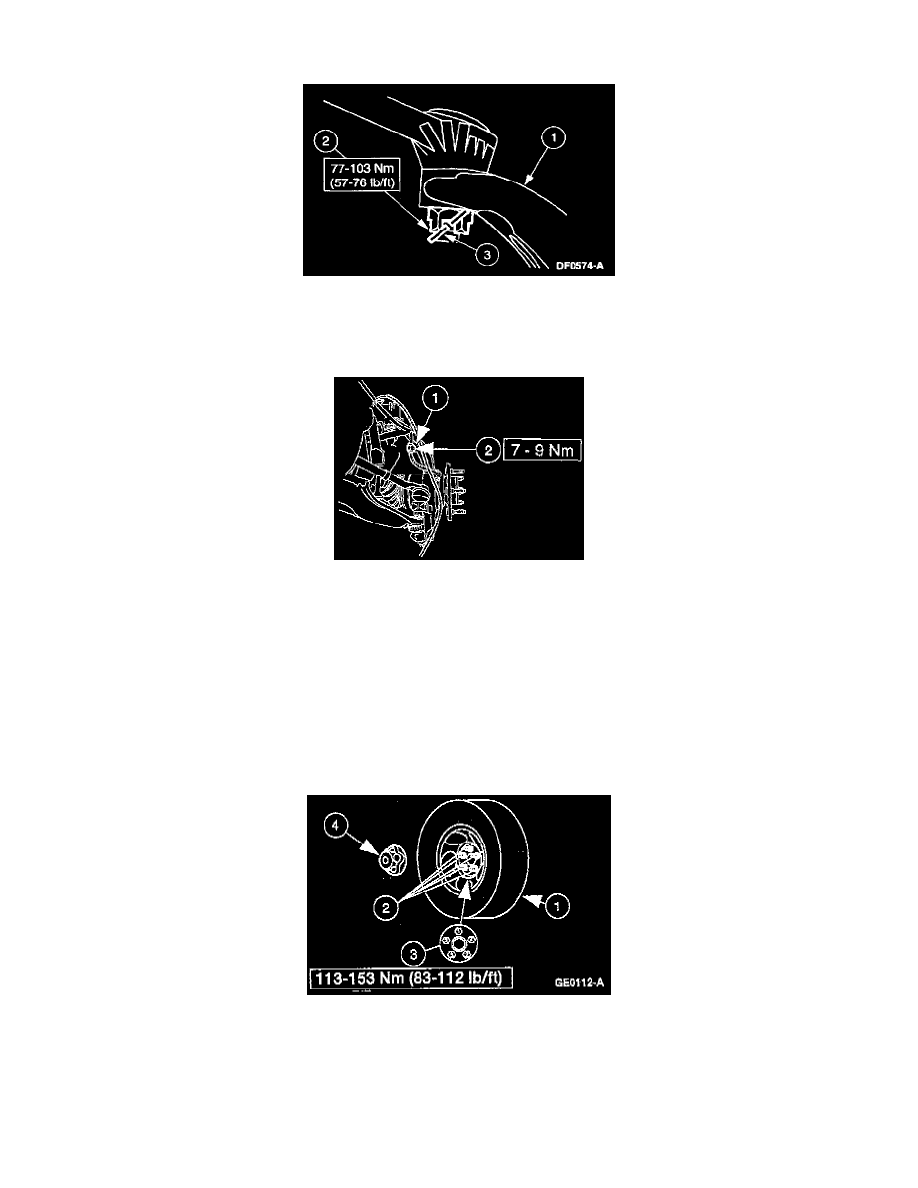
2. Install the front suspension arm upper ball joint castellated nut.
(1) Position the front wheel knuckle.
(2) Install the upper ball joint castellated nut.
(3) Install a new cotter pin.
3. If equipped with 4WABS, install the anti-lock sensor wire bracket bolt.
(1) Position the anti-lock sensor wire.
(2) Install the bolt.
4. Remove the jack.
5. Clean the wheel hub and mounting surfaces.
WARNING: WHEN THE WHEEL IS INSTALLED, ALWAYS REMOVE ANY CORROSION, DIRT OR FOREIGN MATERIAL
THAT MAY BE PRESENT ON THE MOUNTING SURFACES OF THE WHEELS OR THE SURFACES OF THE WHEEL HUB,
BRAKE DRUM OR BRAKE ROTOR THAT CONTACTS THE WHEEL. INSTALLING WHEELS WITHOUT PROPER
METAL-TO-METAL CONTACT AT THE WHEEL MOUNTING SURFACES CAN CAUSE THE LUG NUT TO LOOSEN AND THE
WHEEL TO COME OFF WHILE THE VEHICLE IS IN MOTION, CAUSING LOSS OF CONTROL.
6. Install the tire and wheel assembly.
(1) Position the tire and wheel assembly.
(2) Install the lug nuts and lower the vehicle.
(3) Tighten the lug nuts.
(4) Install the center cap.
7. Lower the vehicle.