
F 250 2WD Pickup V8-7.3L DSL Turbo VIN F (1994)
Needle Bearing Assembly Replacement
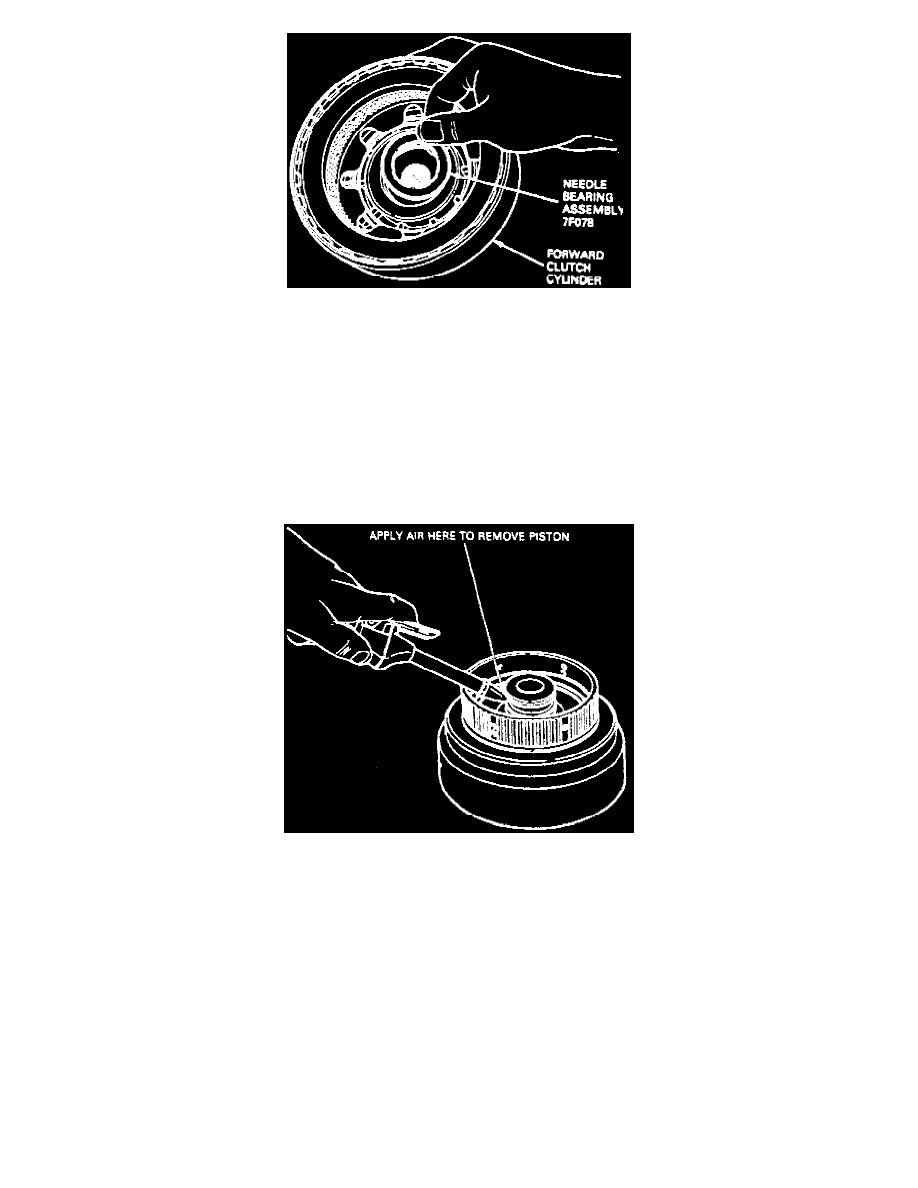
1. Remove needle bearing assembly from inner face of cylinder.
2. Remove needle bearing assembly No. 7F374.
3. Remove both Teflon seal rings No. 7F078 from grooves.
4. Remove snap ring, then the front pressure plate.
5. Remove clutch pack, cushion spring, and rear pressure plate.
NOTE: Clutch pack may consist of 3 or 4 plates, depending on model. Tag parts for assembly reference.
6. Remove return spring snap ring, then the return spring.
7. Remove steel ring from piston groove.
Air Application Location
8. Remove piston from cylinder using compressed air.
9. Remove outer seal from piston, then the inner seal from cylinder.
ASSEMBLE
NOTE: Soak all friction plates in clean transmission fluid for fifteen minutes.
1. Install inner seal in cylinder, then outer seal on piston.
2. Inspect piston check ball for freedom of movement and clean it necessary.
3. Using lip seal protector No. T77L-77548-A or equivalent, install piston into cylinder.
4. Install steel ring into groove on piston.
5. Install return spring into cylinder. Ensure return spring fingers are against piston/steel ring.
6. Install snap ring.
7. Install rear pressure plate, then cushion spring.
8. Install four steel plates and four friction plates alternately, starting with a steel plate.