
F 250 4WD LD Pickup V8-281 4.6L VIN W EFI (1997)
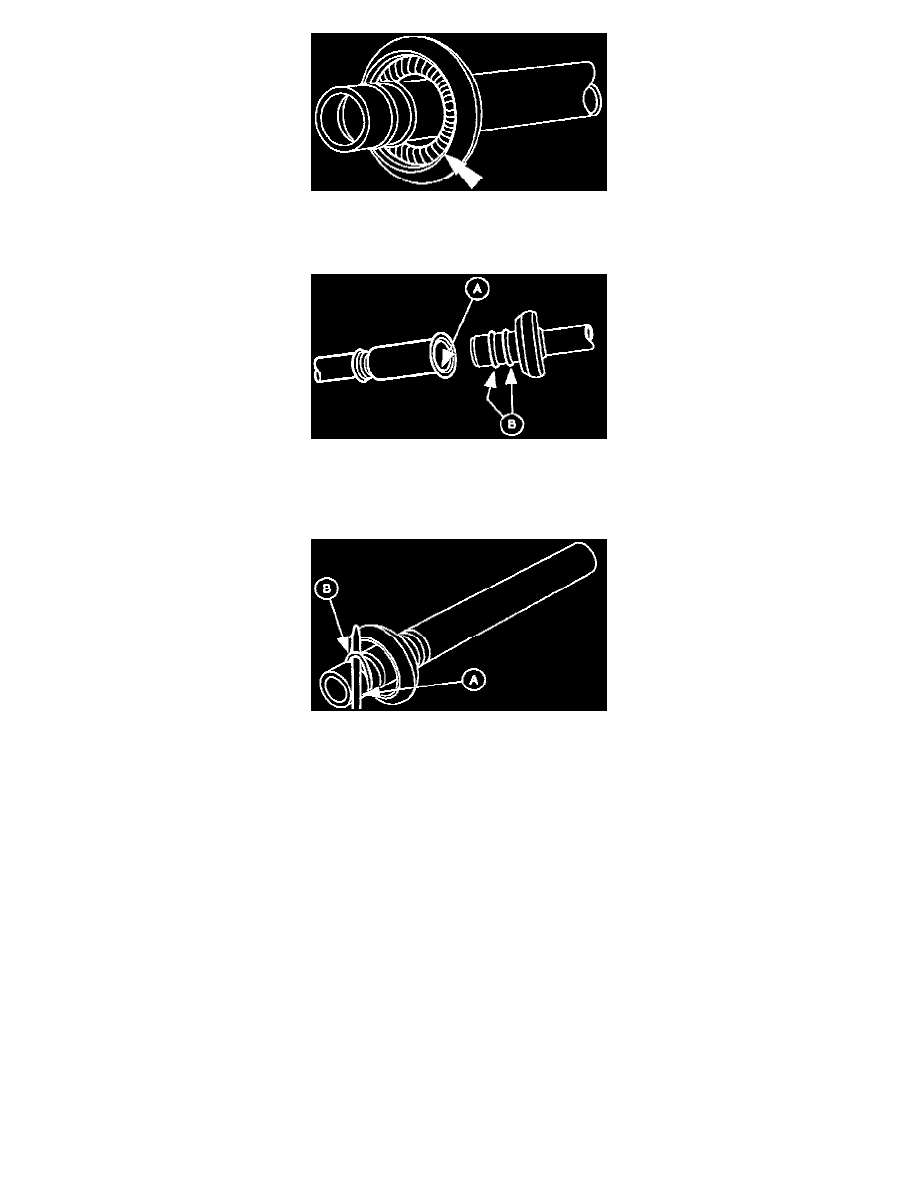
5. Check for a missing or damaged A/C tube lock coupling spring. A damaged spring can be removed with a small hooked wire. Install a new spring
if the old one is damaged or missing.
6. Clean the fittings.
7. On the (A) female spring lock coupling, check the inside of each fitting for scratches, corrosion or debris from deteriorated (B) O-rings.
^
Remove any surface residue from the inside of the coupling by polishing with 400-grit emery cloth or equivalent. Polish the surface by using a
twisting motion so that any scratches made will not cross the O-ring sealing surface. Finish polishing with 600-grit emery cloth or equivalent.
Remove all polishing residue from the fitting with a lint free cloth.
8. Use the (A) Plastic O-Ring Tool supplied with the O-ring kit or equivalent to remove the (B) O-ring seals from the male fitting.
NOTE: Do not use metal O-ring tools. They can cause axial scratches across the O-ring grooves resulting in refrigerant leakage.
9. Install the O-ring seals.
Lubricate new O-ring seals.
^
Use YN-12b Compressor Oil F2AZ-19577-AC or equivalent meeting Ford specification WSH-M1C231-B to lubricate seals.
NOTE: Use only specified O-ring seals. Use of any O-ring seal other than the one specified may allow the connection to leak intermittently during
vehicle operation.
10. Lubricate the male fitting and the O-ring seals, and the inside of the female fitting.
^
Use YN-12b Compressor Oil F2AZ-19577-AC or equivalent meeting Ford specification WSH-M1C231-B.
11. Install a plastic indicator ring into cage opening if an indicator ring is to be used.