
F 350 2WD Super Duty V8-5.4L VIN 5 (2006)
Part 2
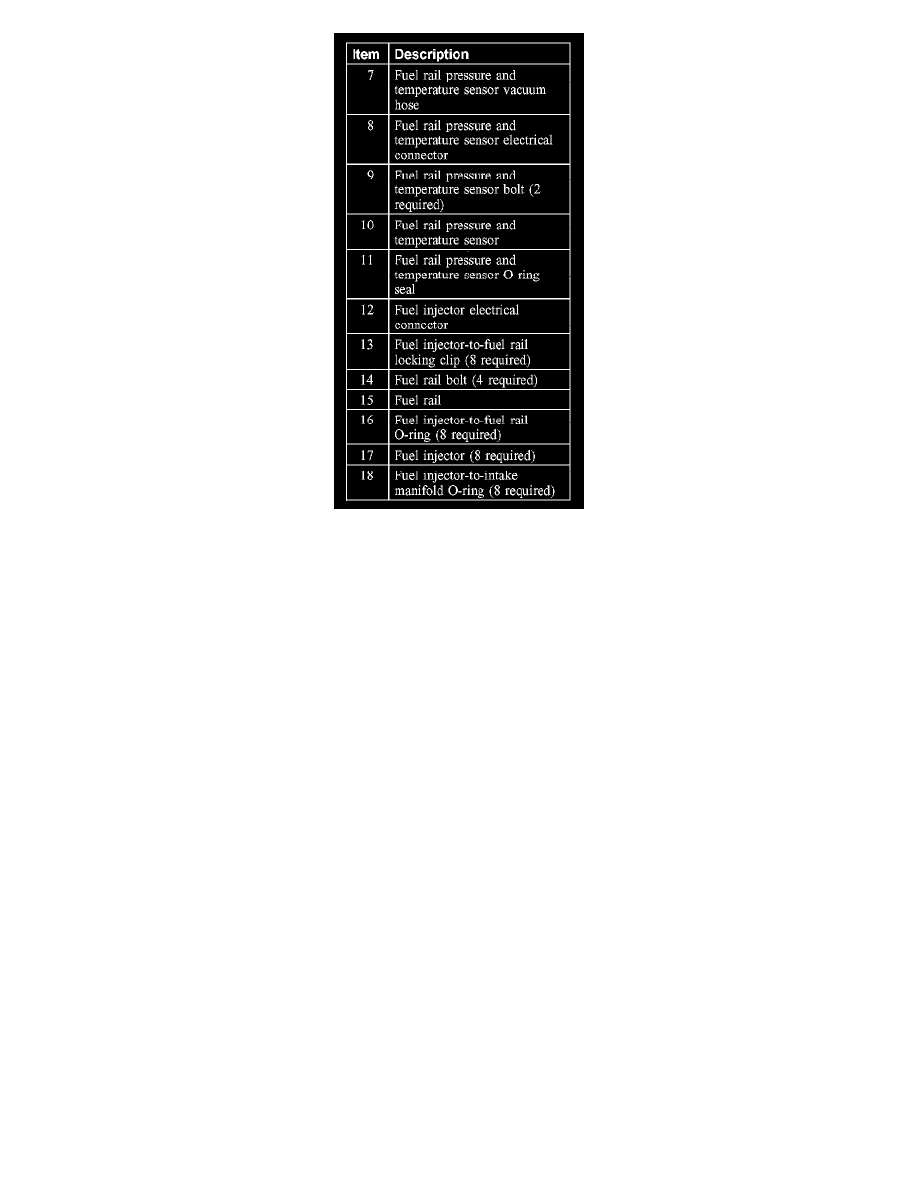
Exploded View
Removal and Installation
WARNING:
-
Do not smoke or carry lighted tobacco or open flame of any type when working on or near any fuel-related components. Highly
flammable mixtures are always present and may be ignited. Failure to follow these instructions may result in personal injury.
-
Fuel in the fuel system remains under high pressure even when the engine is not running. Before working on or disconnecting any of the
fuel tubes or fuel system components, the fuel system pressure must be relieved. Failure to follow these instructions may result in personal
injury.
-
Fuel in the fuel system remains under high pressure even when the engine is not running. Before servicing or disconnecting any of the fuel
lines or fuel system components, the fuel system pressure must be relieved to prevent accidental spraying of fuel, causing personal injury
or a fire hazard.
CAUTION:
-
Fuel injection equipment is manufactured to very precise tolerances and fine clearances. It is therefore essential that absolute cleanliness
is observed when working with these components. Always install blanking plugs to any open orifices or tubes.
-
When reusing liquid or vapor tube connectors, make sure to use compressed air to remove any foreign material from the connector
retaining clip area before separating from the tube.
1. Release the fuel system pressure.
2. Disconnect the battery ground cable.
3. Remove the air cleaner inlet pipe.
4. Disconnect the mass air flow (MAF) sensor electrical connector.
5. Disconnect the brake booster vacuum hose.
6. Disconnect the positive crankcase ventilation (PCV) tube quick connect couplings.
7. Disconnect the crankcase ventilation tube quick connect couplings.
8. Disconnect the fuel supply tube spring lock coupling.
9. Disconnect the fuel rail pressure and temperature sensor electrical and vacuum connectors.
10. NOTE: Lubricate the new O-ring seal with clean engine oil prior to installation.
Remove the 2 bolts and the fuel rail pressure and temperature sensor.
-
Discard the O-ring seal.
-
To install, tighten to 4 Nm (35 lb-in).