
F 350 4WD Pickup V8-351 5.8L VIN H EFI (1997)
Climate Control Assembly Switch Knob(s)
REMOVAL
1. Grasp knob in fingers and pull straight back, away from heater control. Repeat for each heater control.
INSTALLATION
1. Align flat, keyed portion of knob with keyed location on heater control shaft and push until knob bottoms against shaft. Repeat for each knob.
Climate Control Assembly Switches
REMOVAL
1. Disconnect the battery ground cable.
2. Remove trim strip above the center finish trim panel and glove compartment area.
3. Remove two screws retaining the center finish trim panel to the instrument panel. Remove center finish trim panel.
4. Remove four screws retaining heater control to the instrument panel.
5. Pull heater control from instrument panel far enough to gain access to the rear of the heater control.
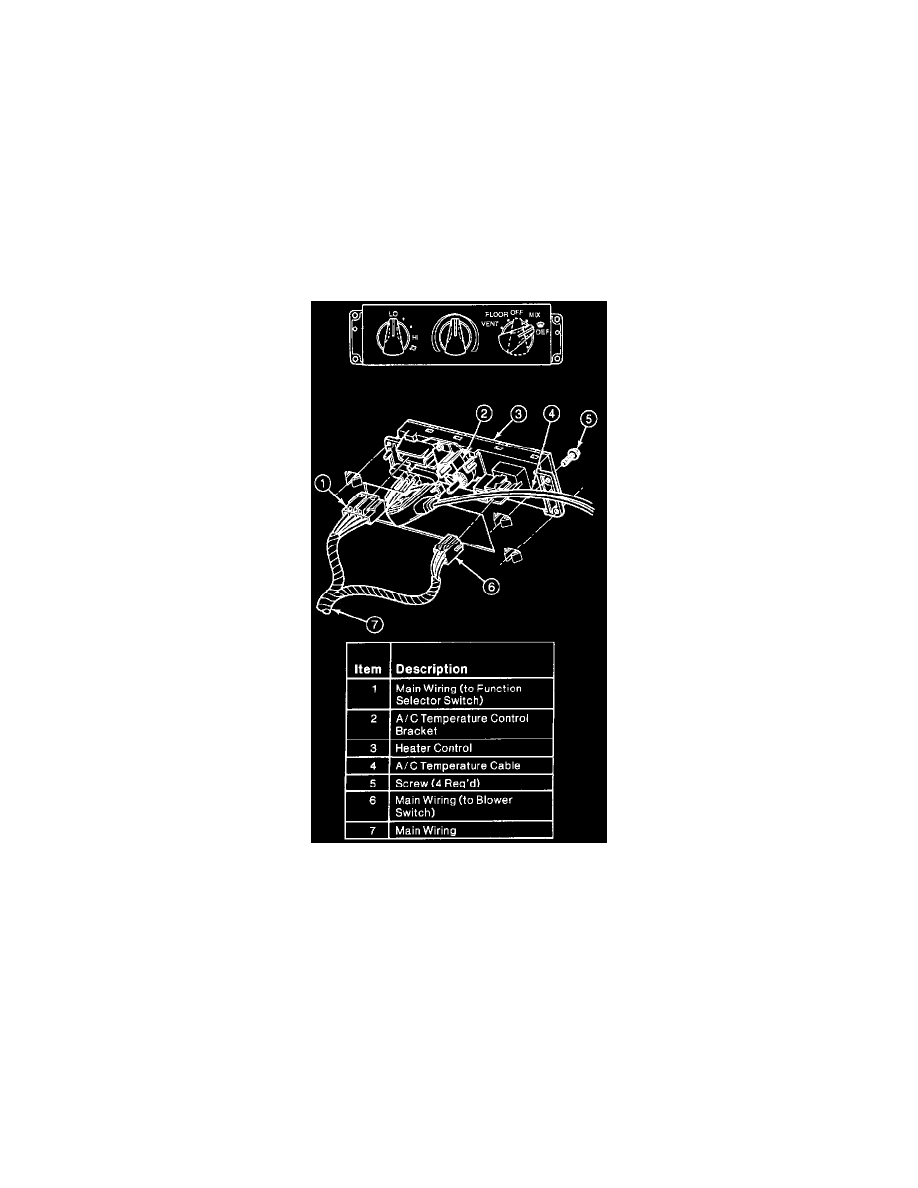
Heater Control, Rear View
6. Disconnect hardshell electrical connector from the heater blower motor switch.
7. Disconnect hardshell electrical connector from the mode selector switch.
8. Disconnect A/C temperature cable. See: Climate Control Assembly
9. Remove one screw attaching the mode selector switch to the heater control.
10. Remove mode selector knob (pull off) and rotate mode selector switch to remove from heater control.
11. Remove two nuts retaining vacuum fitting to the mode selector switch and remove vacuum fitting from switch.
12. Remove mode selector switch.
INSTALLATION
1. Follow removal procedure in reverse order.
2. Reconnect battery ground cable and test system for proper operation
NOTE: When the battery has been disconnected and reconnected some abnormal drive symptoms may occur while the Powertrain Control
Module (PCM) relearns its adaptive strategy. The vehicle may need to be driven 16 km (10 miles) or more to relearn the strategy.