
F 350 4WD Pickup V8-7.3L DSL (1988)
Air Duct: Customer Interest
Defroster - Uneven Airflow To Driver's Side
HEATER - UNEVEN DEFROSTER AIR FLOW - VEHICLES BUILT BEFORE 10/01/87
Article No. 88-5-16
LIGHT TRUCK:
1987-88 F-SERIES, BRONCO
ISSUE:
Uneven defroster air flow to the driver's side of the windshield may be caused by an imbalance in the air distribution from the defroster
nozzle. The imbalance may allow the passenger side of the windshield to clear faster than the driver's side of the windshield.
ACTION:
To correct this, install a new design defroster nozzle which directs more of the air flow toward the driver's side of the windshield. Refer to
the following service procedure for removal and installation information.
1.
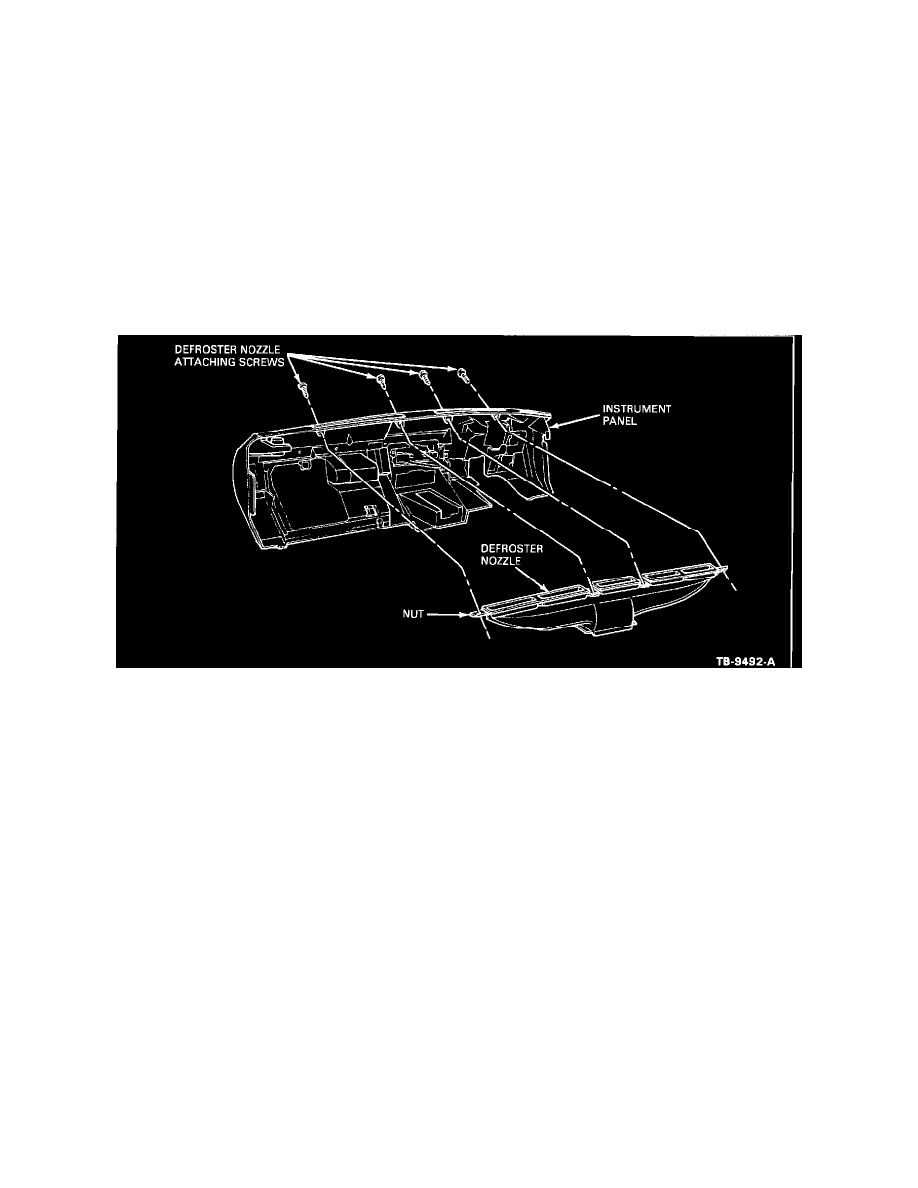
Loosen the instrument panel and pull it back far enough to gain access to the defroster nozzle screws.
FIGURE 8
2.
Remove the four (4) screws attaching the defroster nozzle to the underside of the instrument panel, Figure 8.
3.
Remove the radio antenna cable clips from the rear side of the defroster nozzle.
4.
Pull defroster nozzle rearward, making sure to clear the mounting tabs.
5.
Lift defroster nozzle out from behind the instrument panel.
6.
Obtain the new design defroster nozzle (E8TZ-18490-A).
7.
Position the new defroster nozzle over the plenum defroster air outlet and against the underside of the instrument panel.
8.
Route the heater control cables to the rear of the defroster nozzle.
9.
Install the four (4) screws that attach the defroster nozzle to the underside of the instrument panel.
10.
Install the radio antenna cable clips.
11.
Reposition and tighten the instrument panel,
PART NUMBER
PART NAME
CLASS
E8TZ-18490-A
Defroster Nozzle
C
OTHER APPLICABLE ARTICLES: None